#Game Development
Makin' games instead of playin' 'em.
75 entries — 3 posts, 72 notes
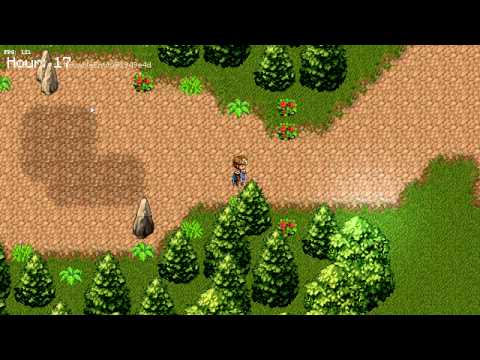
Now my shadow mobs leave little cute footsteps. Running into these guys starts a battle, this was my take on the more random “tall grass encounters”. I plan to alter the shadow mobs to hint at what creature they might be: color of the shadow, size/shape of the shadow, size/color/pattern of the footsteps, etc.
I made a new font! I wanted something italic for my “internal dialogue” boxes, styled differently than actual spoken dialogue. Fun fact, did you know there are over 2,000 unique two-letter character sequences? This font required ~450 unique kerning rules for custom letter spacing. My first (non-italic) font only required 2 or 3…
I call it FF57I (very creatively, for Fisher’s Font, 5x7, Italic)
It’s been a while - ARC Raiders has taken up more of my free time than I’d like to admit… But! I’ve been working on some combat improvements.
Statuses: I tried to convey more details about status conditions. I’m worried it’s too much currently - but I’d rather add too much up front and then only keep what’s important later. That said, I was able to create visual feedback for all the parts of a status:
- Statuses are applied with “stacks” which are removed over time. This is shown with the status background, it’s kind of like a vertical progress bar.
- Based on thresholds of how many stacks are applied, the status is in level 1, 2, or 3 - indicated by the dots below it. As the level changes, a “upwards” or “downwards” animation is shown on top of it.
- Statuses trigger their effects every 4 combat ticks (starting from the time they are applied). This is indicated by the “rotating” and flashing border.
Move “Animations”: Not to be confused with actually animating my sprites, hehe - I added a flexible system for adding sprite transformations as skills are triggered. This was a relatively cheap way to add some much needed visual feedback for combat.
Tempo: Combat doesn’t have to be real time, but if you queue moves fast enough, it is. If you’re able to keep moves queued you increase your tempo, which adds a damage bonus. This used to be a tick counter, but I’ve changed it to a more abstract gauge.
Overall, I’m trying to focus on adding some more feedback elements (animations/sounds) to help the player understand if their actions are doing what they want. Combat is a tricky thing to balance and tune. I’m eager to get sounds working - and then I think I’ll be at the point where I’d be happy to get some play testing and feedback on it.
A small experiment rendering triangular “pixel” art in Godot.
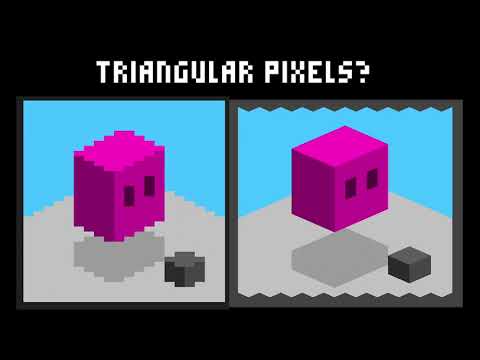 Rendering triangular pixel art in Godot
Sounds! I’ve been working on my sound engine - something that has barely existed until now. There are two big updates shown in this video:
- Dialogue Sound: I emulated the Golden Sun dialogue sounds, I’m quite happy with it. It’s still a little squeakier than I want it - but I’ve made it possible to tweak energy, pitch, speed, “worble”, etc. to get different voices for different characters.
- Spatial Audio: Entities can now emit sounds, and respect fall off configurations based on their distance from the camera. You can hear the energy shield door get quieter the further I walk away from it; you can also here the footsteps of the NPCs in the hallways as they walk by
I just grabbed some royalty free sound for now to work on the audio system, but I need to start putting my Foley Engineer hat on soon to start figuring our the “sound identity” of my game. Having realistic sounds doesn’t fit the visual aesthetic, so I need to lean into heavily compressed/bit crushed GBA-esque sounds.
This bug has been haunting me since day one…
My camera follows a targeted entity, lagging slightly behind and speeding up as the entity gets further away. There’s an equilibrium met where the speed of the entity matches the speed of the camera as it tries to catch up. This creates nice, fluid camera movements when the character starts or stops moving.
The problem is that slight differences in frame timings cause the camera movement jitter between two pixel coordinates, making the entity’s render position flicker by a single pixel. The effect is subtle, it just makes the animation feel “off”…
The fix wasn’t obvious. I started tracking the standard deviation of camera-to-entity deltas over N frames. When the deviation’s low (steady motion), I lock the camera delta to a fixed threshold to stop per-frame jitter. Once it rises above that threshold, normal logic resumes.
The result? Smooth motion at last - no more phantom jitter, and I can finally sleep at night.
Today marks the first time that my custom game engine was used to actually create a game-like over-world experience! I’m working on building out the initial game loop for my first play-test build, and I can only do that thanks to the recent work I’ve done on my entity control system.
I loved being able to add dynamic dialogue fairly easily (e.g. tracking if you try to take other people’s papers, how many times you try to enter a private area) - and design some decently complex world state sequences.
Here are some screen shots of the Tiled map for this scene:
I spent a lot of this weekend working on the startup sequence of my game. Primortal is a love story to the GameBoy Advanced and my childhood playing on it: it’s rendered in 240x160, and your inputs are limited to A/B/Start/Select/D-Pad.
So when a player starts my game I want them to know, in their bones, that they’re getting into a GBA game.
This is what I came up with :) I’m very happy with the visuals, I want to keep working on the audio, but today is honestly the first time I’ve touched music editing software in almost 20 years… So it will take some practice.
I’m a little concerned about flying too close to the sun with some of the mimicry/homage that there’s some copyright infringement? I hope not… What do you think?
Just a small update on my NPC path finding. I was fighting some bugs that I’ve worked through:
- They were sometimes taking slightly non-noptimal paths (like, overshooting a turn).
- They were getting stuck for longer than I wanted.
- They weren’t adjusting their plans as things change in front of them, only once they ran into stuff…
To help understand the issues, I added some debugging logic to render their path ahead of them, it helped A LOT in identifying the actual issues. Plus it’s really cool being able to see their plans and how they change based on your impact.
The only thing left that I want to do is adding the walk-back fail safe, but at this point I think I can just design my world to avoid it as a problem. I’ll come back to it another time.
Adding/deleting entities & path-finding improvements
Up until today, entities could only be added to the world when the Tiled map was loaded. But I’ve added dynamic system events for registering and deleting entities. In this demo video, I added a button to spawn a new entity, who will try to walk across the map before triggering their own deletion.
I’ve also improved my NPC path-finding algorithm immensely.
- Cached paths: A scripted behavior used to just run an A* algorithm every time an entity was idle. Now it caches the last path calculated for a few seconds, reducing CPU load. It will still re-calculate its path if it runs into an issue. I exponentially backs off those retries if they are continuously stuck to avoid using up too much CPU when an NPC is stuck.
- Dynamic impedance: Originally, the algorithm only supported binary “blocked” or “not blocked” tiles. Now tiles and entities have a dynamic impedance, a weighted value of how much of an obstacle something is. A wall has an infinitely high impedance, while an NPC that walks around has a low one. This allows NPCs to identify paths that go through closed doors or other NPCs (if there’s no other way). I eventually want to add controls to my map file that create “encouraged” paths, which would just be a series of tiles with lower than normal impedance values.
There are still two improvements I want to make before moving to my next focus:
- Predict future (non-)impediments: if an entity that is in an NPCs way is actively moving (out of their way), we should ignore their impedance. As of right now, all NPCs think all other (moving) NPCs are just static obstacles. They all try to walk around each other, even though they’re all going to the same place. It’s more like a stampede than a queue.
- Backtracking when stuck: If two NPCs get in each other’s ways such that there’s no way to get around each other - they’ll just get stuck forever. I want to add a mechanism to walk backwards a few tiles on a random rare occasion, letting the other NPC through. This would be more of a failsafe than a feature - to prevent a game sequence from getting permanently stuck.
I can’t believe it’s been over 10 years since I first learned of A* in school… It was honestly one of the most magical home work assignments I did - just a few dozen lines of code and, ✨ta-da✨, magic, you’ve got something “intelligently” moving around your world…
I’ve decided on a title for my game (which I have been calling Project F). Introducing… Primortal: Soul Remains
And with it, I came up with a title card and simple animation sequence at game startup 😎
In the game, a “Primortal” is the physical and metaphysical essence of a creature. It is comprised of everything from the anatomy of a creature, to it’s DNA, to the fingerprint of its soul… With it, your Animech can learn that creature’s abilities. The name comes from these roots:
- Similar to “primordial”: existing at or from the beginning of time.
- Primal: relating to the most essential or powerful forces in nature or behavior.
- Mortal suffix: a life that is subject to death
“Soul Remains” is a play on words in a few ways:
- The game explores what a life is, and what happens when you die - does your soul remain?
- You are the last remaining person in your circle - all your friends and family have died. You are the soul remaining person in your life.
- As a result of this trauma, the character disassociates - what remains in the world is their soul - wandering through life (until you find a new family and come to terms with the past)
- As you capture Primortals in the game, there’s a moral and ethical question around the practice. Does their soul remain? Trapped in some prison?
Here’s a snapshot of the title card, in all its glory:
Scripted entity behaviors! Here’s an example of the player remotely controlling another entity by pressing buttons. Once the NPC steps on one of the end-spots, the NPC walks itself back to the start.
Since my XenoLog posts a week ago, I’ve been busy re-writing my entire entity control system for the over world game state. It’s taken 5,000+ lines of code over 100+ files, but it’s been worth it! Entities no longer implement a single interface, and they no longer interact directly with the dozen or so sub-systems that make up the over-world state.
The entity system was revamped, and now maintains 5 independent components for each entity:
- Position: Where they are, and how they’re moving
- Behavior: Automatic updates the entity state every tick: player controls, NPC wandering “AI”, scripted motion, etc.
- Renderer: What sprites/lights/animations to render
- Occupation: Which tiles they are “in”, important during movement
- Presence: How they engage with other entities (i.e. can the be interacted with? do they block ingress into an occupied tile?)
On top of that, all changes to entities and other game state components go through a new Event & Effect dispatcher, decoupling triggers and side effects. This allowed me to implement a Plan system with which I can queue up combinations of serial and parallel effects in whatever sequence I want. At the moment, the system supports:
- 10+ events (entity enters a zone, player interacted, scripted movement completed, etc.), and
- 25+ effects (trigger dialogue, mutate entity, change camera, swap out entity behavior, etc.)
This all culminates to parameterized, generic entity creation. I can register bespoke (or reusable) entity constructors and event handlers and reference them within Tiled (my map editor) when creating entities. These can be used to create flexible NPC interactions, dialogue sequences, teleportation, basically anything you need to do to control a game entity.
I feel like at this point, I’m close to completing the “build the game engine” milestone and I can start focusing on actually working on the “true game”.
A lot of this stuff I’ve built is already available in something like Unity or Godot - but part of this project has been about proving to myself I could program a game without. It’s been a lifelong dream to build a game from scratch - seriously, since middle school when I first played with HTML. So I’m super proud of this specific update.
Another one of those “doesn’t look big, but is massive” updates… 😅
I added a full event & effect system to my engine, replacing a dozen smaller systems I had built to facilitate all of the other game mechanics in the over world.
That meant re-implementing: interactions, dialogue/chatter triggers, timers/delays, movement restrictions, zones, combat triggers, teleportation, state transitions, camera adjustments, and more…
But, hey! We got there! :) It just took 3-4 full evenings of effort… The only thing not working is dashing across gaps, that was a problem for another day…
On top of that, I added support for JavaScript event handlers, allowing me to embed JS directly into my entity definition in Tiled. This will hopefully make it easier to create more interactive worlds directly in the map editor, without having to hop around between my code and map editors. Event handlers can be written in Go, along side the rest of my code, in JS files (edited in my IDE) and referenced by entities, or inline directly in Tiled.
The default property editor is gross in Tiled for code snippets (see the video…), but I’m working on a fork of Tiled to support basic JS editing with autocomplete and linting based on a types file! Here’s a little look at that:
Oh, I also added some actual settings in the menu, allowing me to more easily tune of knobs to debug rendering issues. Nothing for real players though…
Another seemingly small, but large world editing update - dynamic ambient lighting! Up until now, my lighting layer had a single base color. I added functionality to my map loaded and scene renderer to change the ambient light based on the map default, or a dynamic ambient lighting area, defined with rectangle objects in Tiled. This will allow me to alter the base lighting room by room, or area by area.
In the screen shot below, you can see the rectangles around the temporary dungeon demo areas and the island area.
That’s enough menus and UI work for me for a little bit..
I’m really happy with my skill tree, and skill inspector - especially since the skill definitions are nuanced and technical. I think the Animech level-up screens will change the most in the future, I have some ideas for additional stats to boost around damage.
But I think I’ve hit all of the upgrade screens I want to support for my first play-test demo. Something about them looking good - even for early testing - makes it feel nice to play.
I think next up, I’m going to tackle my dynamic entity scripting system. I’m going with goja and Typescript, at least, that’s the plan!
I thought I’d add a transition effect between menu screen - I tried to emulate older CRT screens, tube TVs changing the channel, and the classic pip boy. There are some mocing scan lines, vignetteing, “flashing”, pixel row dithering, and some other small thing. I like where I ended up, but I’m concern it’s too much? Is it distracting? Or “nice! keep it!”?
From working menus, to pretty menus 😎
A nice, animated, scrolly list for the creaures, and a fancy dynamic skill tree for the creature skills you can unlock. I spent way more time than I want to admit on this stuff… I also really like the simple threshold shader I applied to my normal sprites to align with the “lo-fi screen” aesthetic of this menu.
Working menus! Now you can…
- Upgrade your Animech’s Sync and Shield stats using experience
- Unlock skills from Primortals using research points
In addition to these game updates, I also spent a lot of time on hashing out my story, and the tutorial sequence. Next up, I want to add the ability to change load-outs, so you can choose which skills you have in combat.
I’m really pleased with this update. Now that I can battle and collect experience and research point, I need a way to spend those things to upgrade the player’s abilities. Since this game has some catch-em-all elements, I couldn’t help but emulate the Pokedex a little bit… Introducing the “Xenolog” - a little PDA that will show your current game progress; and while in HQ, be able to upgrade your player. I’m really happy with this little sub-device menu look and feel. Now I can start on the actual functionality of the menu…
Not a whole lot to show - I’ve mostly been working on refactoring and clean up. I’ve been refining my player load out design and “Primortal” archetypes. I originally wanted:
- A party system, where you would “load in” 1 of your 4-6 Primortals in your team
- Damage Types, Body Types, and Type Affinities with strengths and weaknesses amongst each other
Ultimately - it was too complex and not fun. I’ve decided to simplify it quite a bite. I went from 8 body types & 8 damage types, to 5 Primortal “Flavors”. Each flavor has general patterns for the types of skills they use an and how they behave in combat. But it’s not like rock, paper scissors - more like the colors in Magic the Gathering - it’s behavioral theming - no strict rules.
Instead of party members, defeating and optionally capturing Primortals reward you with research points to unlock the skills that creature uses. Before deploying on your next adventure, you can change your skill loadout with skills you’ve unlocked from all Primortals.
This shift has made it much easier to focus in on a tighter combat experience - focused more on building fun and interesting skill sets, and the puzzle solving of applying those skills in an efficient sequence to maximize outgoing damage and minimize incoming damage in real time - and less about swapping party members to play against type weaknesses.
I decided to focus on 5 core creatures to start - one for each type:
- Kinetic: focuses on direct hits and defending one-self
- Thermal: Sustained burning status damage
- Voltaic: Glass cannon, weak - but string hits
- Corrosive: Low passive damage + low damage small hits
- Mutagenic: Self healing while chipping away the opponent
Plus a 6th creature - a dummy robot to start building out the combat tutorial.
Small update to statuses - internally, they are tracked with “stacks”, but visually they are represented with level, 1-3. It simplifies the effects a bit. Burning now does more damage the more “exposure” the (longer, and strong the effect is) - Poisoning deals flat damage, but the higher the level, the slow the stacks decrease. I think it looks much cleaner
I also implemented “Interrupt”, which is when you get hit while in a vulnerable stance. It nullifies the remaining ticks in your current skill. I also want to add a skill that stuns a player after, essentially making them “sleep” for a few ticks after their current skill.
I feel like this is a bigger update than most. I mocked up the core game play loop I’m looking for: travel to a planet, battle mobs to get research points, then gather enough elythium to escape back. Once back at HQ, use your research points to upgrade your character. At first, to get to a rough demo to have people try it out and offer feedback on the general idea, I want to trade research points in for new combat skills.
Speaking of combat… I also added a status system! In this video, you can see burning and poison - a tad cliche, but easy examples to implement. I’m still feeling out how I want statuses to impact you exactly. I think burning will scale based on the number of applied stacks, poison will damage based on % of max health. I’m also considering adding exposed to increase incoming damage, stun to randomly prevent skills from triggering, and symbiotic which will cause you take damage if your opponent does. I guess there are tons more I want to try, but that’s too much for this post.
The last major combat mechanic I want to implement is “staggered” - a condition applied to opponent that forces a stance where they can’t make moves and are vulnerable to damage. Then I wan to work on the basic upgrade screen :)
Today: Mob Shadows..
I’ve been on the fence on how to handle combat encounters - Do monsters wonder around (expensive to animate/code)? Do I introduce tall grass a la Pokemon (limiting in different biomes)? Do certain zones just randomly trigger combat like FF (unpredictable and feels jarring)?
My current plan? Shadows! Here’s my first stab at a “Mob Shadow” that wanders around an area, but once you get close, speeds up and tracks towards you. If it comes in contact with you, combat is triggered! I like the idea of seeing the mobs and have control over the situation, as well as dodging if you wish.
Some pipe-dreams would be different shadow shapes/colors, footprints, sound effects, etc. to hint at what the mob might be. But for now - I think this is perfect for the initial game loop.
Introducing… Elythium! A mix of: “Elysium”, the ancient Greek mythological paradise/state of ideal happiness; and Lithium, the highly reactive and flammable element. On your adventures, you need to collect enough of this stuff to fuel the return flight home.
I’ve finally entered the phase of working towards an actual game loop - I finally feel like my combat and adventuring states are fleshed out enough to support it.
As part of this, I also spent a lot of time streamlining my sprite configurations - before I was mostly manually coding the frames and their timings - now I can just throw together some YAML next to the PNG and reference an animation name! These crystals subtly shift between different hues and sparkle!
This one will be hard to explain.. but this blog is for me in the end. I’ve added stances to the skill execution, represented by the black lines with an icon (shield = defending, !!! = vulnerable). Those stances will eventually impact how damage is calculated.
This adds a nice layer to the skill system where you need to time your skills’ stances with your opponents damage ticks (white dot with black border) to avoid taking extra damage or even reduce it.
Next steps will be to actually adjust damage calculation, not just render the stances. Then I want to add a stunned effect (getting hit while vulnerable) which will basically “parallelize” you for a few ticks (adding a dummy skill that does nothing). Then? Statuses! Always need burn…
Just showing off the tileset I’m working on - the initial part of the game, which will act as the tutorial, will be in a sci-fi lab of sorts, maybe in a large space ship, we’ll see…
I’ve never made my own assets before - and I’m very happy with how things are coming along. I’m definitely taking inspiration from other assets packs I’ve found online and trying to make it my own :)
Started work on my first art asset: a sci-fi space lab tilesheet! :) I love how the color bloom (LEDs) and lighting system already make it look so good.
In it’s current iteration, I’m still pulling a lot of inspiration from Cyber Monkey’s SciFi Spacial tilesheet, but I plan to adopt it more - changing the industrial striped tape out, and maybe going for a more black & white vibe and removing the greenish blue walls.
With shaders now working, I wanted to try out something funky. I really like playing my GBA games on emulators with simulated pixel grids - so I added a shader that adds scan lines, pixel grids, and sub pixel tinting. I want to add a settings menu to allow player to tune these or turn them off completely - maybe I’ll do that next :D
Here’s a zoomed in example without video compression of a white background:
Now, with shaders! I had to work on a custom pixel fork to allow me to bind samples to uniforms accessed by custom shaders. This let me implement “screen” and “overlay” compositions to build my light map. Lights are now an extension of entities and have their own update behaviors (such as flickering for a torch, or pulsing for the coin).
Time to make the game moody :) I was able to add some basic lighting. This is just the beginning. I still need to render the actual entities (animated torch sprites) that are emitting the lights, add light fluctuations/jitter, and more lighting variations, maybe let entities hold lights, consider supporting shadows… the list goes on…
Small iteration in the combat state. Health is now fluid - damage adjusts a target, but the actual health takes time to reach that target. This means the health bar updates smoothly and it technically allows you to recover from death. I want to add skills that change how quickly (or slowly) the effective health updates.
I also added a pending animation on the next skill, and some UI button hints for canceling the pending skill.
Next up, I want to show both the “target” and “current” health in the stats bar.
This update was a bit tedious, and less game focused - but hopefully it will let me iterate on my UIs quickly as I flesh out my combat state.
Text boxes are now fully configurable with width/height, render origin location, and vertical + horizontal alignment.
With those, plus the 9-box frames I added a while back, I created a generic collection of “badges” that can be used for small UI elements. In this example type badges, a la Pokemon - and button input tool tips!
I was struggling to find a 5px tall font I liked for some of my more detailed UI elements. So I made my own! It was way simpler than I expected thanks to the PixelForge tool I found. I love some of the more stylized letters, like A, C, G, O, P, S, and U (specifically the “lower” case letters).
This also opens up an awesome opportunity to create custom icons as part of the font that I can easily include in text :)
Sadly, it’s not easy to make special kern pairs (like for LT) with bitmap fonts. It kind of bugs me (look at ‘HEALTH’ above). But maybe some day I’ll circle back and see if I can make it work with glyph pair substitutes. It would require a much more feature rich tool to achieve.
I spent a lot of time recently on non-visual work recently, which is hard to demo.
I’ve revamped my asset & sprite atlas engine to allow states to filter/specify which assets they want to load into a shared sprite atlas. This shared atlas (a single giant image containing all the sprites I might want to draw) is used with a batch rendering engine to greatly reduce the amount of resources it takes to run the game. It’s currently sitting pretty at ~30MB of RAM. Most importantly, this work required me to fork the pixel v2 library to support this batching with the built-in text package.
After that, I did the work to render the opponent health in combat, and got rid of the debug text rendering. It looks much better now!
Next up, I want to continue to add UX features to combat to make it easier to see what’s happening (and what’s happened), and add the tempo counter.
This update is a mixed bag. I added the ability to render outlined text, shown in a text box here. I plan to use it in the combat state soon.
In the combat state, I added a skill selector component. I plan to add some iconography for buttons. I also want to highlight the active and queued up skill in some way. I rotated the active skill ticker, which visualizes what skills are currently being processed and stuck it in the middle. I plan to add a tempo counter that increases when you have a skill queued up when the current one ends, encouraging you to not “pause” combat.
My next goal will be to add the “combatant cards” with their names, and health bars, instead of the debug text I currently have rendered.
First, now you can run by holding down B :)
Second: Dashing (over gaps)! This is a mechanic I plan to have the player unlock down the road to make areas accessible that weren’t before.
The animation style isn’t my end goal, but was easy to make and fit well enough with my current stand-in tile sheets.
This video starts with me “showing off” my home-spun map editor. It did what I needed earlier on - had swap-able swatches, layer rendering controls, copy/paste abilities, entity property management, and more. Then, it shows me opening the same map in TIled, changing the position of some entities, and finally walking around in the edited map.
When I first started this project, my instinct was to use Tiled to map editing. But I really didn’t enjoy the libraries available, so I developed my own internal data format for maps, and also wrote my own map editor. That was fun, but ultimately stupid.
I still like the map data format I landed on, it integrates nicely with my rendering engine. But I finally bit the bullet and wrote a converter that can parse a Tiled map and convert it to my internal format. Now I can stop worrying about implementing quality-of-life improvements for my bespoke map editor, and instead focus on building the game itself…
PS: I also bought @snowhex’s tileset to use as a placeholder for my sprites - letting me focus on implementing the game engine instead of attempting to draw decent looking pixelart.
Procedural Cave Generation
What’s better than procedural generation with an organic twist?
In one of my previous posts I used a method to generate random dungeons based on graphs. In my implementation the rooms were rectangles, connected by hallways that would turn at 90 degrees - perfect for a dungeon. But caves have a different set of requirements:
- Cave passages need to be fluid and have curves.
- Cave walls need to be rugged, not confined to the 90 degree X and Y grid.
- Cave passages need to have dynamic widths: some larger, some smaller.
- Caves need larger areas, “caverns”.
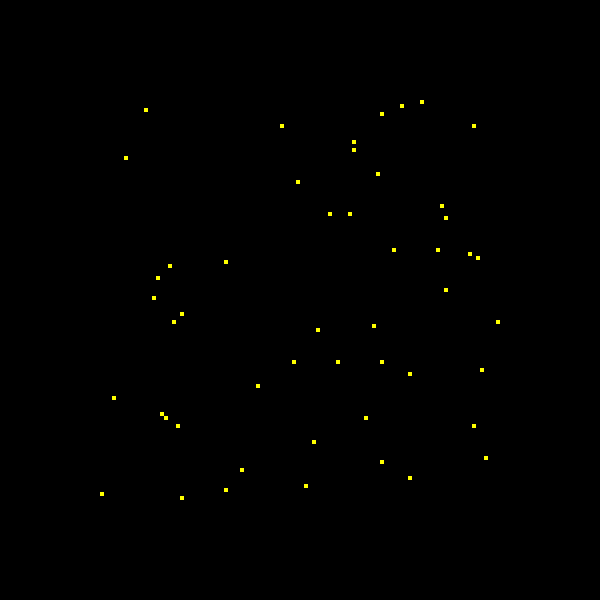
With these requirements in mind, I thought that if I randomly generate points on a grid and connected them with a Relative Neighborhood Graph I could somehow morph the edges to create the curves and more “natural” walls.
To start, I generated the random points. The process is pretty straightforward - I have a predefined area within which I want the cave (defined by a width, height, and some padding).
int x, y;
for (int pointId = 0; pointId < _pointCount; pointId++) {
    x = _random.nextInt(_width - _padding * 2) + _padding;
    y = _random.nextInt(_height - _padding * 2) + _padding;
    _points[pointId] = new Point(x, y);
}
Then I connected them with lines as an RNG graph. In short, it’s an undirected graph where you connect any two points (a, b) where there isn’t a third point (c) that is closer to both (a) and (b) than (a) and (b) are to each other.
Point a, b, c; // the three points
float abDist, acDist, bcDist; // the distances we care about (stored as a squared distance)
boolean isEdge;
for (int aid = 0; aid < _pointCount; aid++) {
    for (int bid = aid + 1; bid < _pointCount; bid++) { // for every pair of points (a and b)
        isEdge = true; // assume it's an edge
        a = _points[aid];
        b = _points[bid];
        abDist = a.squaredDistance(b);
        for (int cid = 0; cid < _pointCount; cid++) { // for all points other than a and b
            if (cid == aid || cid == bid) continue;
            c = _points[cid];
            acDist = a.squaredDistance(c);
            bcDist = b.squaredDistance(c);
            if (acDist < abDist && bcDist < abDist) { // if c is closer to b and a, then a is to b
                isEdge = false; // it's not an edge
                break; // and we can stop looking for this set of a and b
            }
        }
        if (isEdge) a.edges.add(b); // if no other point (c) is closer, make an edge!
    }
}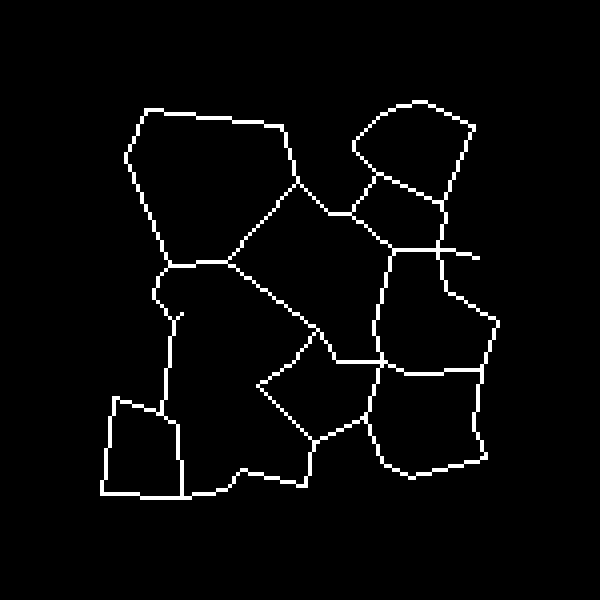
So, now I have a basis for a cave system. I’ve got loops and passage ways and it’s not confined to 90 degree turns. There’s one catch though: it’s not very natural (yet). The passage ways are a uniform width and there is no “curviness” to the walls. So I started looking around. I was focused on biologic and organic growth. I thought I could let the cave “grow.” I found Cellular Automaton; the basis of Conway’s Game of Life. From there I found a lot of great resources on the Procedural Content Generation Wiki, specifically this one by Jlund3. But it has its issues: you couldn’t control the shapes of the cave and there were chances of pockets of air that weren’t connected to each other.
I ended up coming to the conclusion that I could treat my above image like a petri dish and pretend the lines I drew of my graph were like lines of some kind of organic goop. Then after I gave it some time, the organic goop could grow and form more natural structures and pathways. From here on out the entire process is basically greyscale pixel manipulation. For the entrance and exit I drew some larger shapes to ensure they would grow to an adequate size for stairs or ladders. This was now my starting “petri dish.”
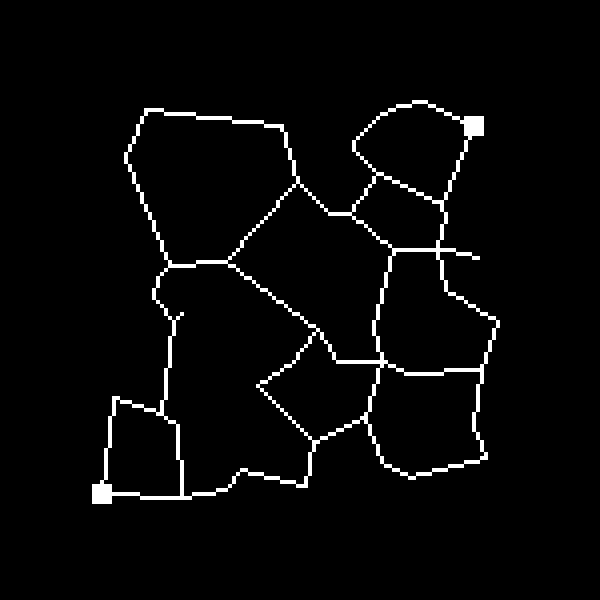
Now I needed to come up with an algorithm that would “let the pixels grow.” The basis of following algorithm is that if a pixel is “large” enough (i.e. it’s value is above a certain threshold), it will grow into other neighboring pixels.
// amount: the growth amount if a growth is to occur
// seedLimit: for every pixel, only let it grow if it meets this threshold
// chance: if a pixel meets the threshold, it should only grow into its neighbors
//         this percentage of the time
// growRadius: size of the growth area - as a square around the seed pixel.
public void grow(float amount, float seedLimit, float chance, int growthRadius) {
    // hold the pixel growth separate from the map while we calculate the growth
    float[][] growth = new float[_height][_width];
    int tx, ty;
    for (int y = 0; y < _height; y++) {
        for (int x = 0; x < _width; x++) { // for each pixel
            if (_map[y][x] >= seedLimit) { // if this pixel meets the threshold - it's a seed!
                // loop through all neighbors within the radius
                for (int dy = -growthRadius; dy <= growthRadius; dy++) {
                    for (int dx = -growthRadius; dx <= growthRadius; dx++) {
                        tx = x + dx;
                        ty = y + dy;
                        // don't grow outside the map boundaries
                        if (tx < 0 || ty < 0 || tx >= _width || ty >= _height) continue;
                        // double the seed pixel's amount when it grows
                        else if (tx == x && ty == y) growth[y][x] = _map[y][x];
                        // roll the dice, if it meets the chance, grow that neighbor
                        else if (_random.nextFloat() <= chance) growth[ty][tx] += amount; //\_map[y][x];*
                    }
                }
            }
        }
    }
    // apply the accumulated growths to the map itself
    for (int y = 0; y < _height; y++)
        for (int x = 0; x < _width; x++)
            _map[y][x] = clamp(_map[y][x] + growth[y][x]);
}
We’ll want to run this growth algorithm a couple times (come on, bacteria doesn’t grow in 10 seconds flat). To make that a little easier we can create a little helper method:
public void growMultiple(int count, float amount, float seedLimit, float chance, int growthRadius) {
    for (int run = 0; run < count; run++)
        grow(amount, seedLimit, chance, growthRadius);
}
We can then use this method to grow our cave system. This is the trickiest part; seemingly small changes to the parameters can create huge changes in the output. Play around with different growth amounts, chances, radii, etc. You can create big, wide smooth caves; or cramped jagged caves pretty easily. I found the following to create a pretty decent “cave” looking result.
oc.growMultiple(8, 1f, 1f, 0.05f, 1);
oc.growMultiple(1, 0.3333f, 1f, 0.5f, 1);
oc.growMultiple(3, 0.05f, 0.5f, 1f, 1);
Awesome, this looks good. However, tiles don’t really work with “gradient” or “blurred” edges, so we need to pass it through a simple contrast filter to make the edges sharp and tile-worthy.
public void contrast(float threshold) {
    for(int y = 0;y < _height;y++) {
        for(int x = 0;x < _width;x++) { // for each pixel
            // if it's above the threshold, set it to 1, otherwise, 0
            _map[y][x] = _map[y][x] >= threshold ? 1 : 0;
        }
    }
}
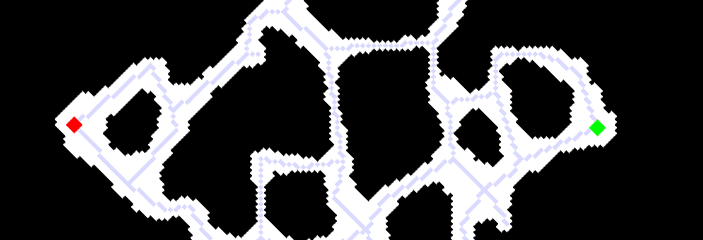
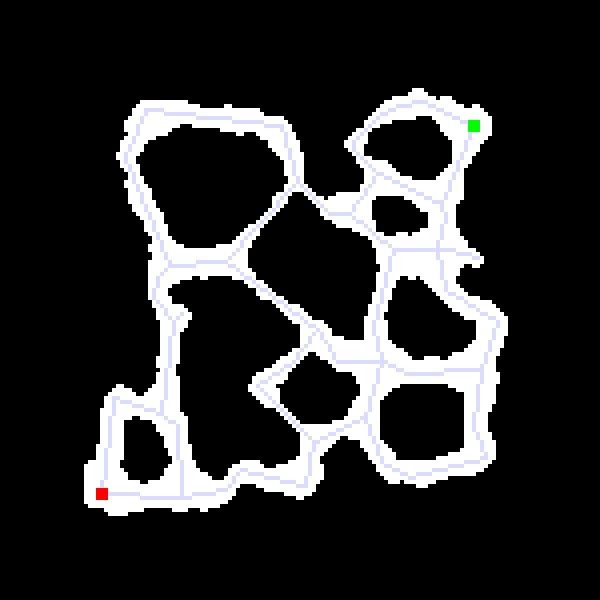
And that’s it. It’s ready to be converted into a tile map. Here’s a sample result, I’ve drawn over the start and end areas (green and red boxes) as well as the underlying graph so you could easily see the extent of the growth:
You can find the full source code here.
Dungeon Generation
I delve in the world of ‘Procedurally Generated’ map generation.
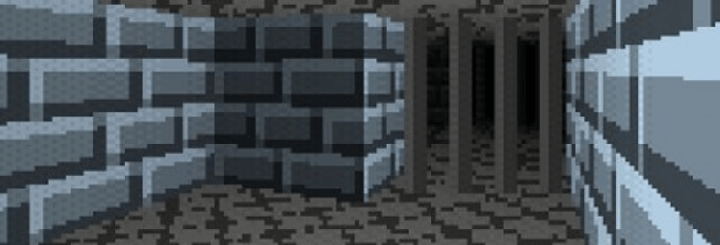
In all of my (unfinished) games, a lot of time is taken up with content generation. This includes art, story, skills/combat ideas, map creation and countless other tasks. One of the things that I’ve always been intrigued by is procedurally generated maps and textures. They offer decent, controlled layouts that can be generated on the fly. So recently, I set out to take a stab at it. I think it’s a good start to a real rogue like dungeon generator; here’s how it went.
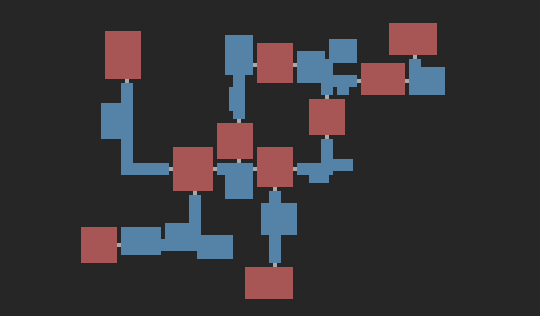
Before we get started, here’s a sample of the end-result. I am really happy with it and plan to eventually generate a tiled map given a tile set.
I stumbled upon this post on Reddit pretty quickly after searching for “procedural dungeon generation” on Google, Procedural Dungeon Generation Algorithm Explained by phidinh6. The post outlines a pretty straight-forward approach to generate random rooms that do not intersect, and then connects them with hallways based on a connected graph. He easily lays it out and gives a nice demo that really helped me visualize the whole process, here.
There were a couple steps that were easier said than done. The first being step 3; specifically “simple separation steering behavior to separate out all of the rectangles.” I couldn’t find anything on the internet that was directly related, but I was able to create something based on what I could see in his demo. The basic idea is to loop through each pair of rooms and shift both the least amount possible to get rid of any overlap. Keep doing so until no rooms overlap. Here’s some commented code to do this step:
// a Room is a simple rectangle (x, y, width, height)
private static void separateRooms() {
  Room a, b; // to hold any two rooms that are overlapping
  int dx, dxa, dxb, dy, dya, dyb; // holds delta values of the overlap
  boolean touching; // a boolean flag to keep track of touching rooms
  do {
    touching = false;
    for (int i = 0; i < rooms.size(); i++) {
      a = rooms.get(i);
      for (int j = i+1; j < rooms.size(); j++) { // for each pair of rooms (notice i+1)
        b = rooms.get(j);
        if (a.touches(b, padding)) { // if the two rooms touch (allowed to overlap by 1\)
          touching = true; // update the touching flag so the loop iterates again
          // find the two smallest deltas required to stop the overlap
          dx = Math.min(a.getRight()-b.getLeft()+padding, a.getLeft()-b.getRight()-padding);
          dy = Math.min(a.getBottom()-b.getTop()+padding, a.getTop()-b.getBottom()-padding);
          // only keep the smaller delta
          if (Math.abs(dx) < Math.abs(dy)) dy = 0;
          else dx = 0;
          // create a delta for each rectangle as half the whole delta.
          dxa = -dx/2;
          dxb = dx+dxa;
          // same for y
          dya = -dy/2;
          dyb = dy+dya;
          // shift both rectangles
          a.shift(dxa, dya);
          b.shift(dxb, dyb);
        }
      }
    }
  } while (touching); // loop until no rectangles are touching
}
He opts to use a Delaunay Triangulation trimmed with a Minimal Spanning Tree to connect the bigger rooms. However, I found naughty’s suggestion to use a Relative Neighborhood Graph to be simpler and to produce better results. It created the loops to make the dungeons more complex while still minimally connecting all rooms. From Wikipedia:
“(A RNG is an) undirected graph defined … by connecting two points A and B by an edge whenever there does not exist a third point C that is closer to both A and B than they are to each other.”
Here’s my implementation:
private static void connectRooms() {
  Room a, b, c; // Rooms to check between
  double abDist, acDist, bcDist; // squared distance between each of the 3 rooms
  boolean skip;
  for(int i = 0;i < corridors.size();i++) {
    a = corridors.get(i);
    for(int j = i+1;j < corridors.size();j++) { // for each pair of rooms
      skip = false;
      b = corridors.get(j);
      // get the sqrd distance between a and b
      abDist = Math.pow(a.getCenterX()-b.getCenterX(), 2) + Math.pow(a.getCenterY()-b.getCenterY(), 2);
      for(int k = 0;k < corridors.size();k++) { // loop through all other rooms
        if(k == i || k == j) // that are not a or b
          continue;
        c = corridors.get(k);
        // get the other two applicable distances
        acDist = Math.pow(a.getCenterX()-c.getCenterX(), 2) + Math.pow(a.getCenterY()-c.getCenterY(), 2);
        bcDist = Math.pow(b.getCenterX()-c.getCenterX(), 2) + Math.pow(b.getCenterY()-c.getCenterY(), 2);
        // if the distance between a and c or b and c are smaller than a, the pairing of
        // a and b is not a graph edge
        if(acDist < abDist && bcDist < abDist)
          skip = true;
        if(skip) // so we break the loop and go to the next a and b pairing
          break;
      }
      if(!skip) { // if this a and b pairing was never skipped, it should be an edge
        if(graph.get(a) == null)
          graph.put(a, new LinkedList());
        graph.get(a).add(b);
      }
    }
  }
}
After these rooms are connected, I needed to generate the hallways required to traverse between them. I wanted the hallways to randomly bend from A to B either clockwise or counterclockwise which caused me some trouble. So much so I needed to look for help at Stack Exchange, here. Thanks to Heckle’s suggestion I was able to find a way to connect the two rooms with connected hallways. There’s a code example on the Stack Exchange page.
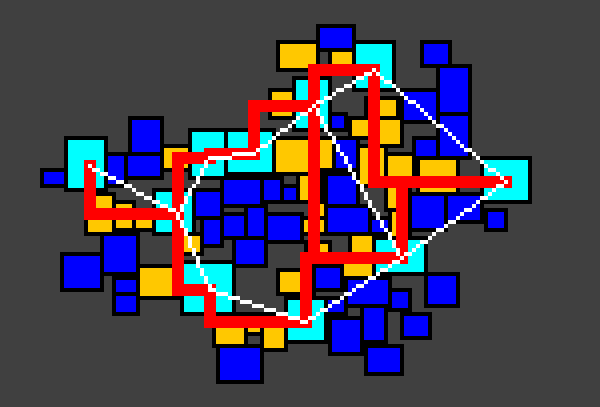
Once I was able to connect the big rooms with hallways, it’s simply a matter of drawing the rooms, smaller corridors and hallways to an image. Pixels can translate directly to tiles, so I plan to generate tile maps based on these generated images. This Image shows a (messy) more detailed result of my methods.
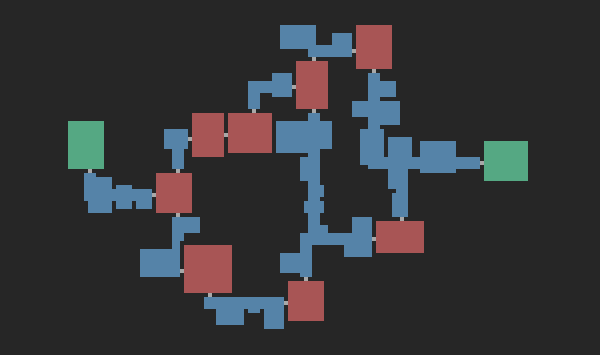
And here’s a final result. I still need to work on the doorways from the hallways and the big rooms, but it’s a great starting point for a rogue-like map.
You can find the full source code on my Procedural Generation GitHub.
Smash Bash was my first attempt at a side-scrolling, platforming, Smash-Bros-style game.
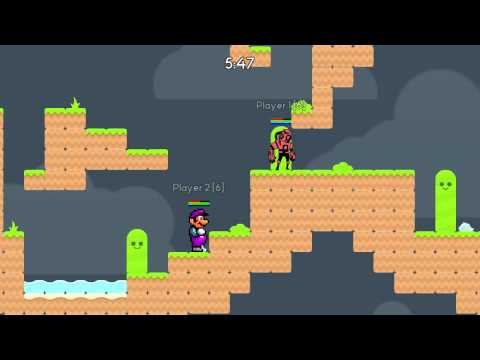 Smash Bash Demo #1
Fizzics is a physics library I built for Smash Bash, and designed as its own standalone library.
 Fizzics v1.0 Demo
2D Lighting and Shadows
Shadows make the world go ‘round. Thankfully 2d shadow casting is pretty easy.
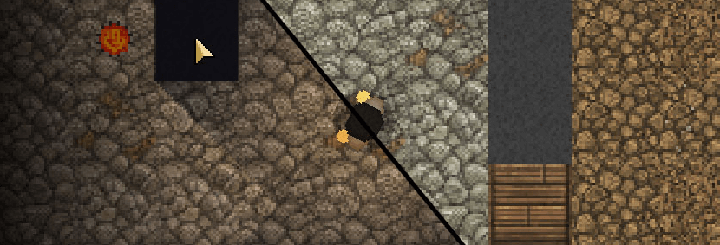
I spent a good amount of time on my “lighting engine” and I’m very happy with the result (so far). There’s still quite a bit that I want to do with the lighting but that will have to be for another day. As of right now, I’ve tackled the most important thing (in my book): shadows. Without shadows, LRK’s lighting system is VERY similar to TWC’s (with a few improvements). It took a lot of work to get to where I am now and I thought what I learned was worth sharing. For the first time on my blog I’m going to go over how I did what I did. Once that’s done, I’ll briefly go over what I could do better and what I have planned for my lighting engine’s future.
The Light Map
The general method to my lighting engine is as follows:
- Create a new Frame Buffer (light map) to draw the light map on.
- Fill the light map with the ambient light color
- Draw the lights to the light map with an additive blend mode.
- Draw the light map over the game’s graphics component with a multiplicative blend mode.
To add shadows, I do this for each light before I draw it to the light map:
- Draw the light image to another Frame Buffer (light buffer).
- Tint the light buffer with the light’s color by filling the light buffer with a color while using a multiplicative blend function.
- Draw the shadows over the light buffer in black.
Here are some visuals to help you follow along. For comparison here is what the game looked like before I added any kind of lighting.
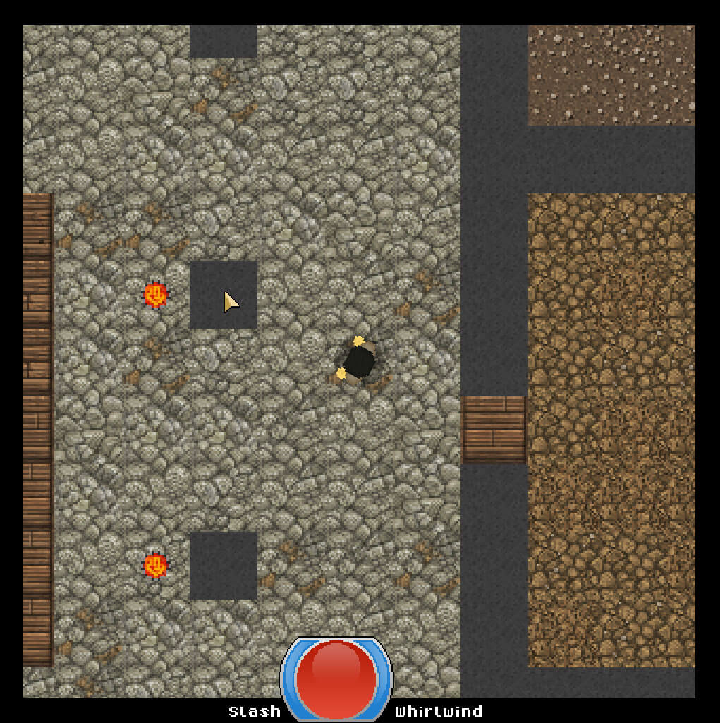
The first step is to create the light map and fill it with ambient light. For this demonstration, I am not using a blend function to draw the light map so it’s easier to see what’s going on.
Then, I draw each light over the light map.
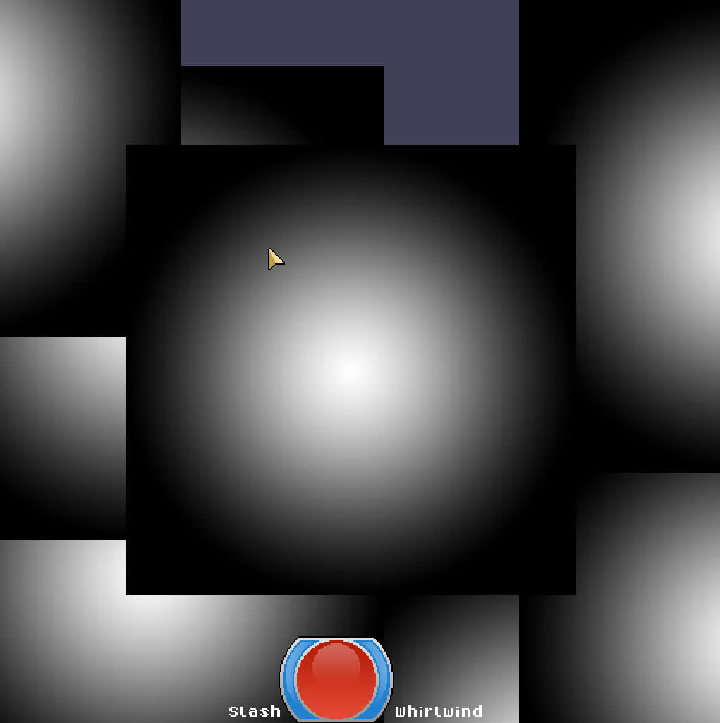
For each light, I fill the light buffer with the light’s color using a multiplicative blend function. (Note, this is not the actual order of drawing, I would tint the image as I draw it. I separated the steps here to make it easier to follow.)
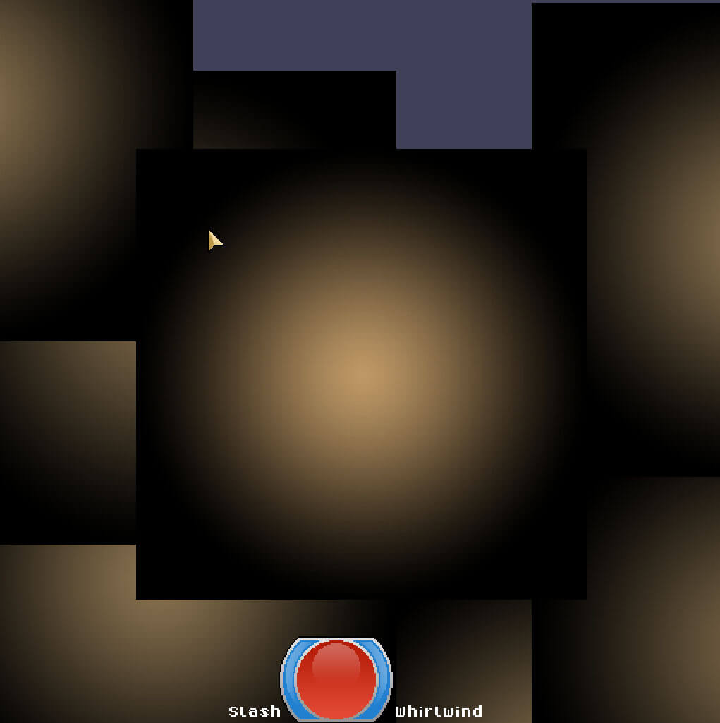
Then for each light I remove the shadows (I’ll go over this later) by simply drawing a black polygon where the shadow should be. (Again, this should be done to the light buffer BEFORE drawing the light to the light map.)
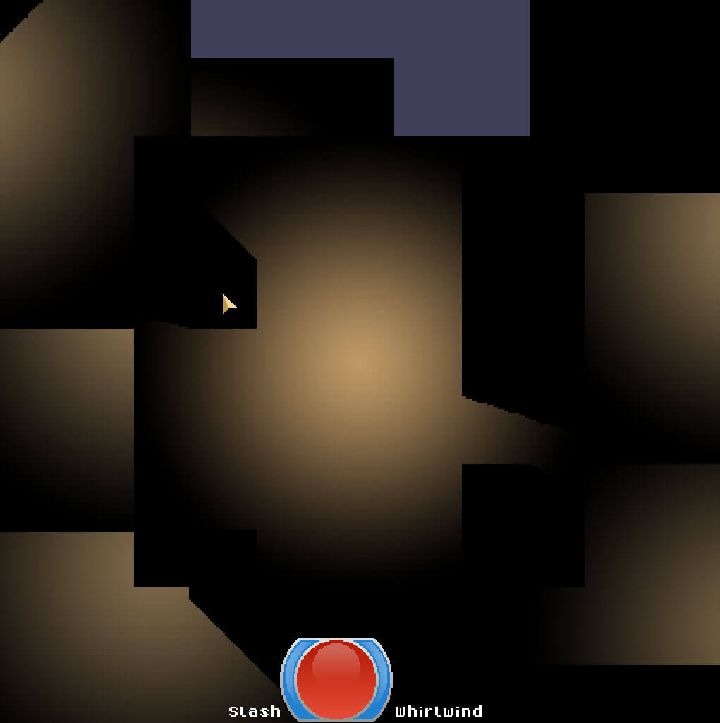
To add the lights to the light map in a “lighty” way, I draw each light buffer to the light map with an additive blend function. You can see the sources of light and their shadows very well here.
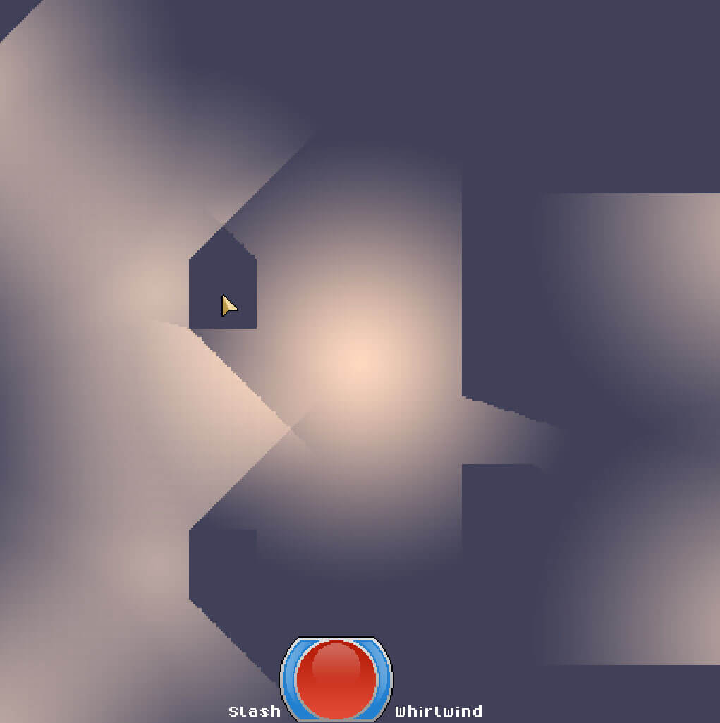
Now, when I draw the light map to the game’s scene I use a multiplicative blend function and TA-DAH, light has been born.
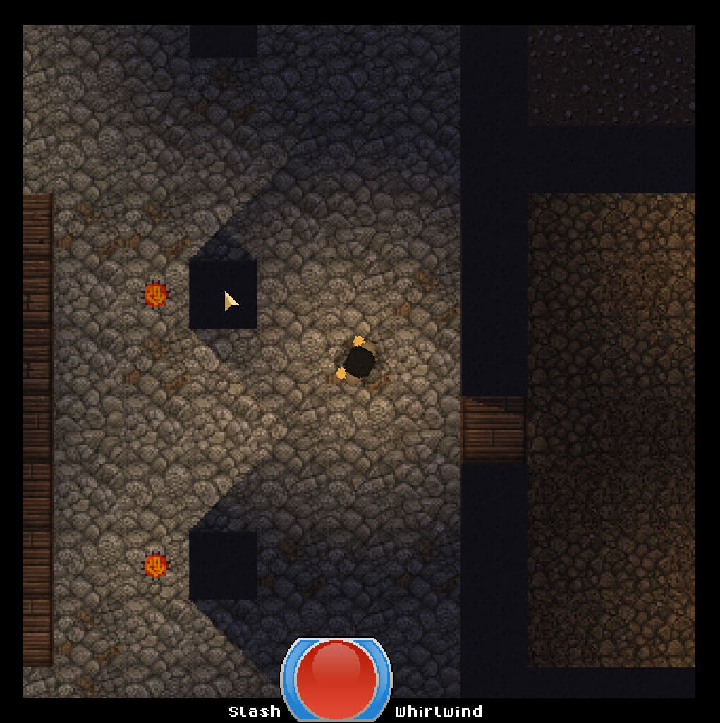
To make the render distance (which is determined by the light the character is holding) less harsh, I draw a simple vignette around the images (which is just a scaled, transparent, black image).
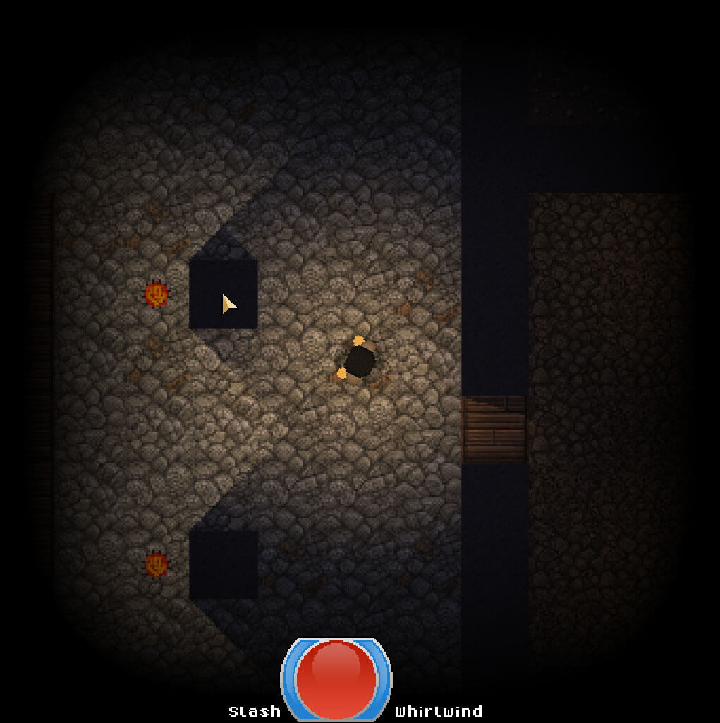
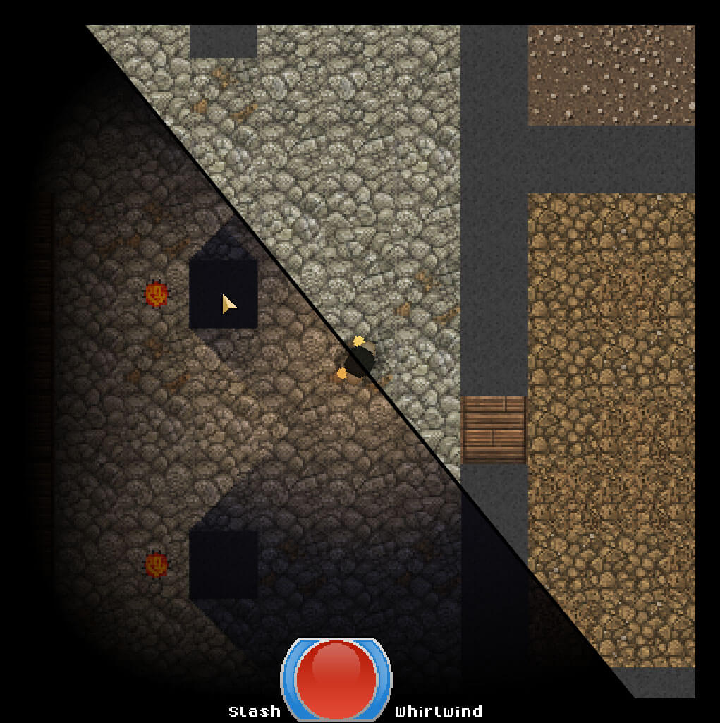
And for a final comparison. The difference is night and day - lighting adds so much more to the game than I thought it would.
Here’s a live-action demo of the lighting in action. This video also features a giant horde of slimes and an OP player.
Shadows
I would not have been able to work out these shadows without the help of this video: Here. I would strongly suggest you watch that video if you really want to understand how this works as he gives a lot of good visuals. I will admit, I have become a bit of a graphics softie thanks to using Slick2D, so I adopted his method and came up with another, less efficient way to go about it.
When I load the map, I create the 2D world with JBox2D based on a collision layer in the Tiled map. When I create a static wall with JBox2D, I also keep an array of lines (2 points) for each wall’s edge. I use these lines as “light blockers”. After I draw the light image to the light buffer, I pass the light buffer, the lights position and other world data to a method. This method then goes through each of these shadow lines that intersect the light’s affected area.
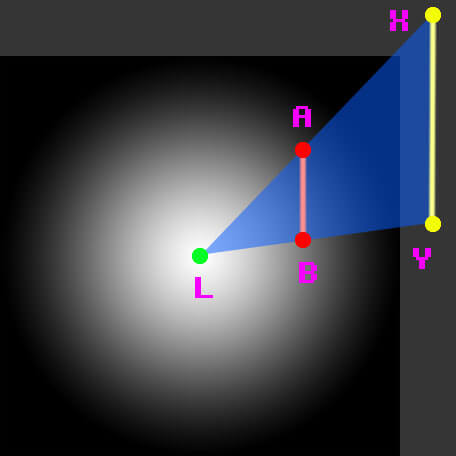
This diagram shows the light image, 5 points, the shadow line and the triangle of light we’re working with. For each shadow line (here the line is A,B), you can make a triangle of light that should be shown (here it’s the triangle L,A,B). If we think of this triangle as a point and 2 vectors (point L with vectors L>A and L>B) we can scale the vectors equally to create a similar (larger) triangle (L,X,Y). Then, if we subtract the original triangle from this bigger one we end up with a polygon (A,X,Y,B) that encloses the space the shadow this line produces from this light. Once we have that polygon, we can simply draw it over the light buffer as so:
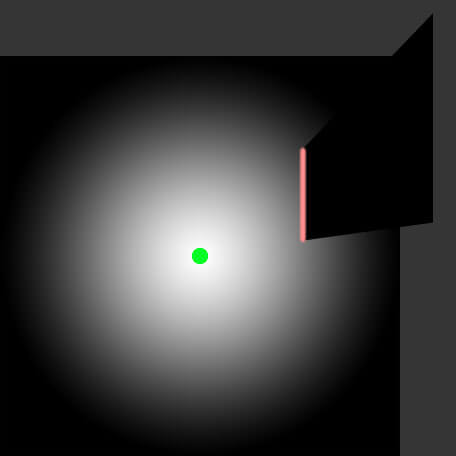
I left the point of the light and the shadow line in this image for demonstration. Also note the dark grey is outside of the light buffer and is not actually drawn to the screen. This happens for every shadow line we have.
What I Could Do Better
There is one major thing I could do more efficiently, but for right now the system is alright as performance is not hurt too harshly from my not-so-efficient ways. As described in the above video, the best way to implement the 2D shadows is to draw a triangle fan that is constructed by clipping a quad where there is an intersecting shadow line with the light’s image as the texture. This would give many fewer draw calls and less resources. If I implemented it this way, each light could be drawn directly to the light map without the need of a separate buffer to draw the shadows.
Another minor issue is the number of calculations per frame I have to make for each light. Most lights are static in their position. I don’t plan to have moving entities that create light shadows, so I could pre-calculate each triangle fan or shadow map when the light is generated. If I use this method, I would have to update any lights’ shadow maps when the surrounding environment changes (door opens, gate closes, etc).
The Future
The biggest thing I’d like to add in the future is a shader to blur the shadow edges. This would do a couple things:
- It would ease the shadows by keeping the shadow/light contrast from being so sharp.
- It would add the illusion of the umbra family. (more realistic lighting)
- And finally it would allow the player to better see the edges of the surrounding walls’ textures which would add more character to each map.
Another small thing I’d like to do is to adjust the blending function of the lights being drawn to the light map. Right now, things can become very “washed” when there are lights close together. In TWC I combated this with alpha blending, but lights that are drawn later still overpower lights drawn before it. I’m not sure if there is a better way to go about this blending, but I want there to be.
PS: I would like to give a shout out to John Smith for this John Smith’s texture pack. I used textures from his Minecraft texture pack for this demo.


The final leg of LRK I worked on before shelving the project. The lighting engine writeup lives in a separate post: 2D Lighting and Shadows. The videos below are the working demos.
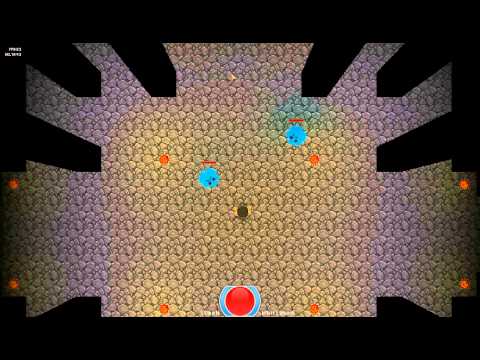 LRK Lighting - Update #1 (Blooper)

Third leg of LRK work - music system plus more adventure-mode progress.
 LRK Music - Update #1
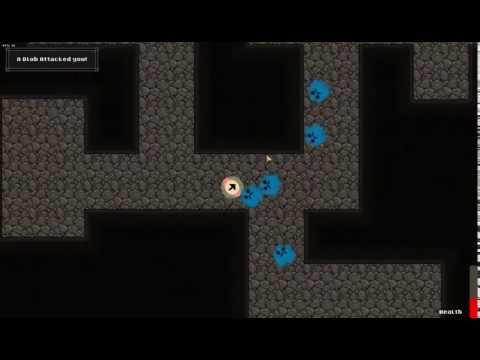
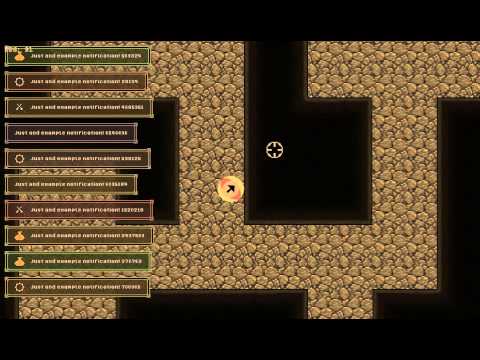
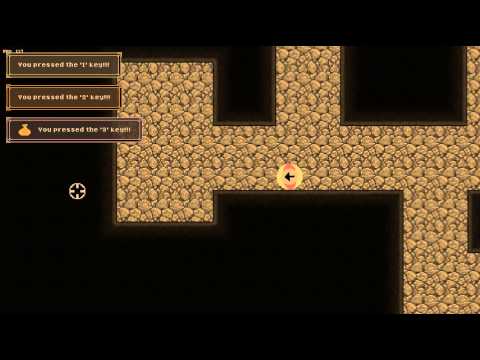
Second leg of LRK work - in-game notification system plus the next round of adventure-mode progress.
 LRK Notifications - Update #1
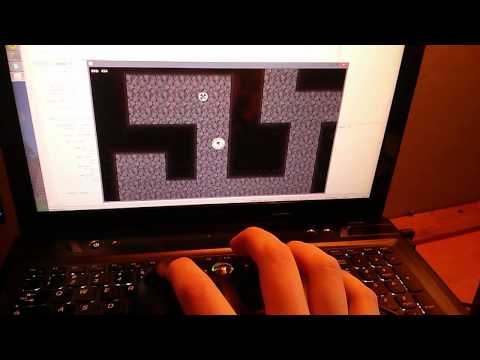


My first leg of work on Lost Relics of Kazar - early adventure-mode demos plus controller input.
 LRK Adventure - Update #1

A sprite editor I started building back when I couldn’t find one that let me see tiles repeated as I edited them.
 zSprite - Update #1