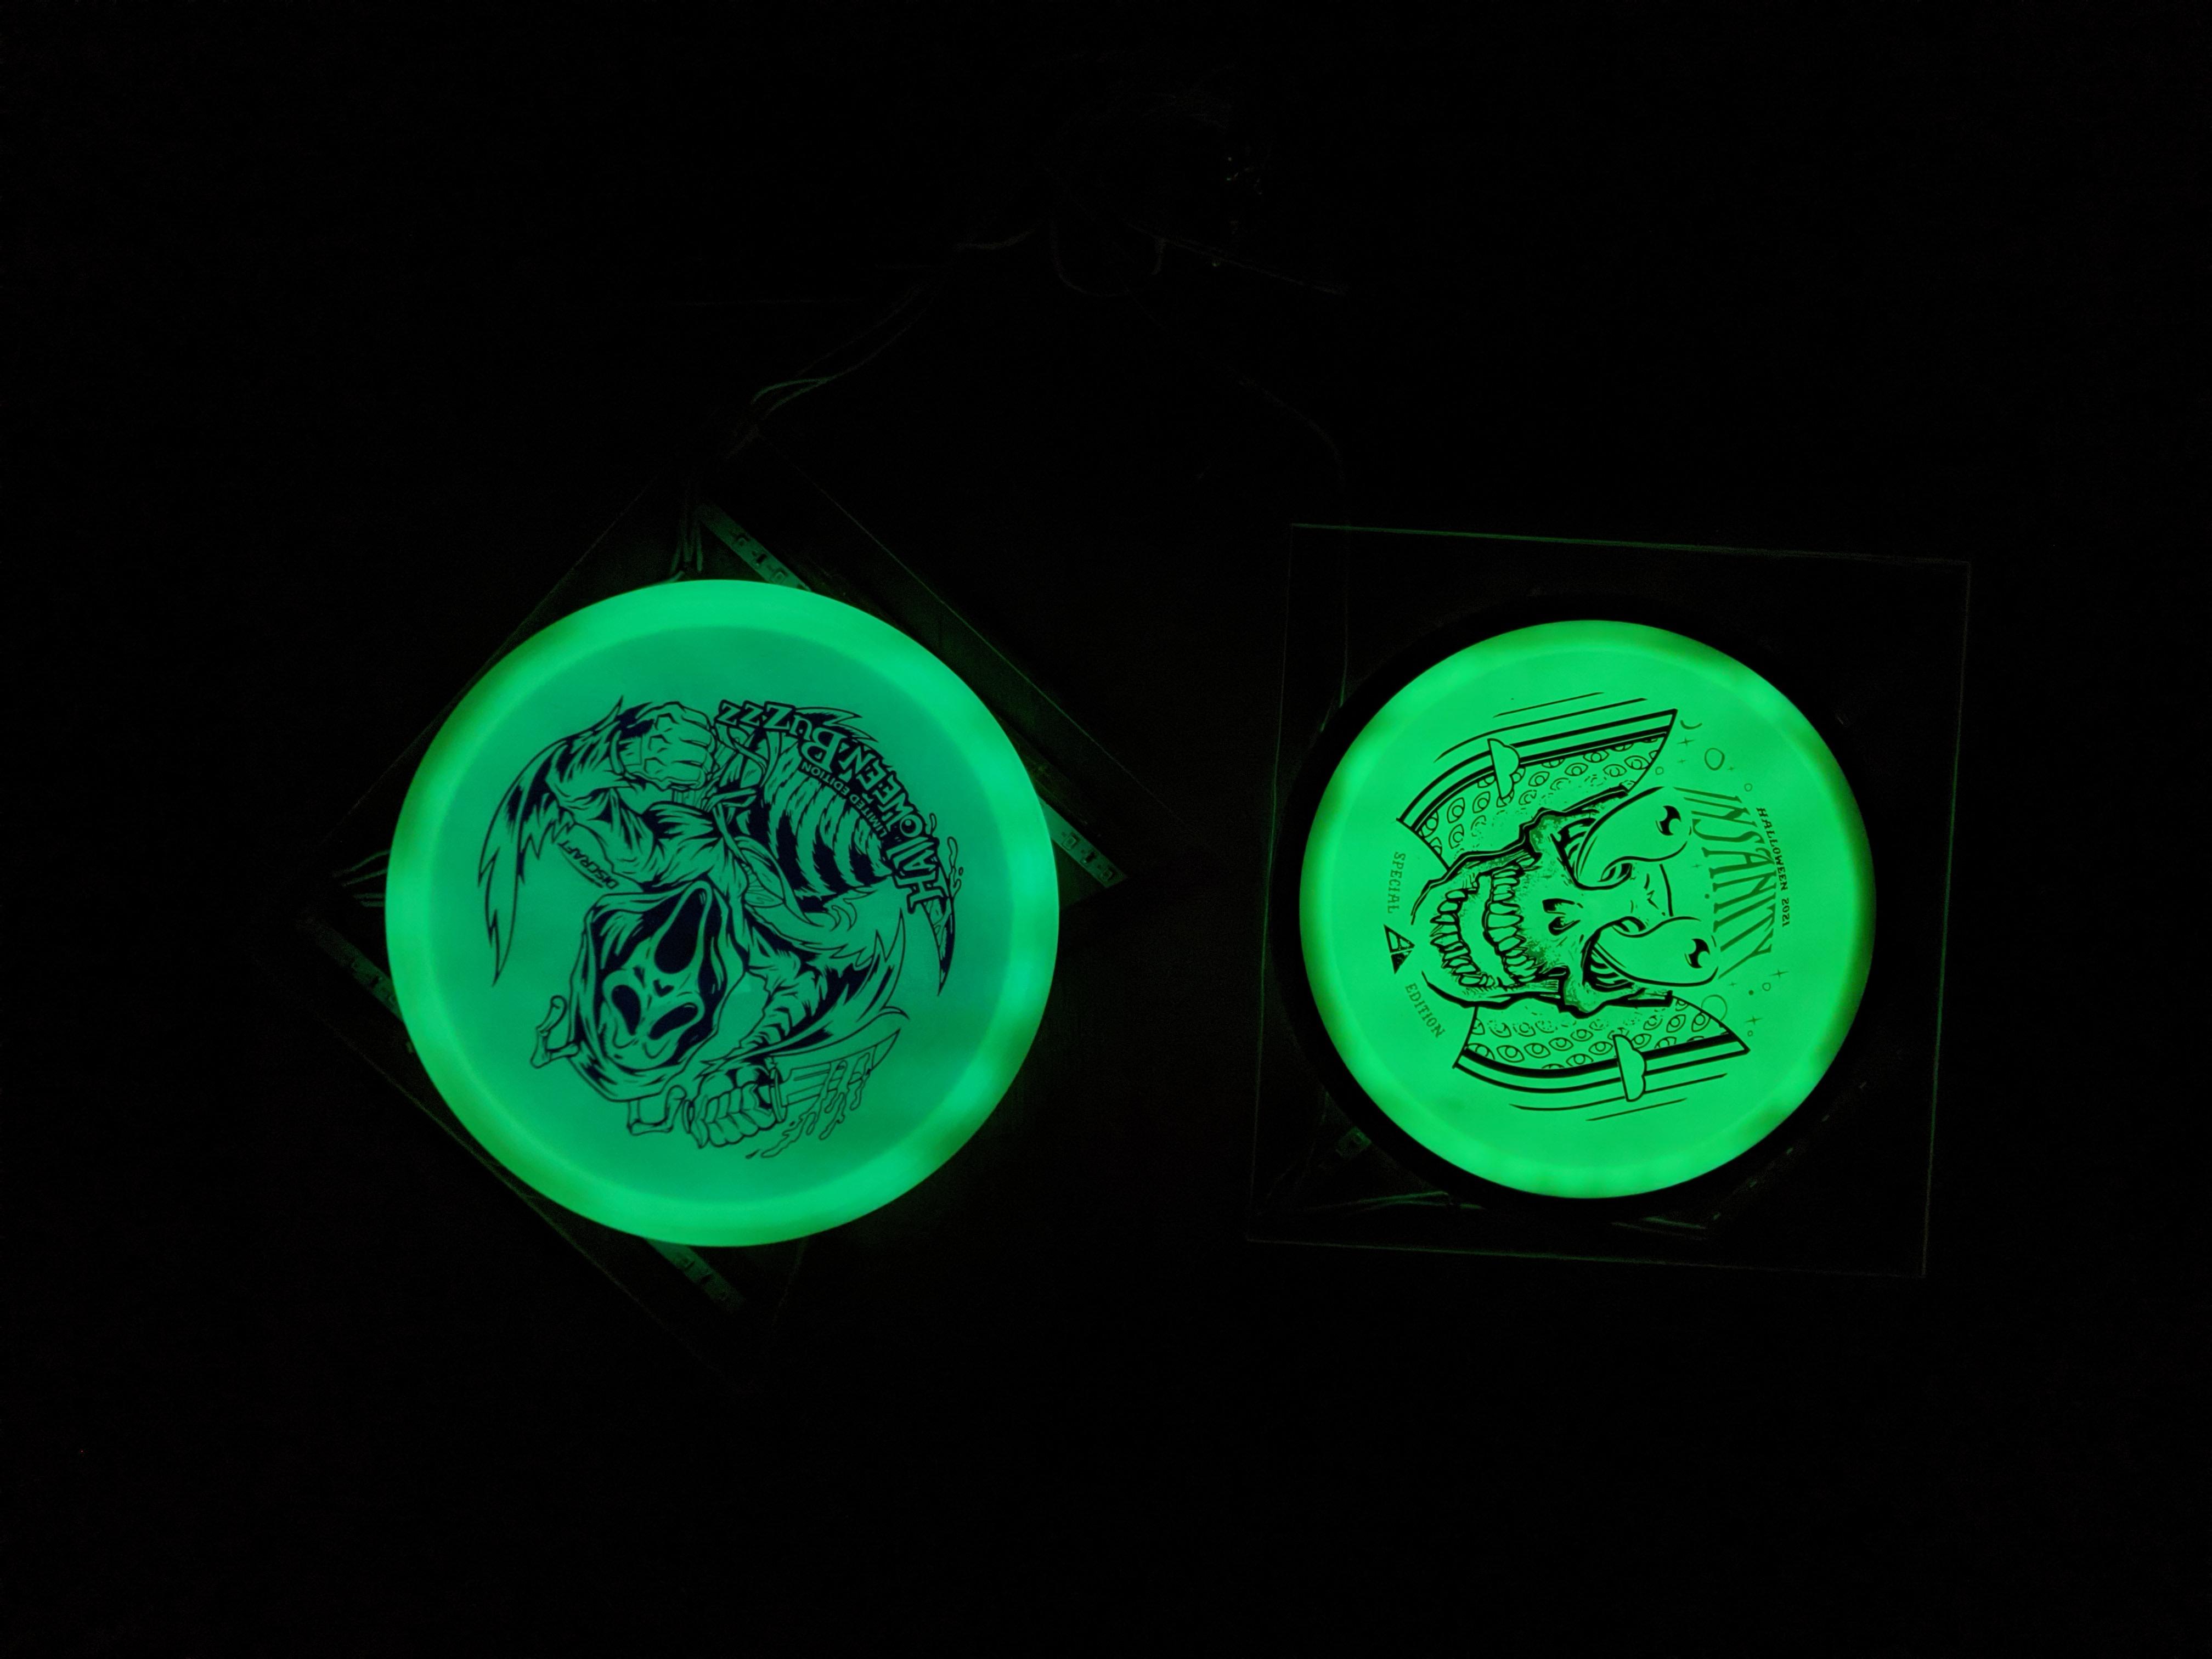
This dye turned out great, nearly perfect - ended up with some bleeding on the white border:( It took 5 layers, including a glue bed, floetrol cells, painting, and spinning.
Here’s a second go at a chameleon dye bed - I pulled it too soon and the colors aren’t as deep as I’d like - but I still love the style. This @mvpdiscsports Terra is starting to compete with my trusty firebird…
Replacing my used-to-be-trusty-but-now-turns-over @eric_mccabe Truth with a new LucidX chameleon dye. I’ve done a dye with this cowboybebop stencil in the past - but I sold it (and regretted it). Well, I loved it so much, I needed one for myself…
This was a second iteration of my chameleon dye - happy with it, but no where near as slick as the first. This @mvpdiscsports Pyro might just replace my trust EMAC Truth this season… And with the fire theme, I threw a Charmeleon, Calsifer, and This is fine Dog on there for fun 🔥
Another new @streamlinediscs disc to cycle into my bag next season. This time a trusty Stabilizer, with my very first chameleon dye and a gorillaz stencil dye.
These are the 4 discs I dyed for the 1st place winners in the St. Albans Museum Sap Tap! It’s a 1 round, amateur, charity doubles tournament, hosted at Hard’Ack. Come play with me this Saturday, 9/24 @ 2pm!
Despite the bleeding… I’m still super happy with this 3-disc series. I reused three one color dye beds: cyan, magenta, and yellow. With packing tape I tried to create all secondary colors with triangles, circles, and squares. And then I soon dyed the back. :)
Man, I’ve wanted to pretty up the bottom of my discs since the get-go! I’m digging this worm dip and turntable 🤩 These are a few discs I bag that I decided to spruce up. I’m so happy with the results.
I finally invested the $5 in some school project foam boards and used some leftover light strips to make a photo box! Now I can stop awkwardly taking 30 photos around the house trying to get the right lighting!
Fighting bubbles recently… I actually think it’s the domey-ness of these super-glidey Latitude64 discs. I’ve not had this issue with flat-tops. Regardless - I’m digging the results of these ones :) Especially that cute bear 🧸
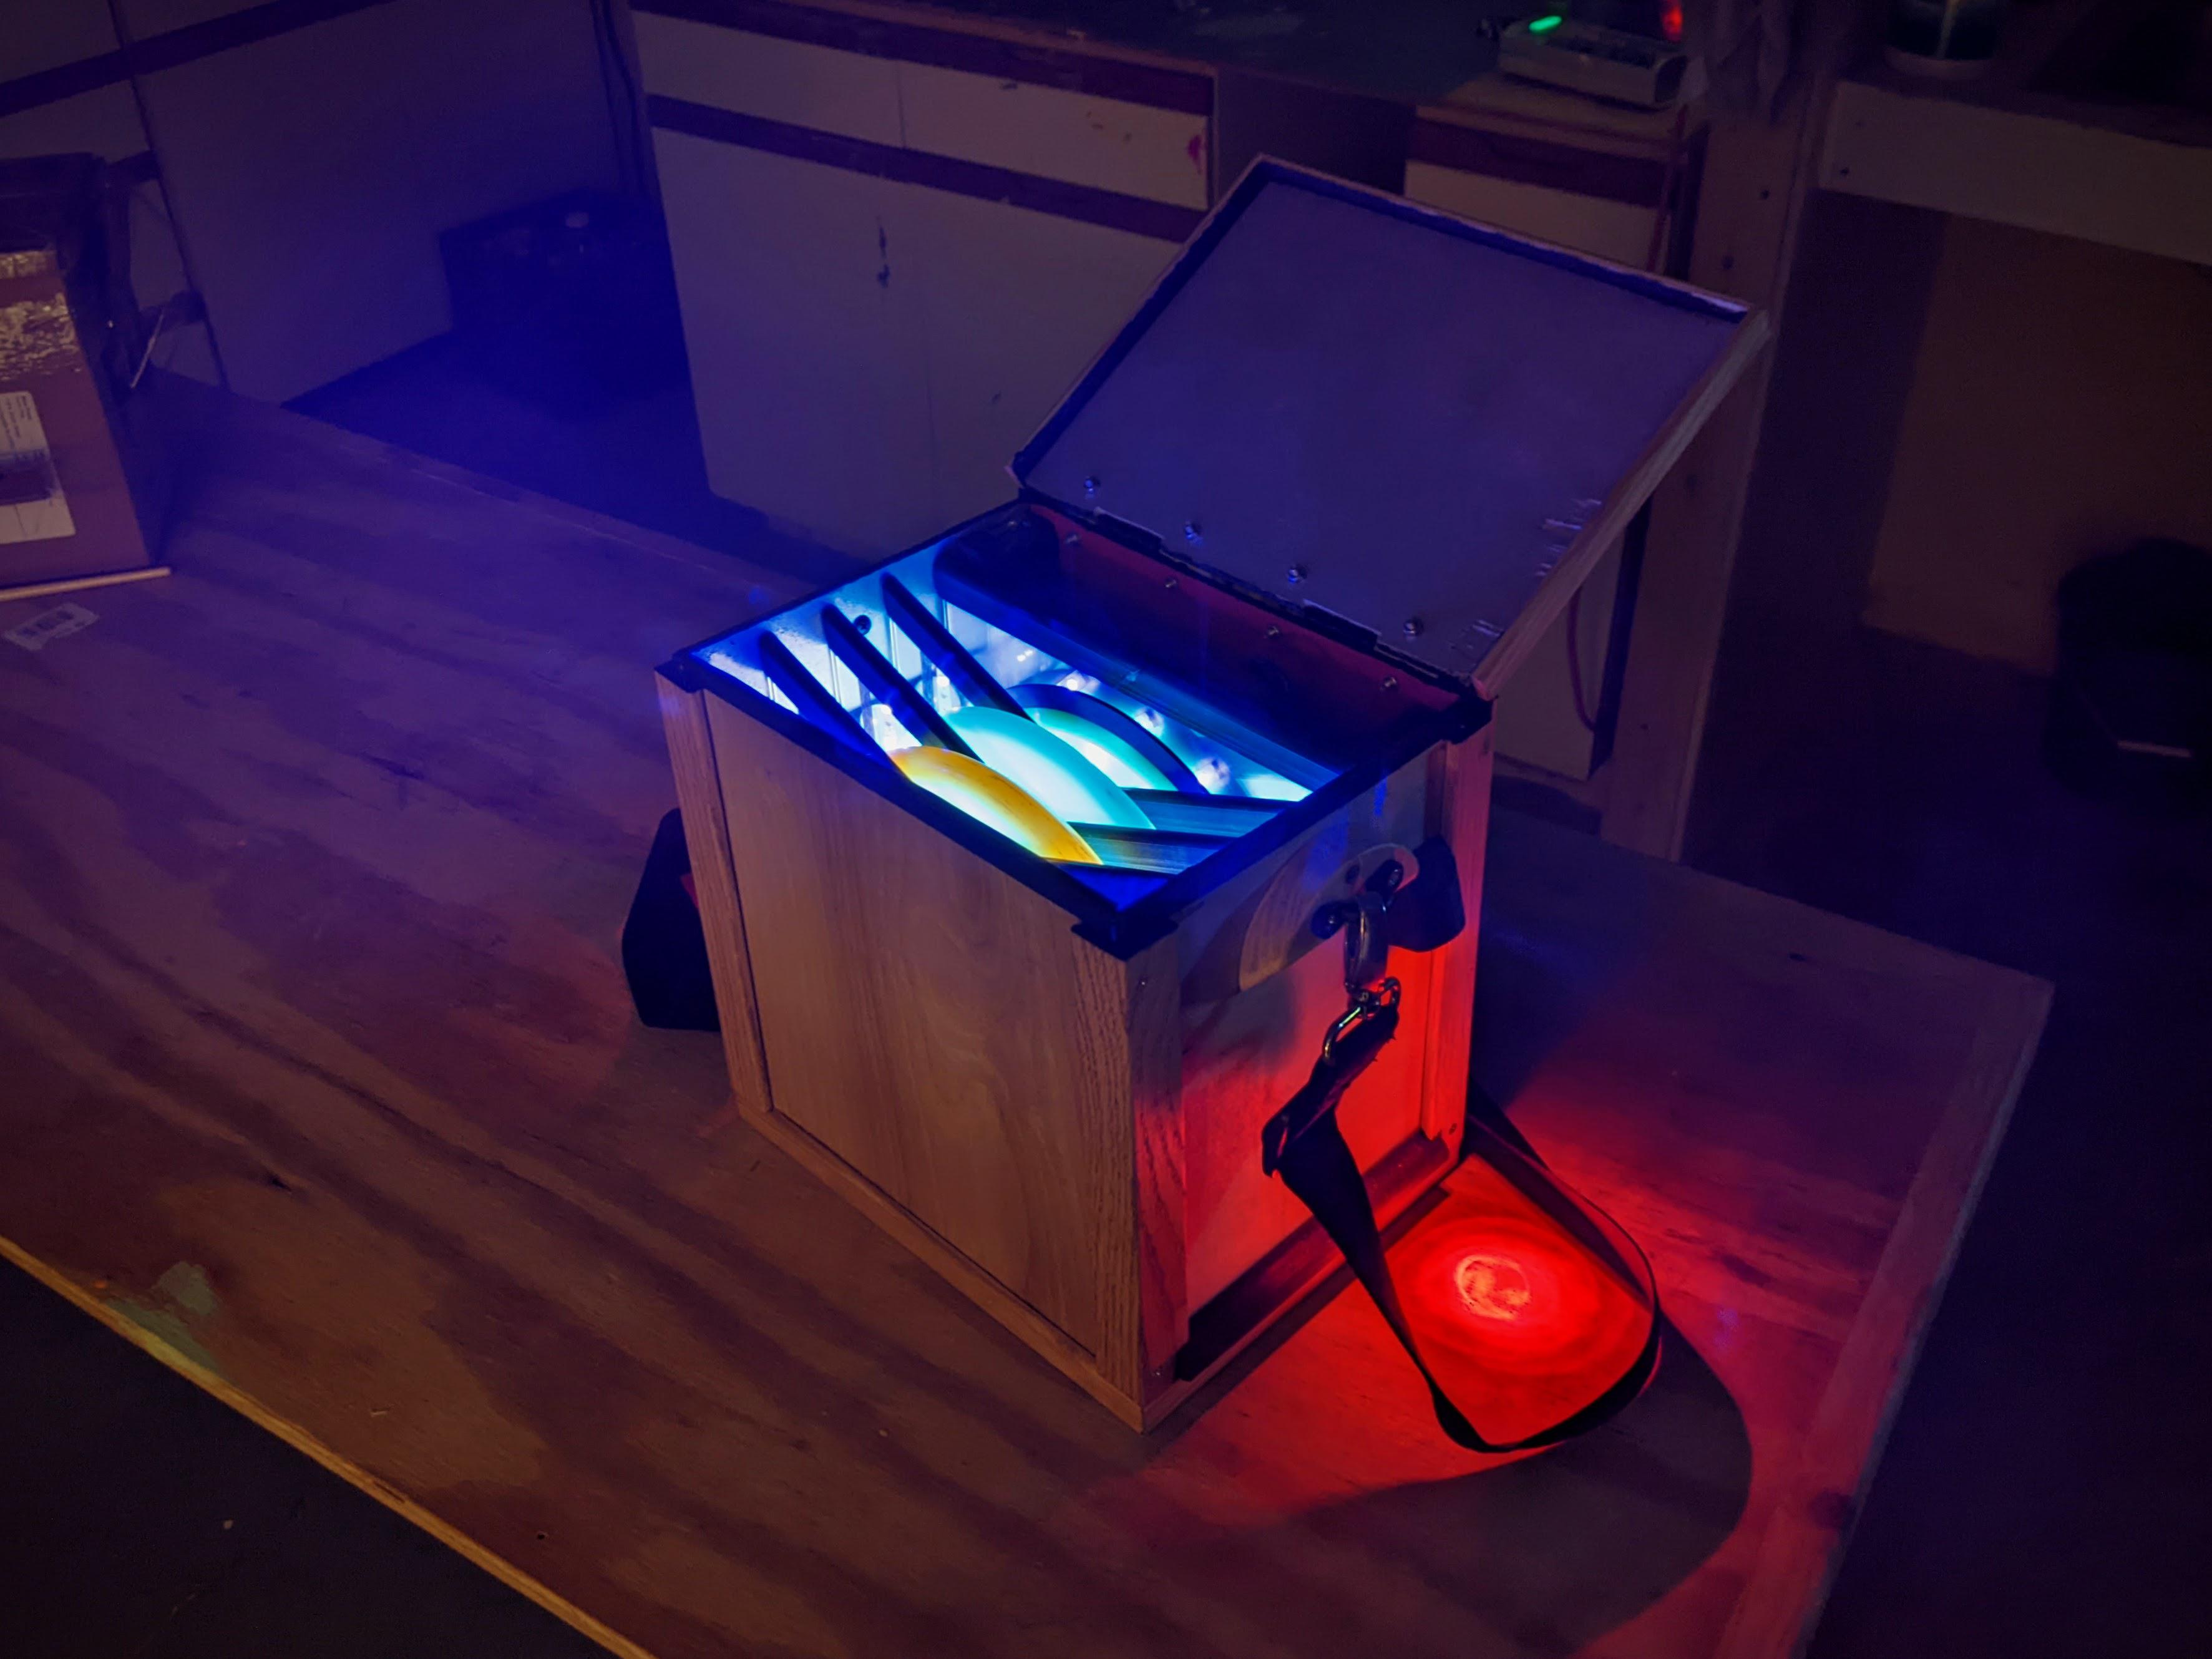
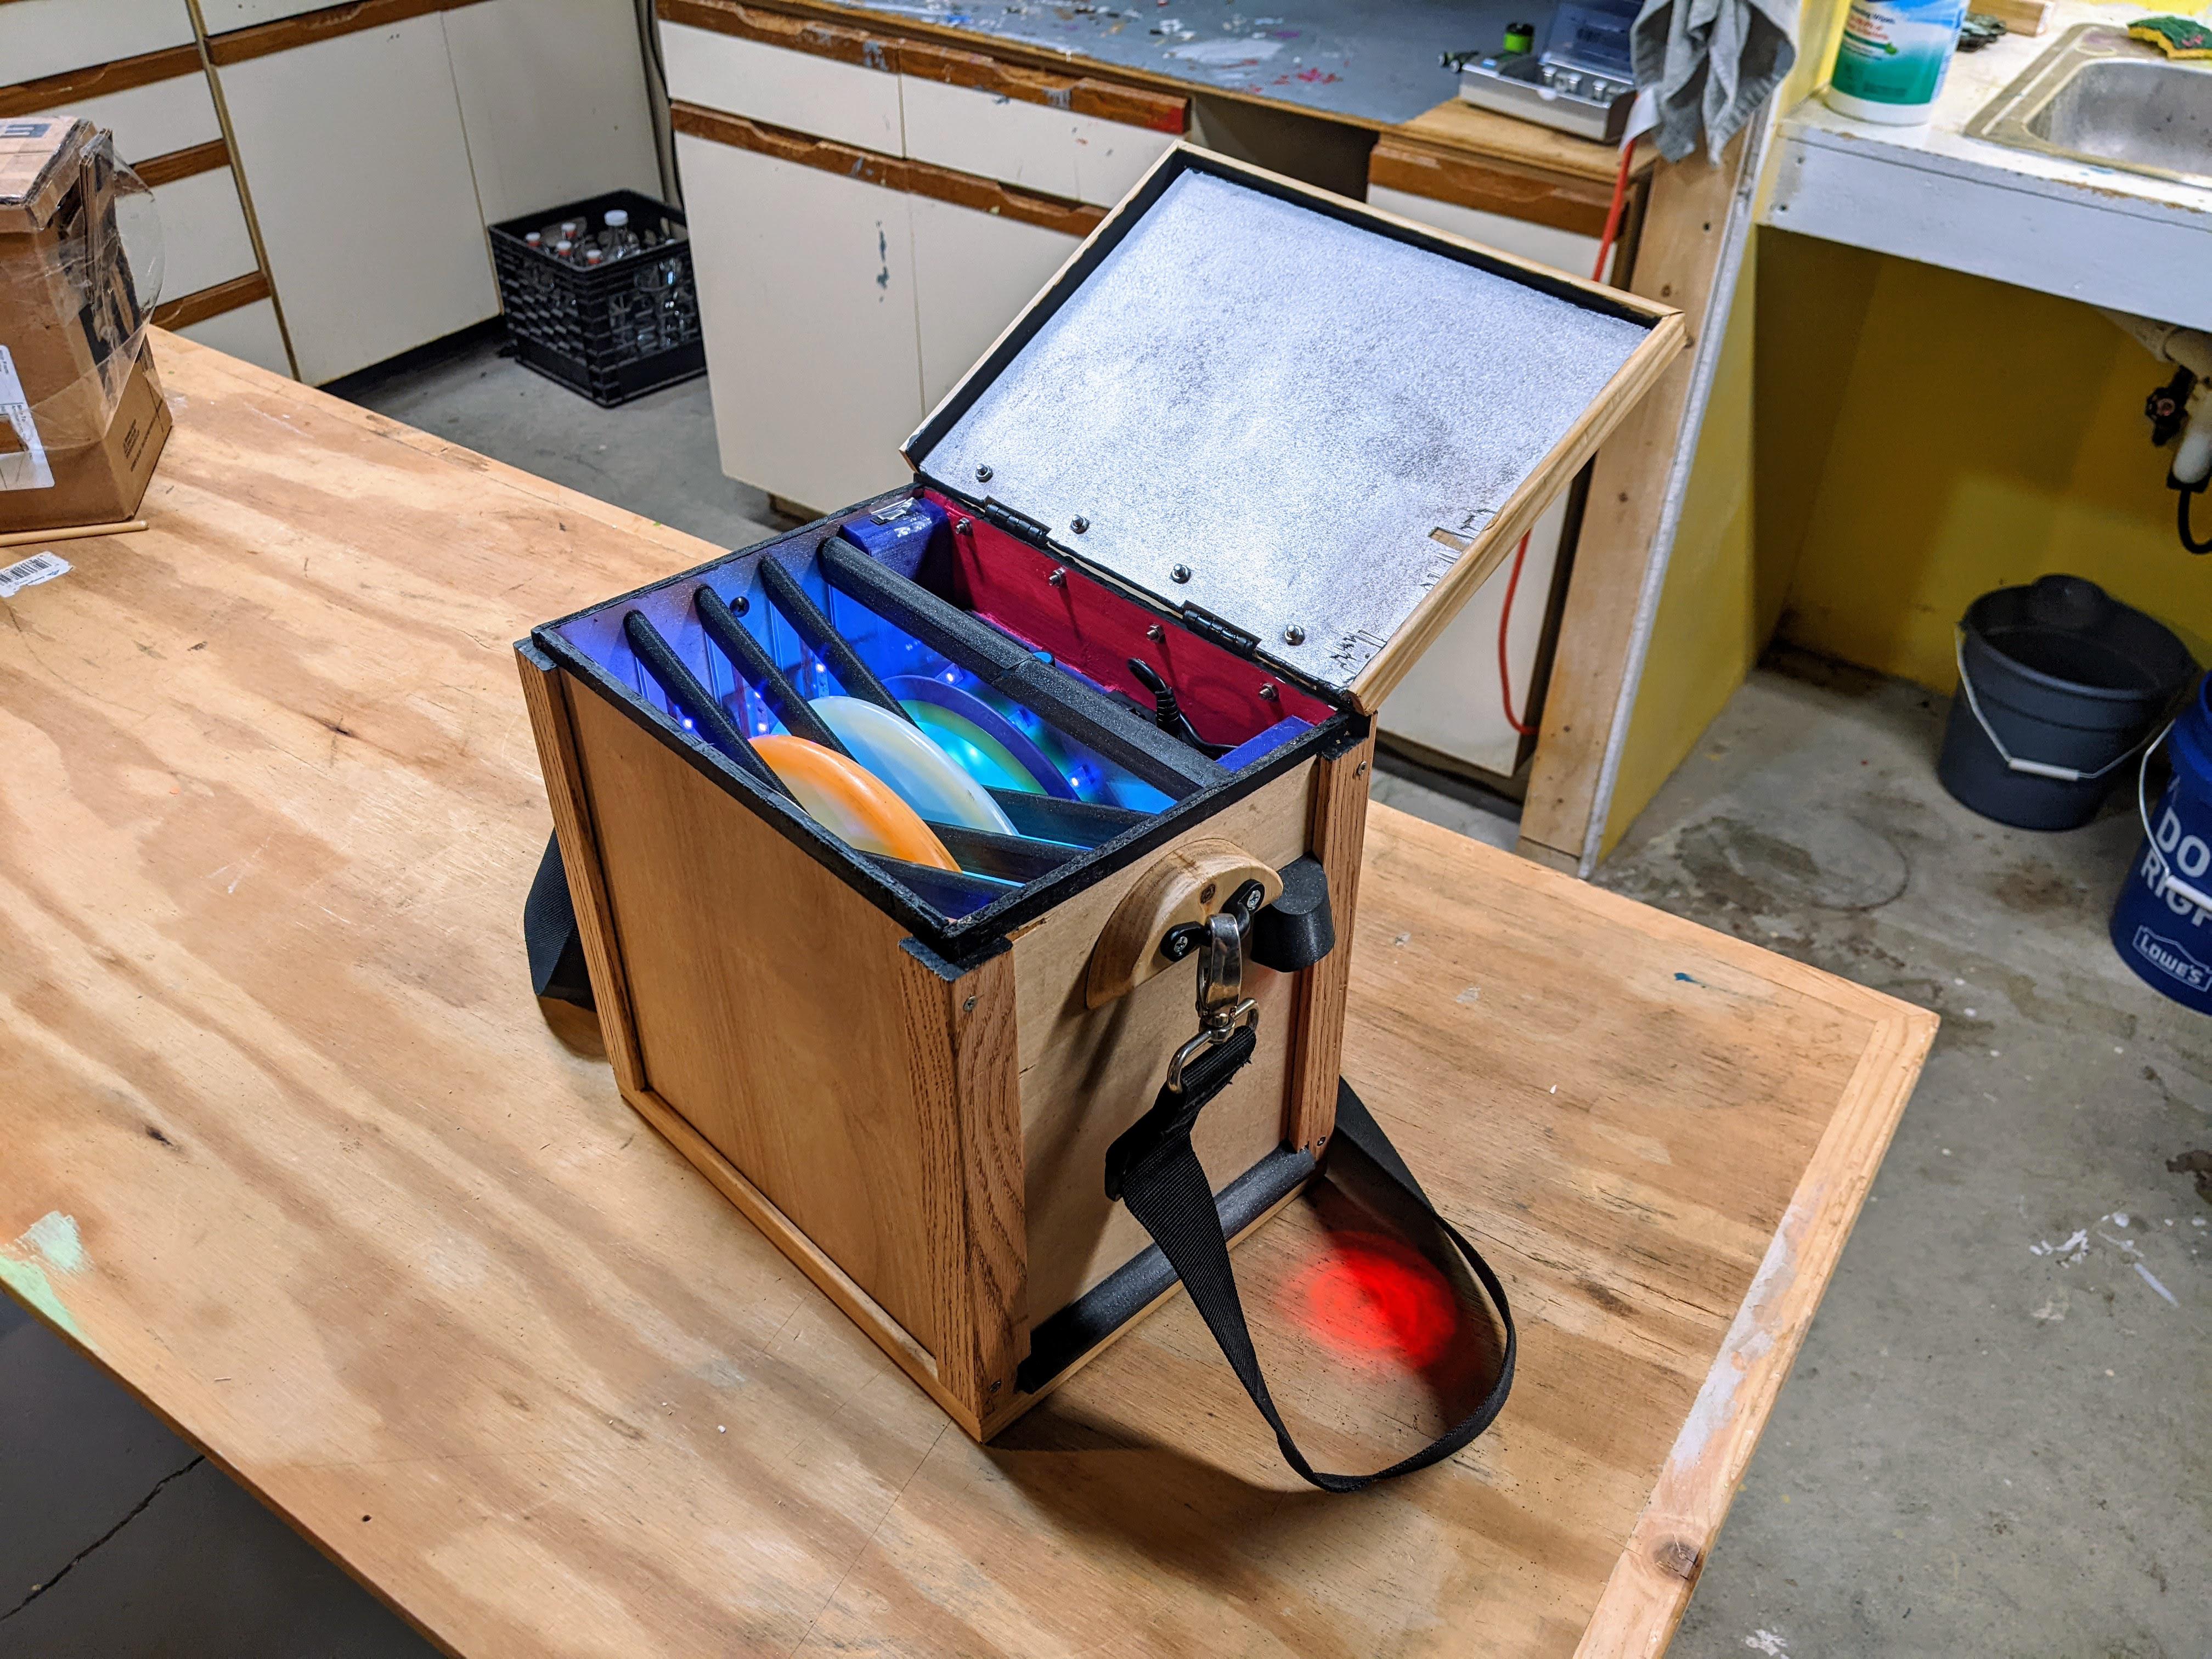
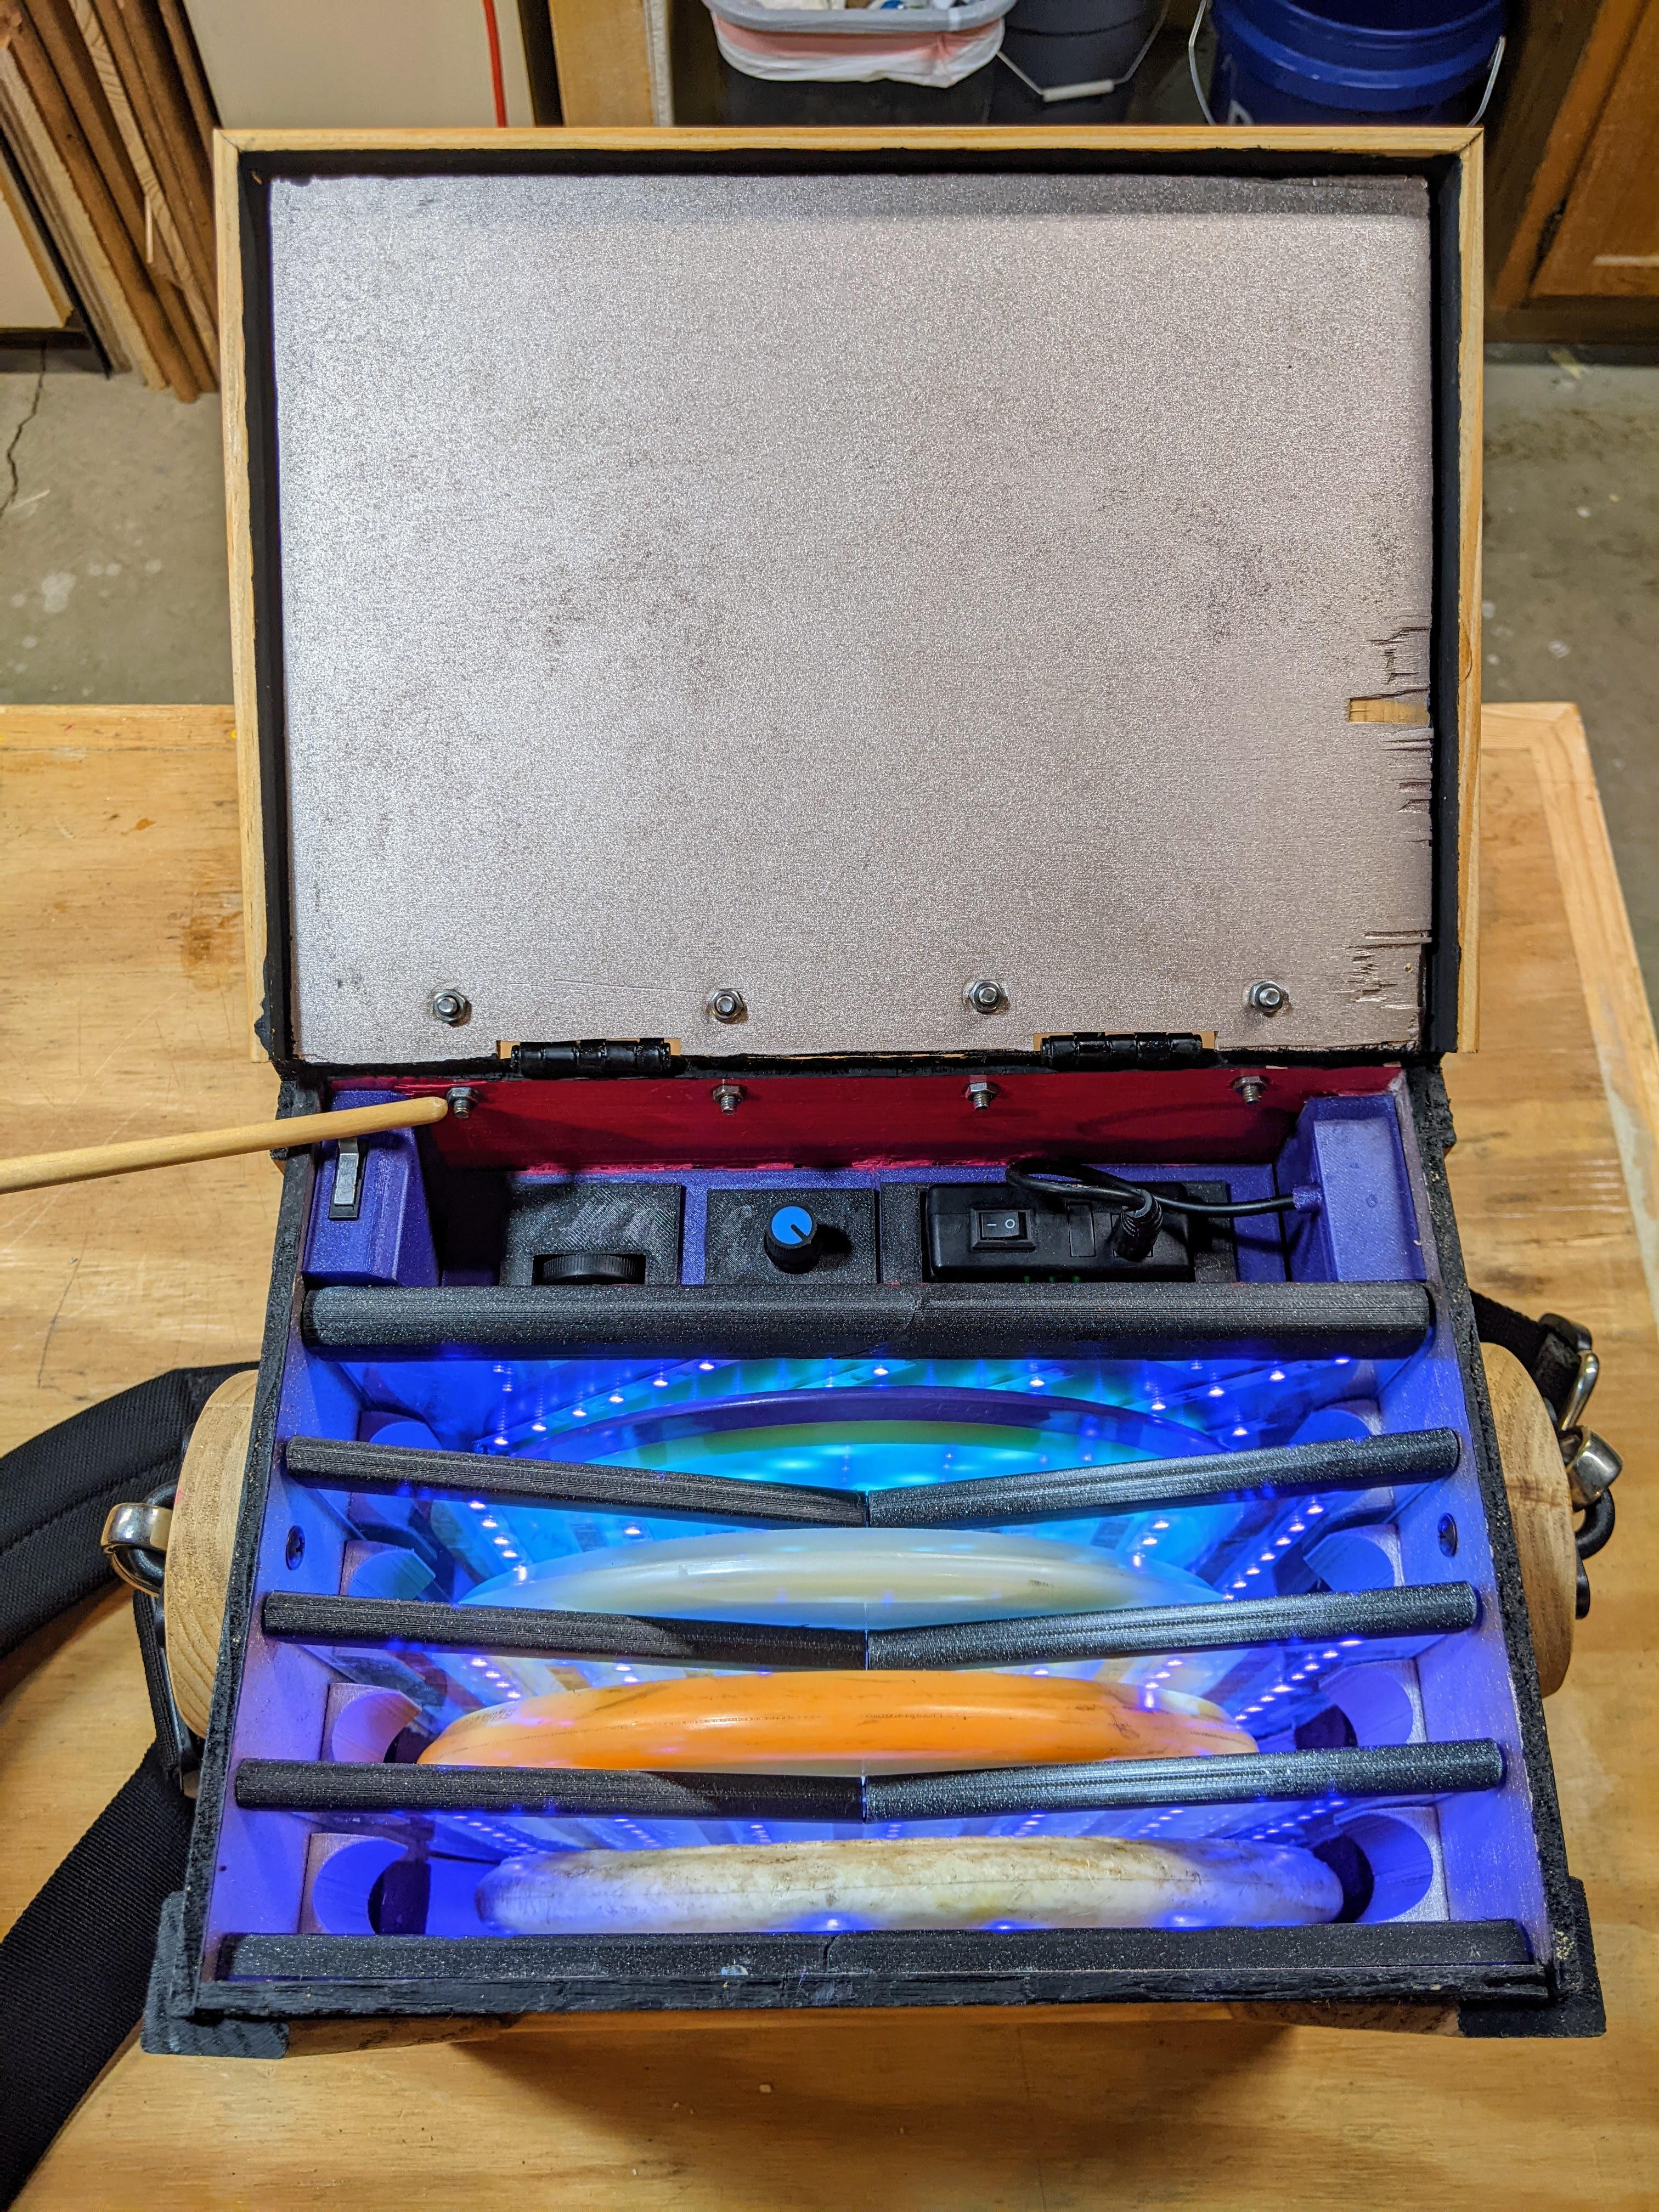
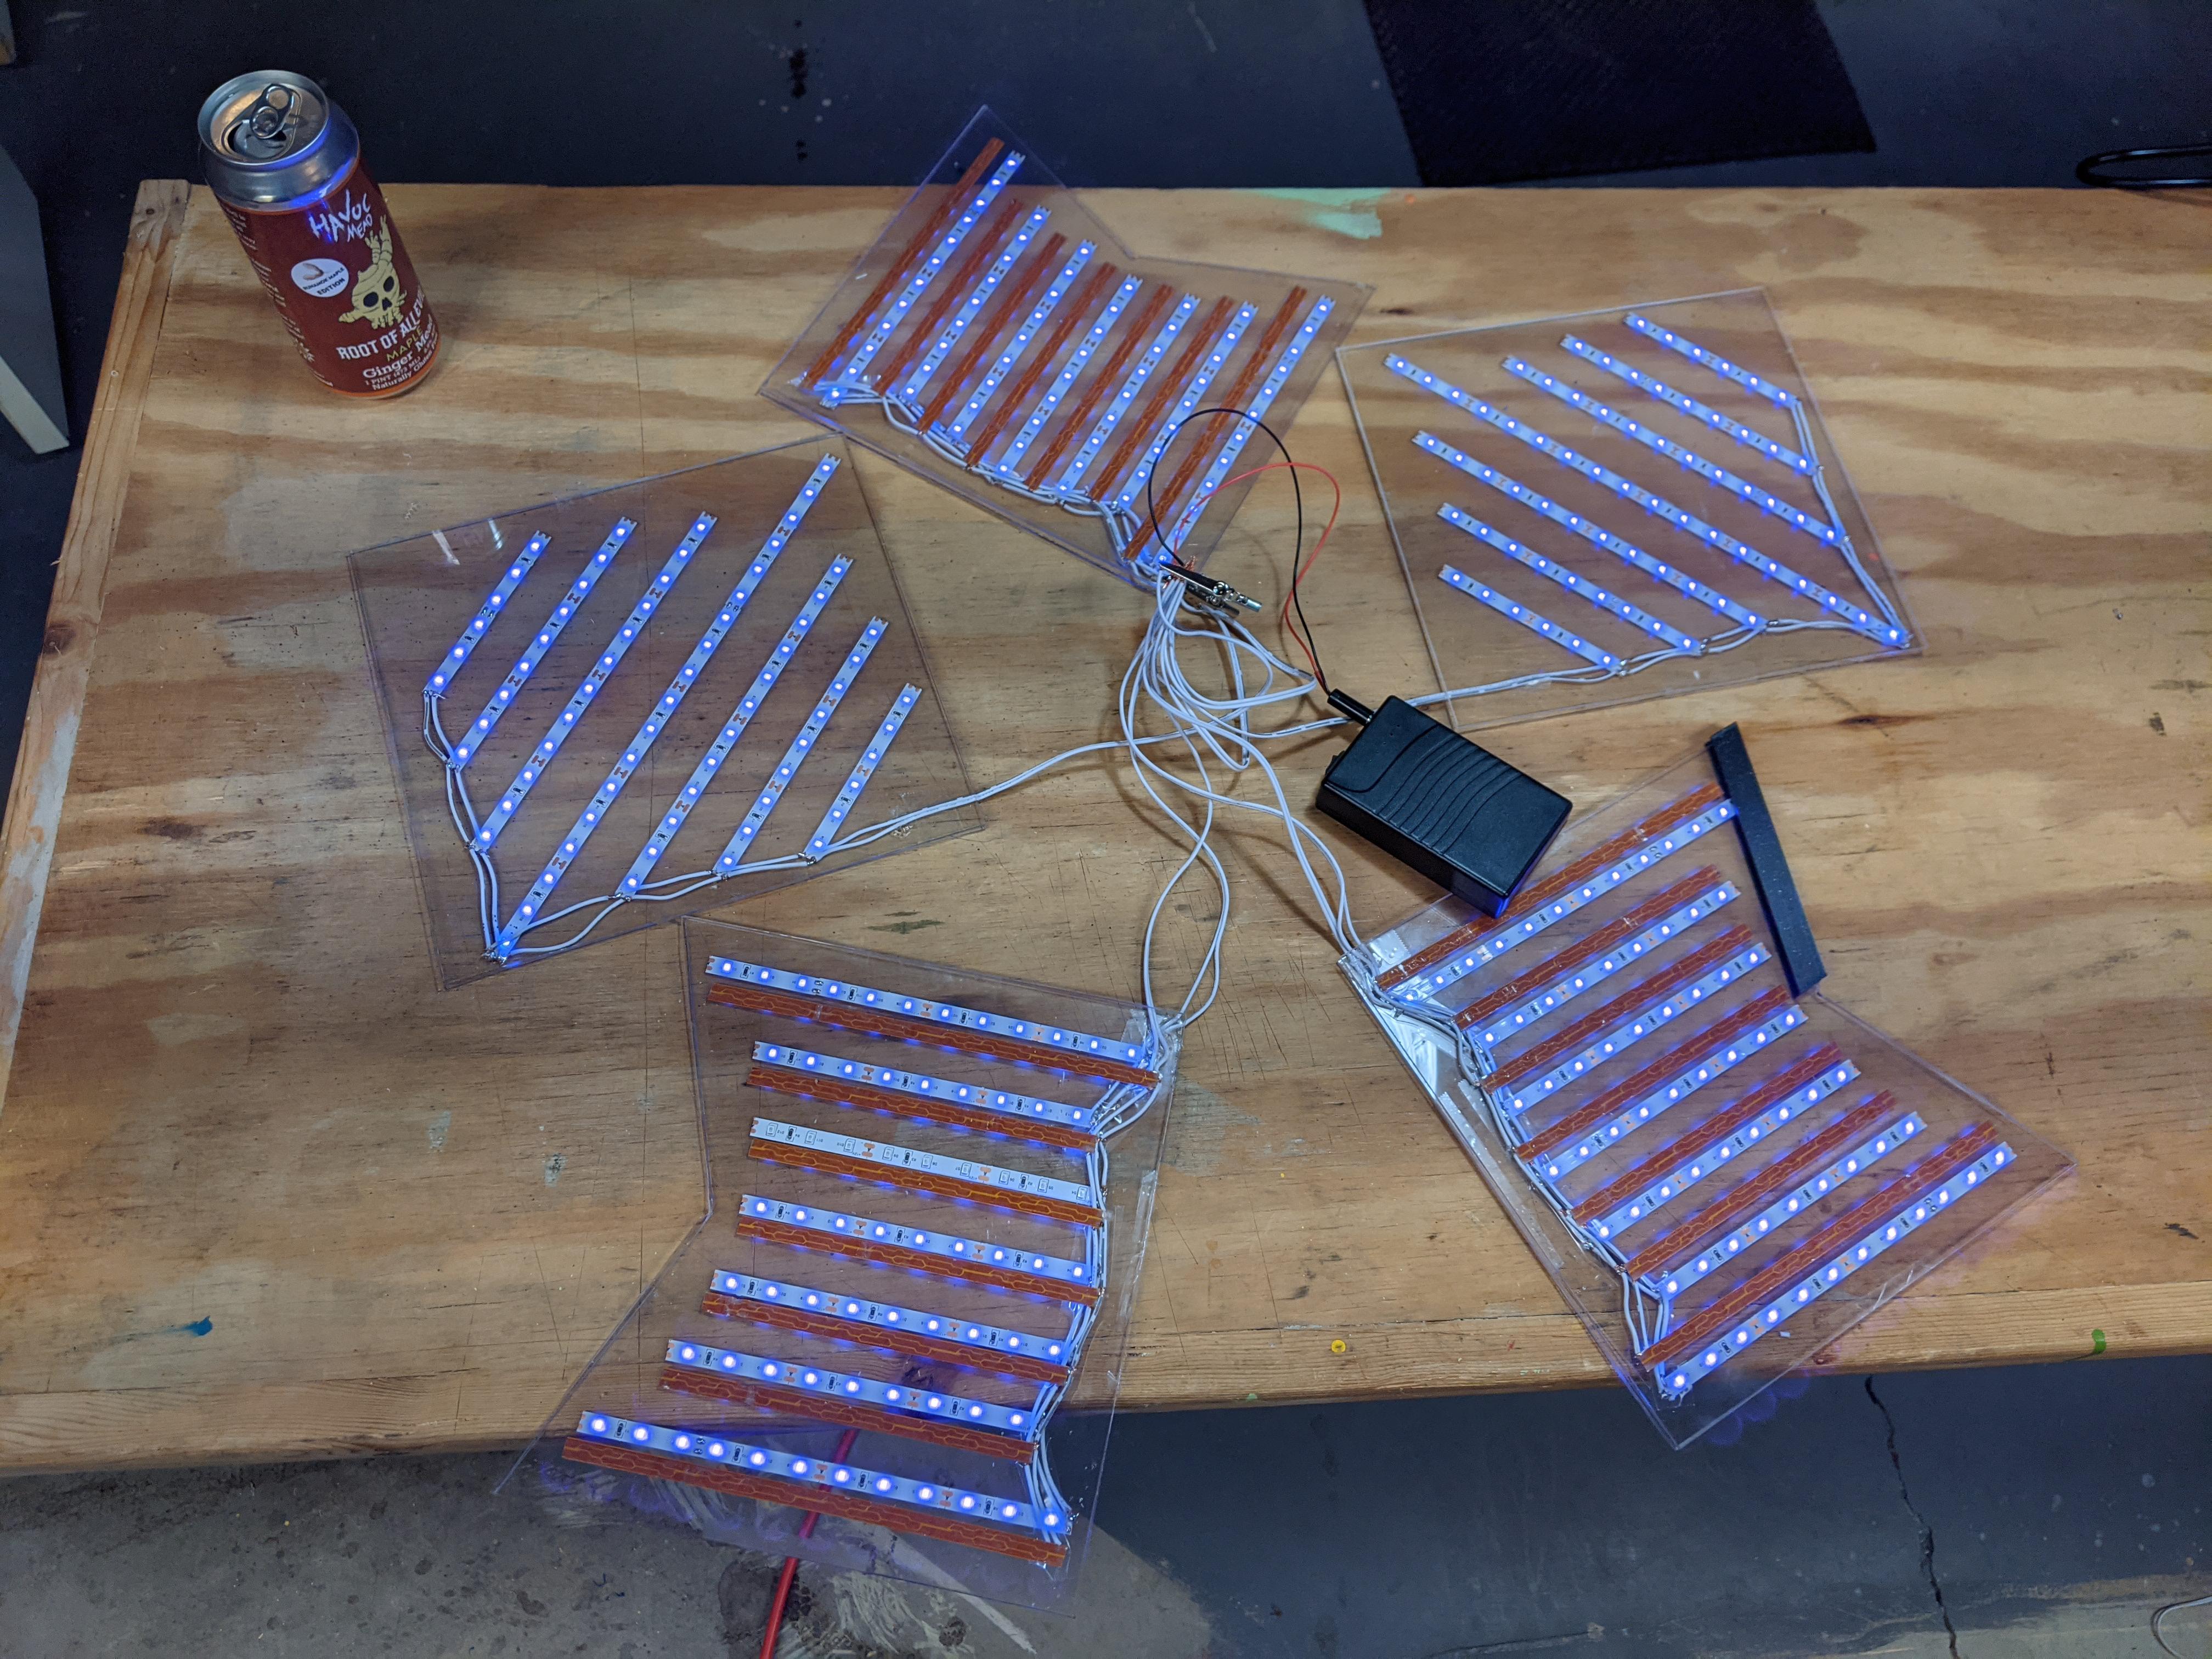
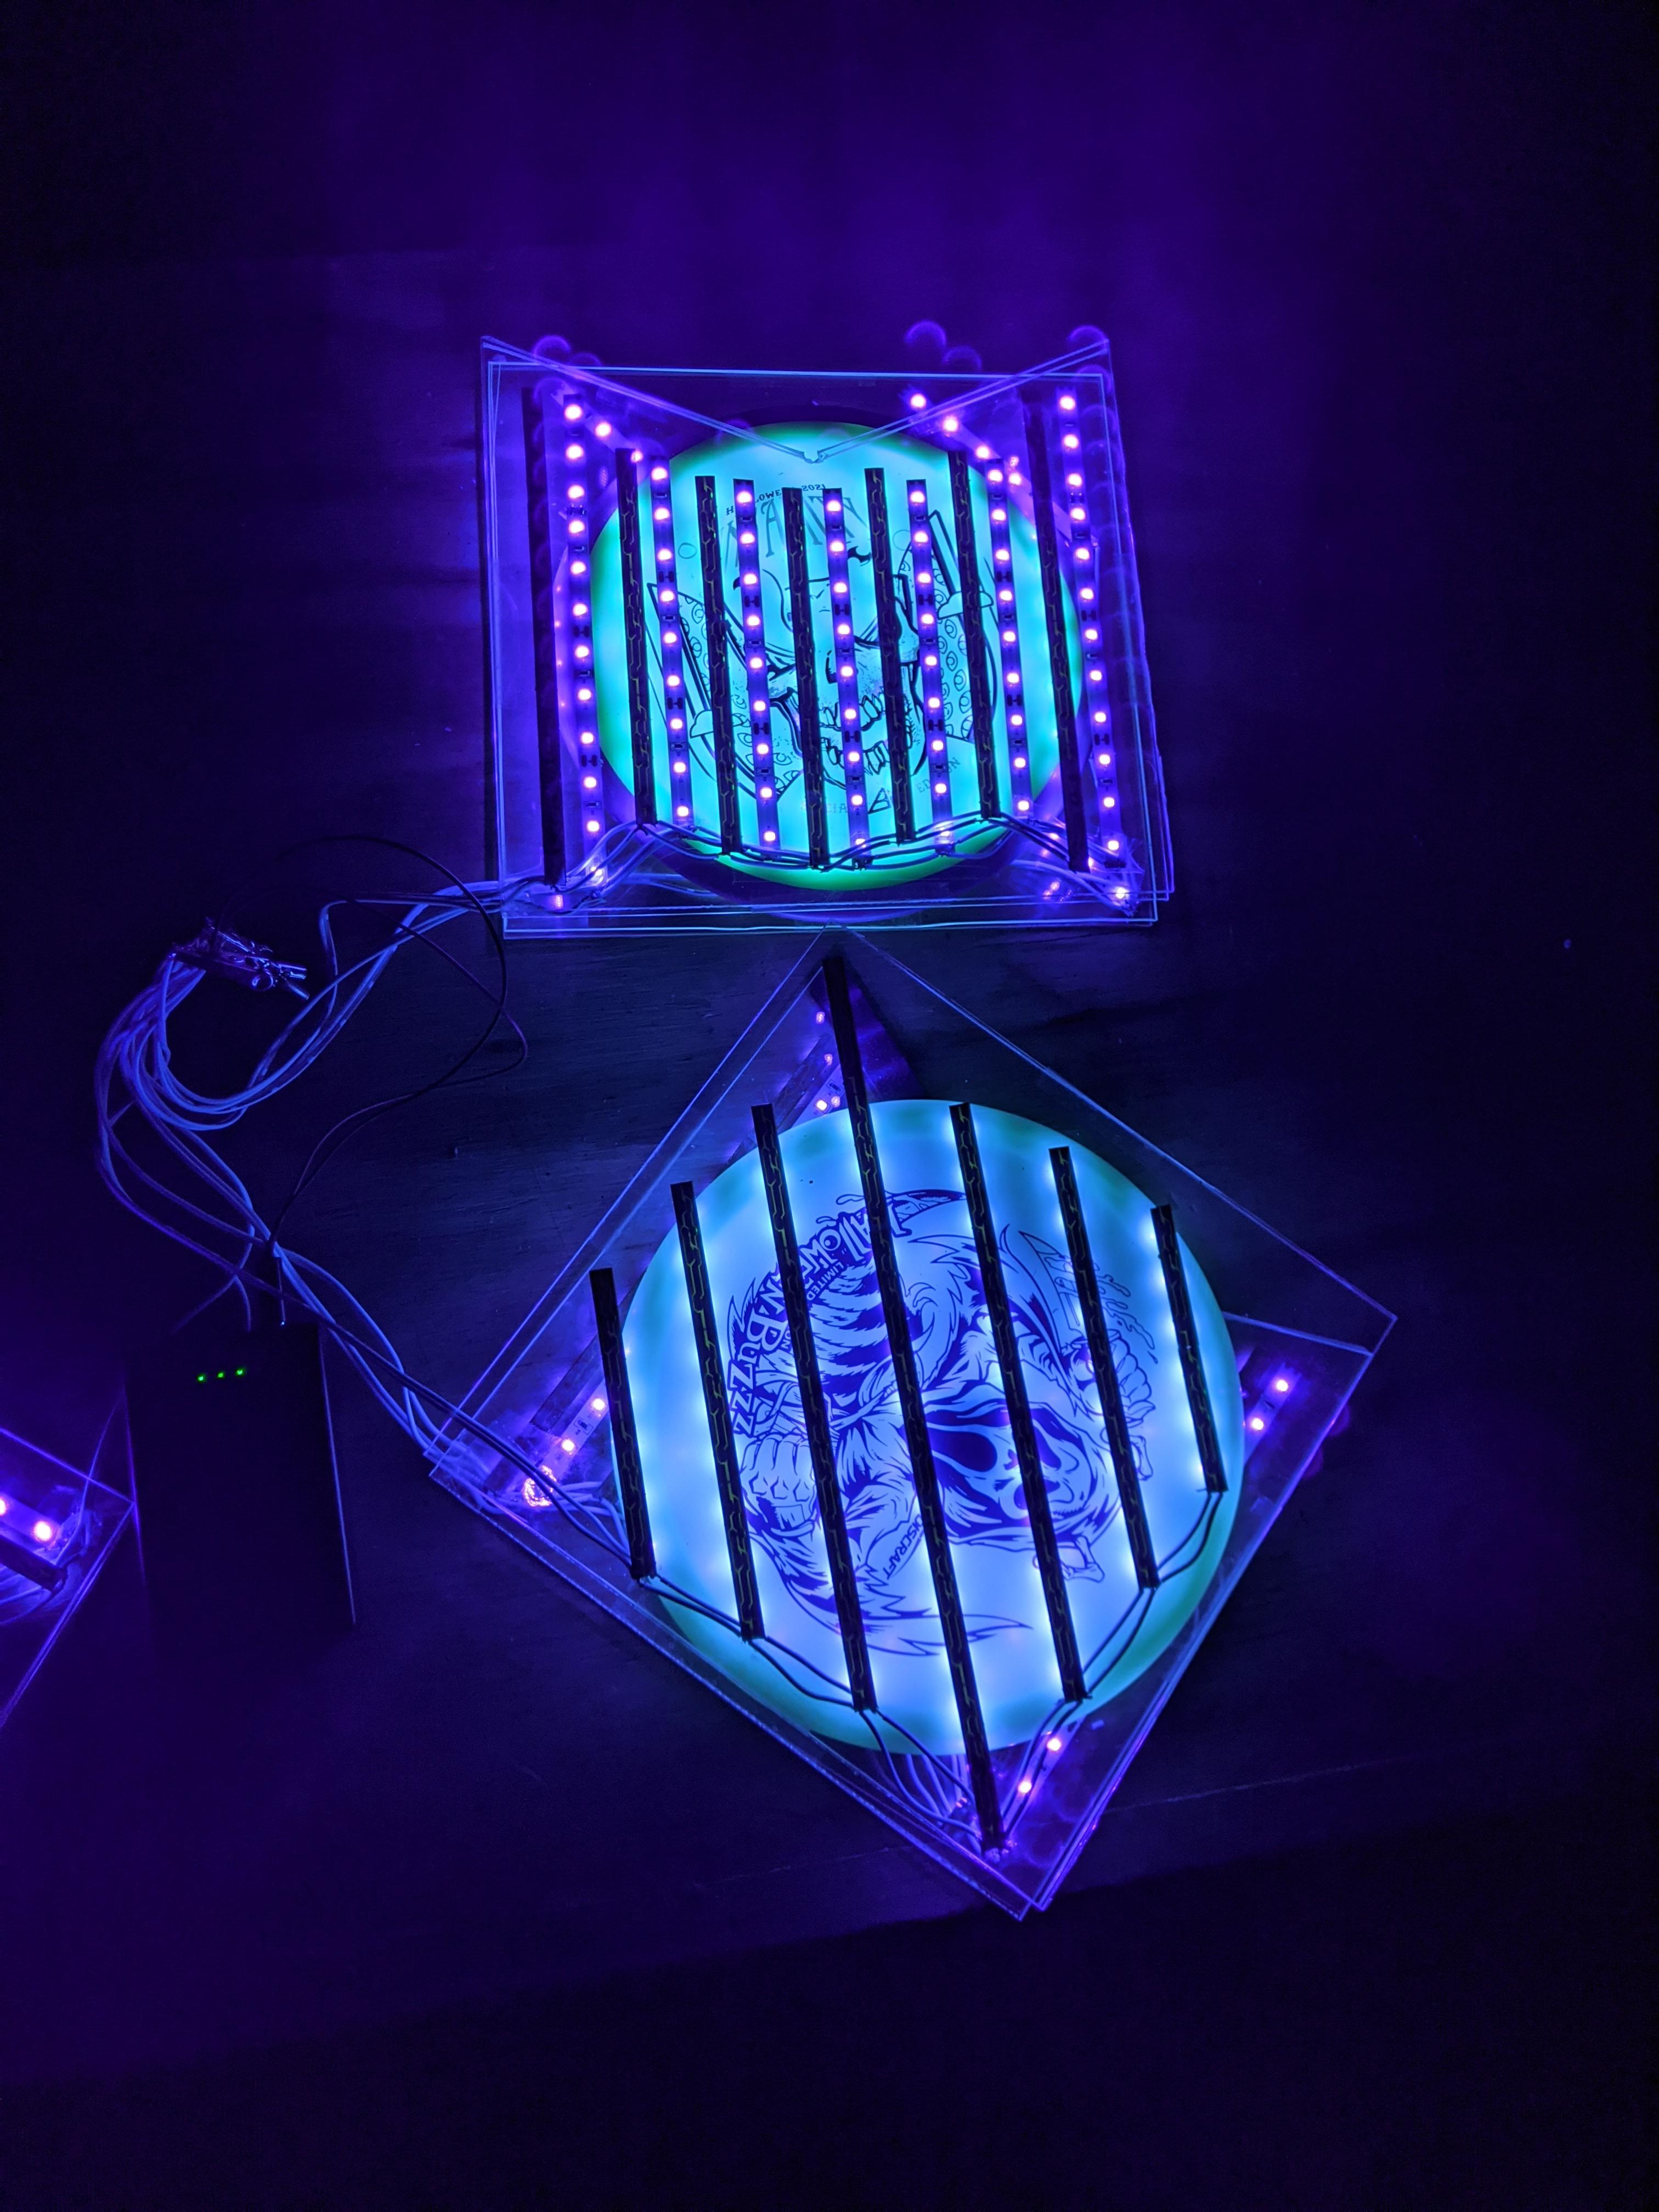
I know it’s not a dyed disc, but it holds ‘em! I made this box to charge up my discs while I play glow rounds this winter. The UV lights turn off when the lid is open so it doesn’t blind you and the red LEDs are dimmable. It’s powered by a rechargable battery and lasts for 5 hours. Can’t wait to try it out for real this week! 🌕🥏⛳🌌
A portable, rechargeable UV-charging box for glow discs - with built-in red night-vision lights and a shoulder strap. Originally posted to /r/discgolf.
The box in all its glory! The UV lights are normally off when the lid is open (to stop you from blinding yourself). The switch is taped down for this photo.
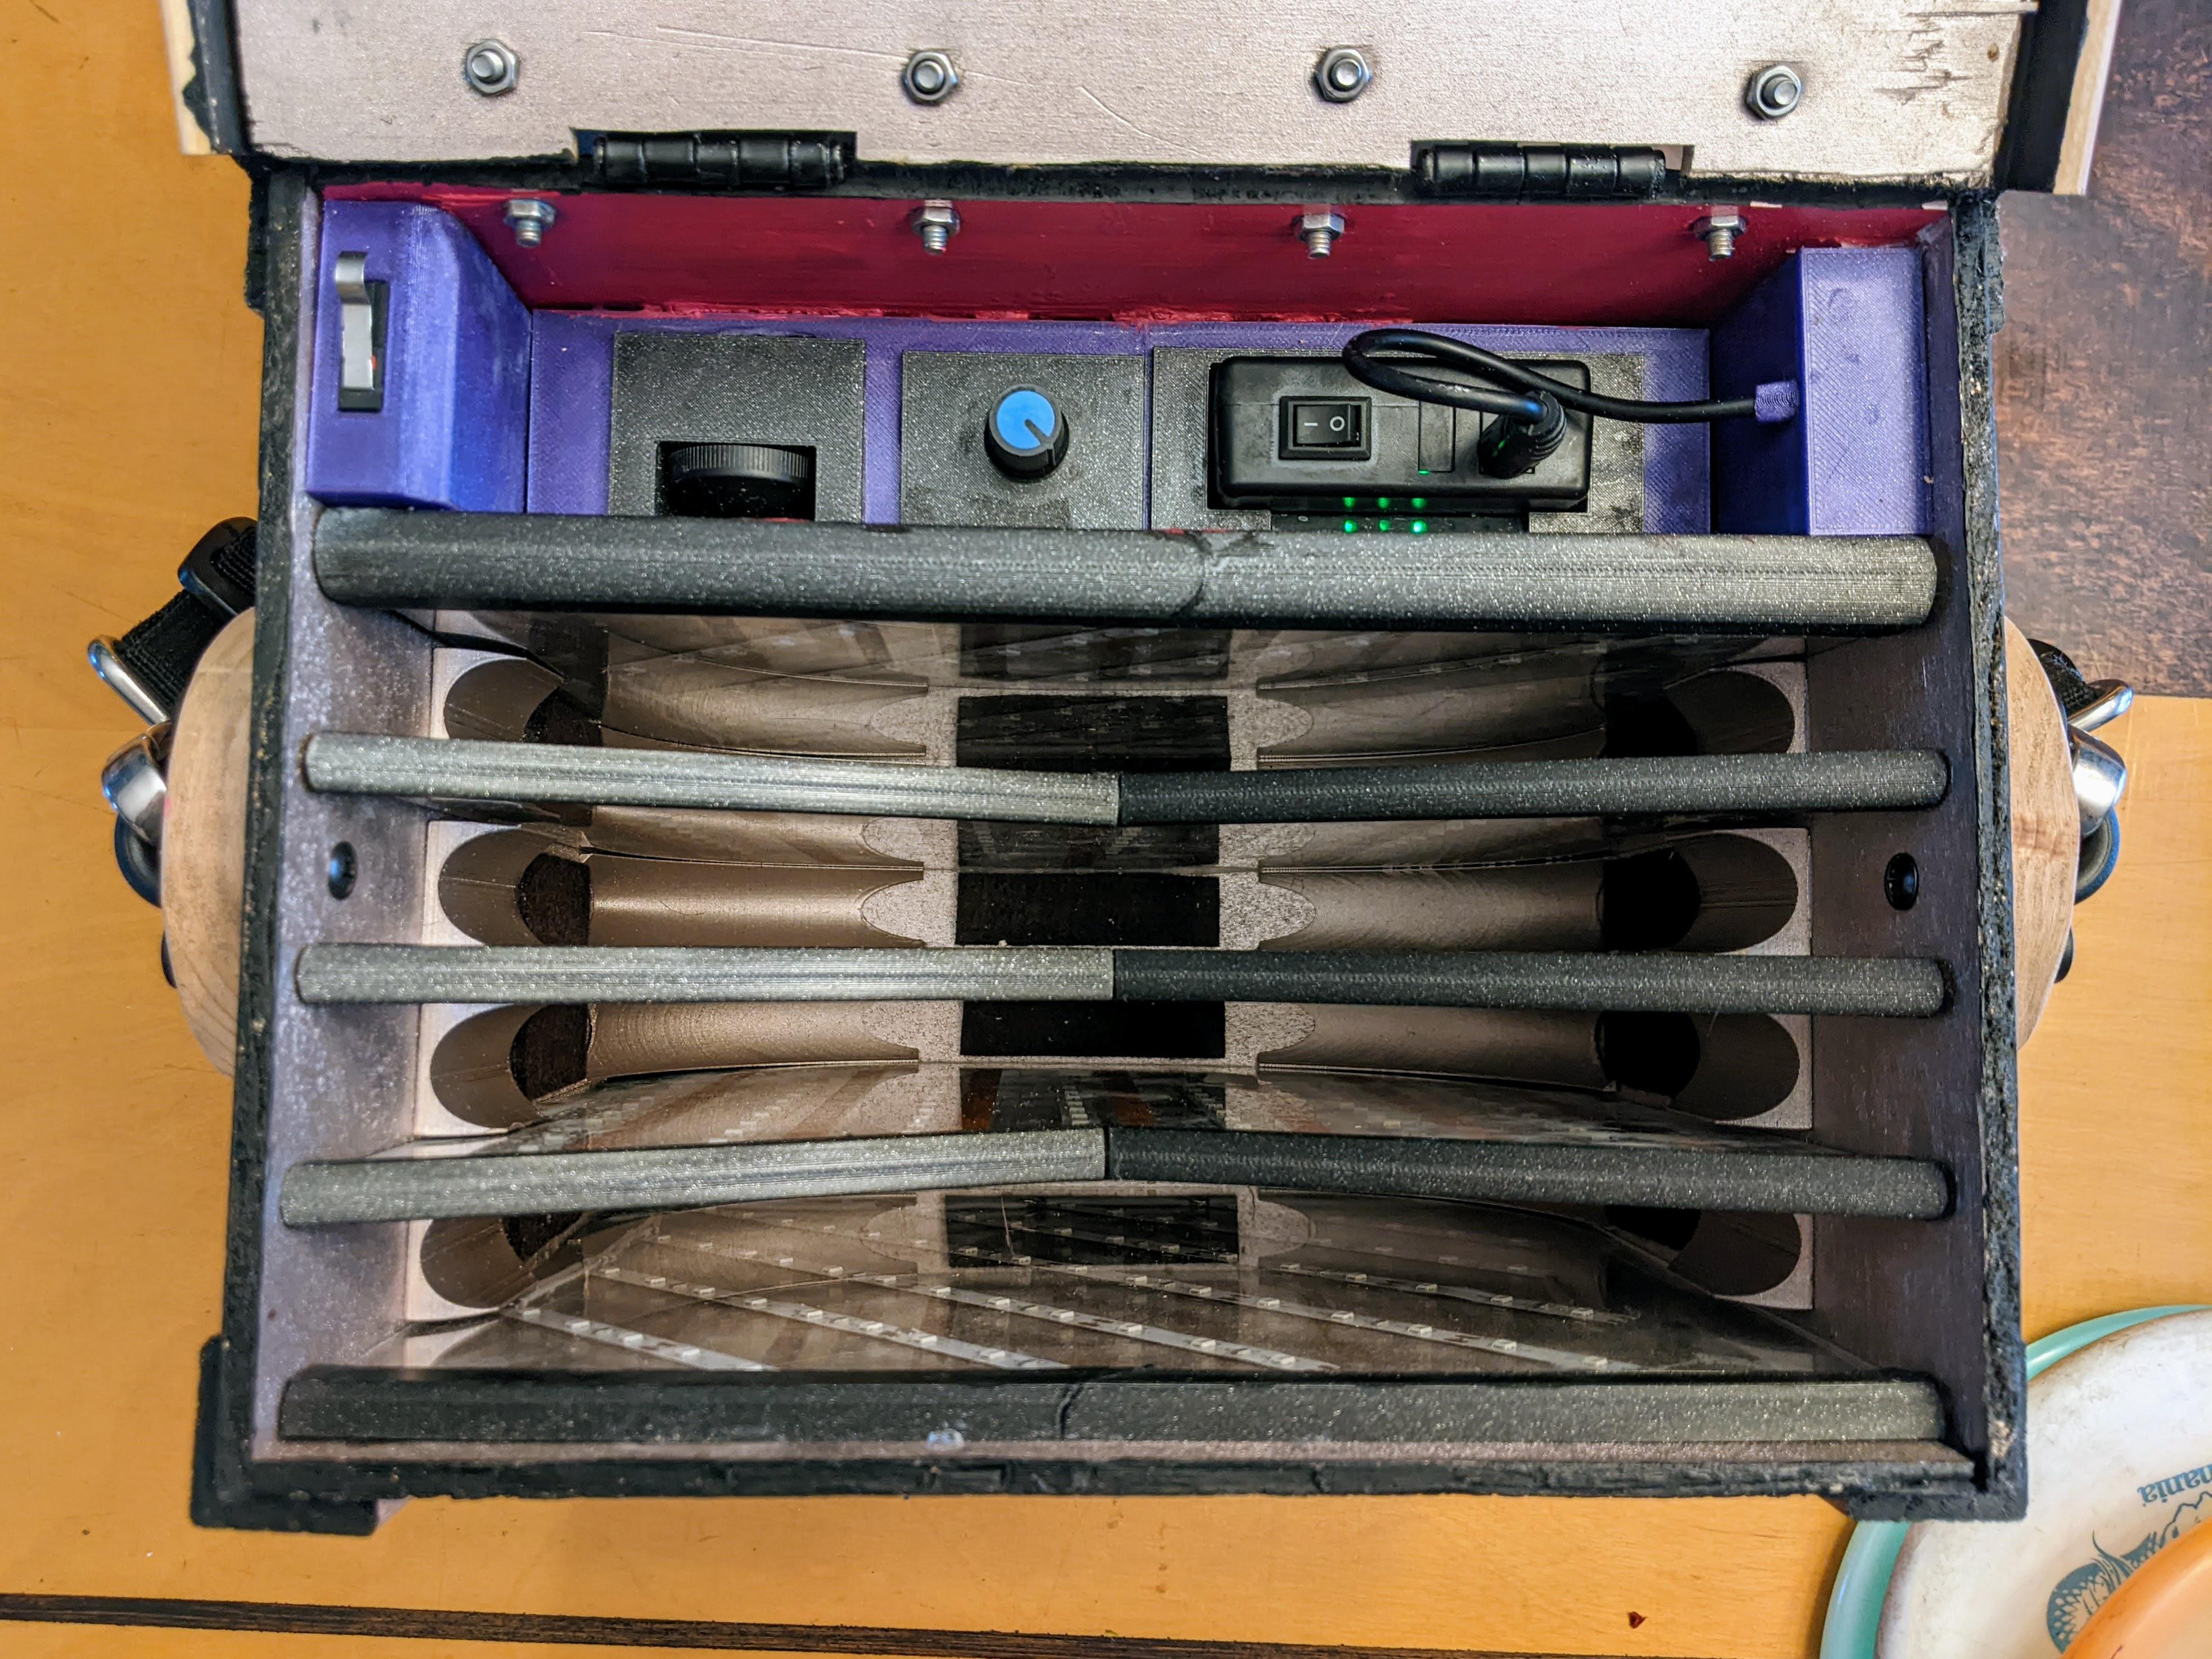
There are UV LED strips between each disc. I spray painted the inside silver to help reflect the UV light on all sides of the disc.
It’s powered by a removable, 12v, 3000mAh, rechargeable battery. I added a 45-degree mirror so you can easily see the current charge level.
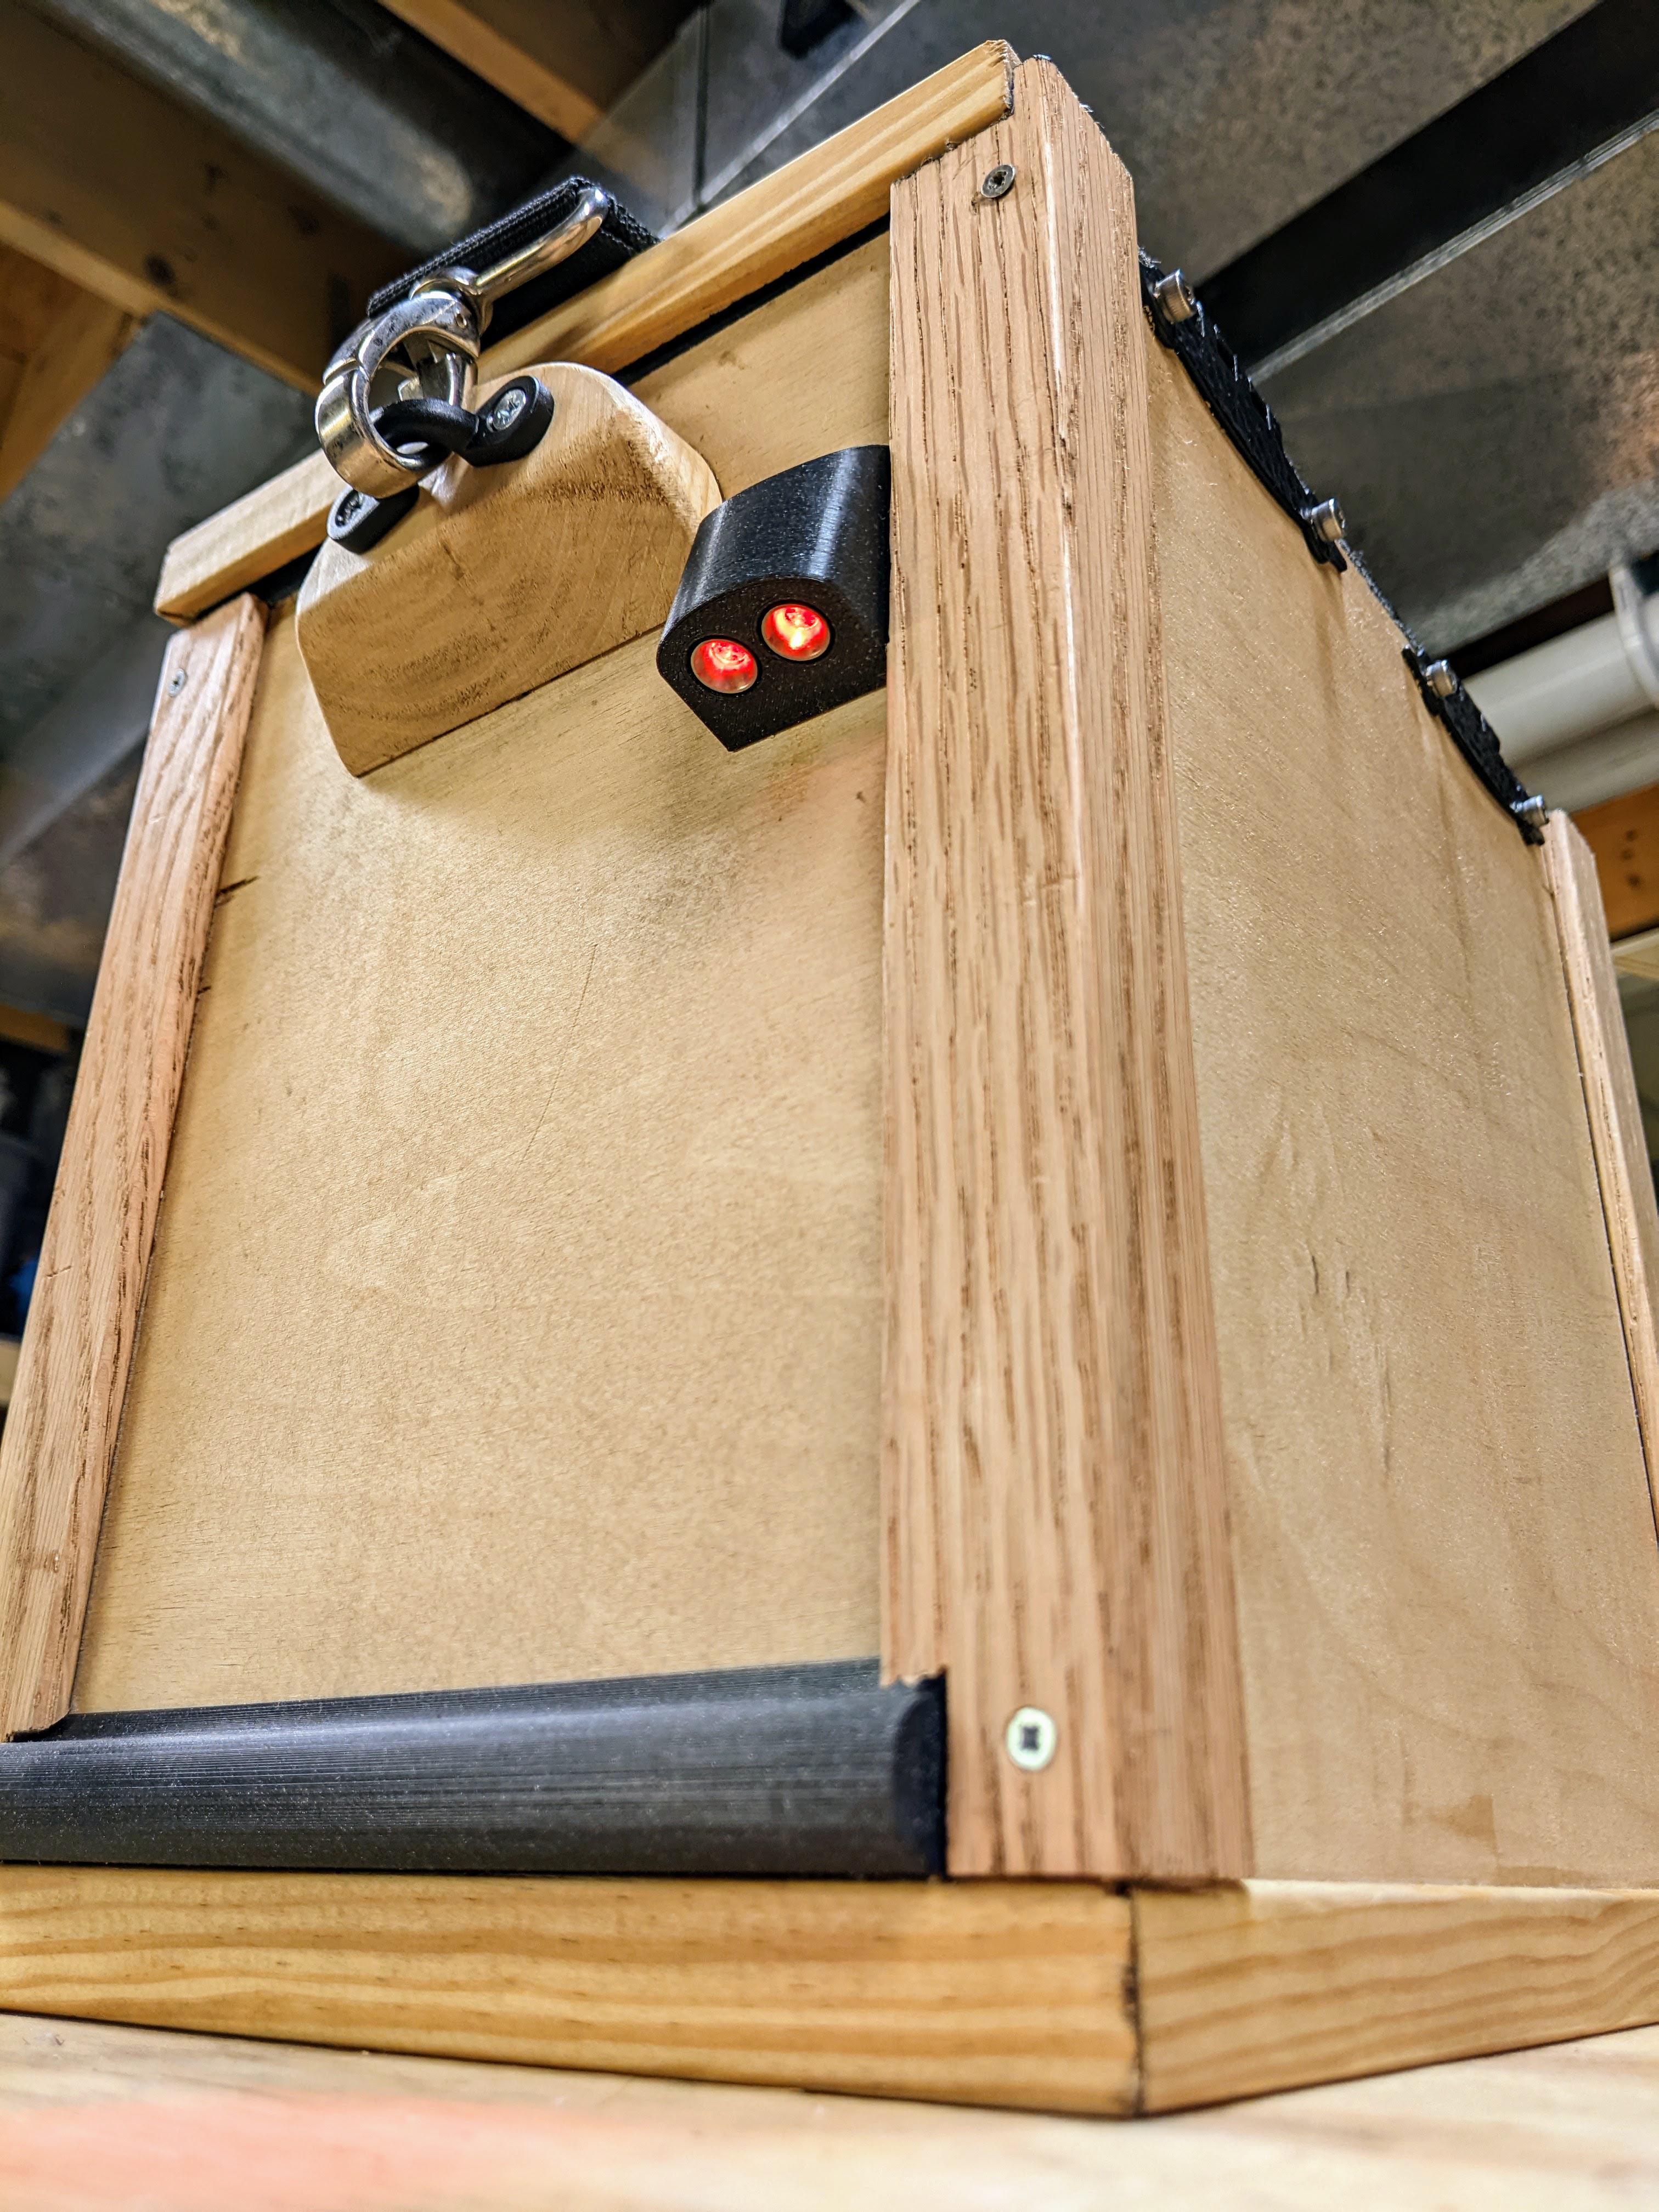
The red LEDs are dimmable and are on both sides. No more pulling out my phone flashlight to make sure I don’t trip, and I get to keep those night eyes :)
The left slider controls the UV brightness (if you’re trying to conserve battery). The middle dial controls the red LEDs. The lid-switch is on the left, held down by a paintbrush.
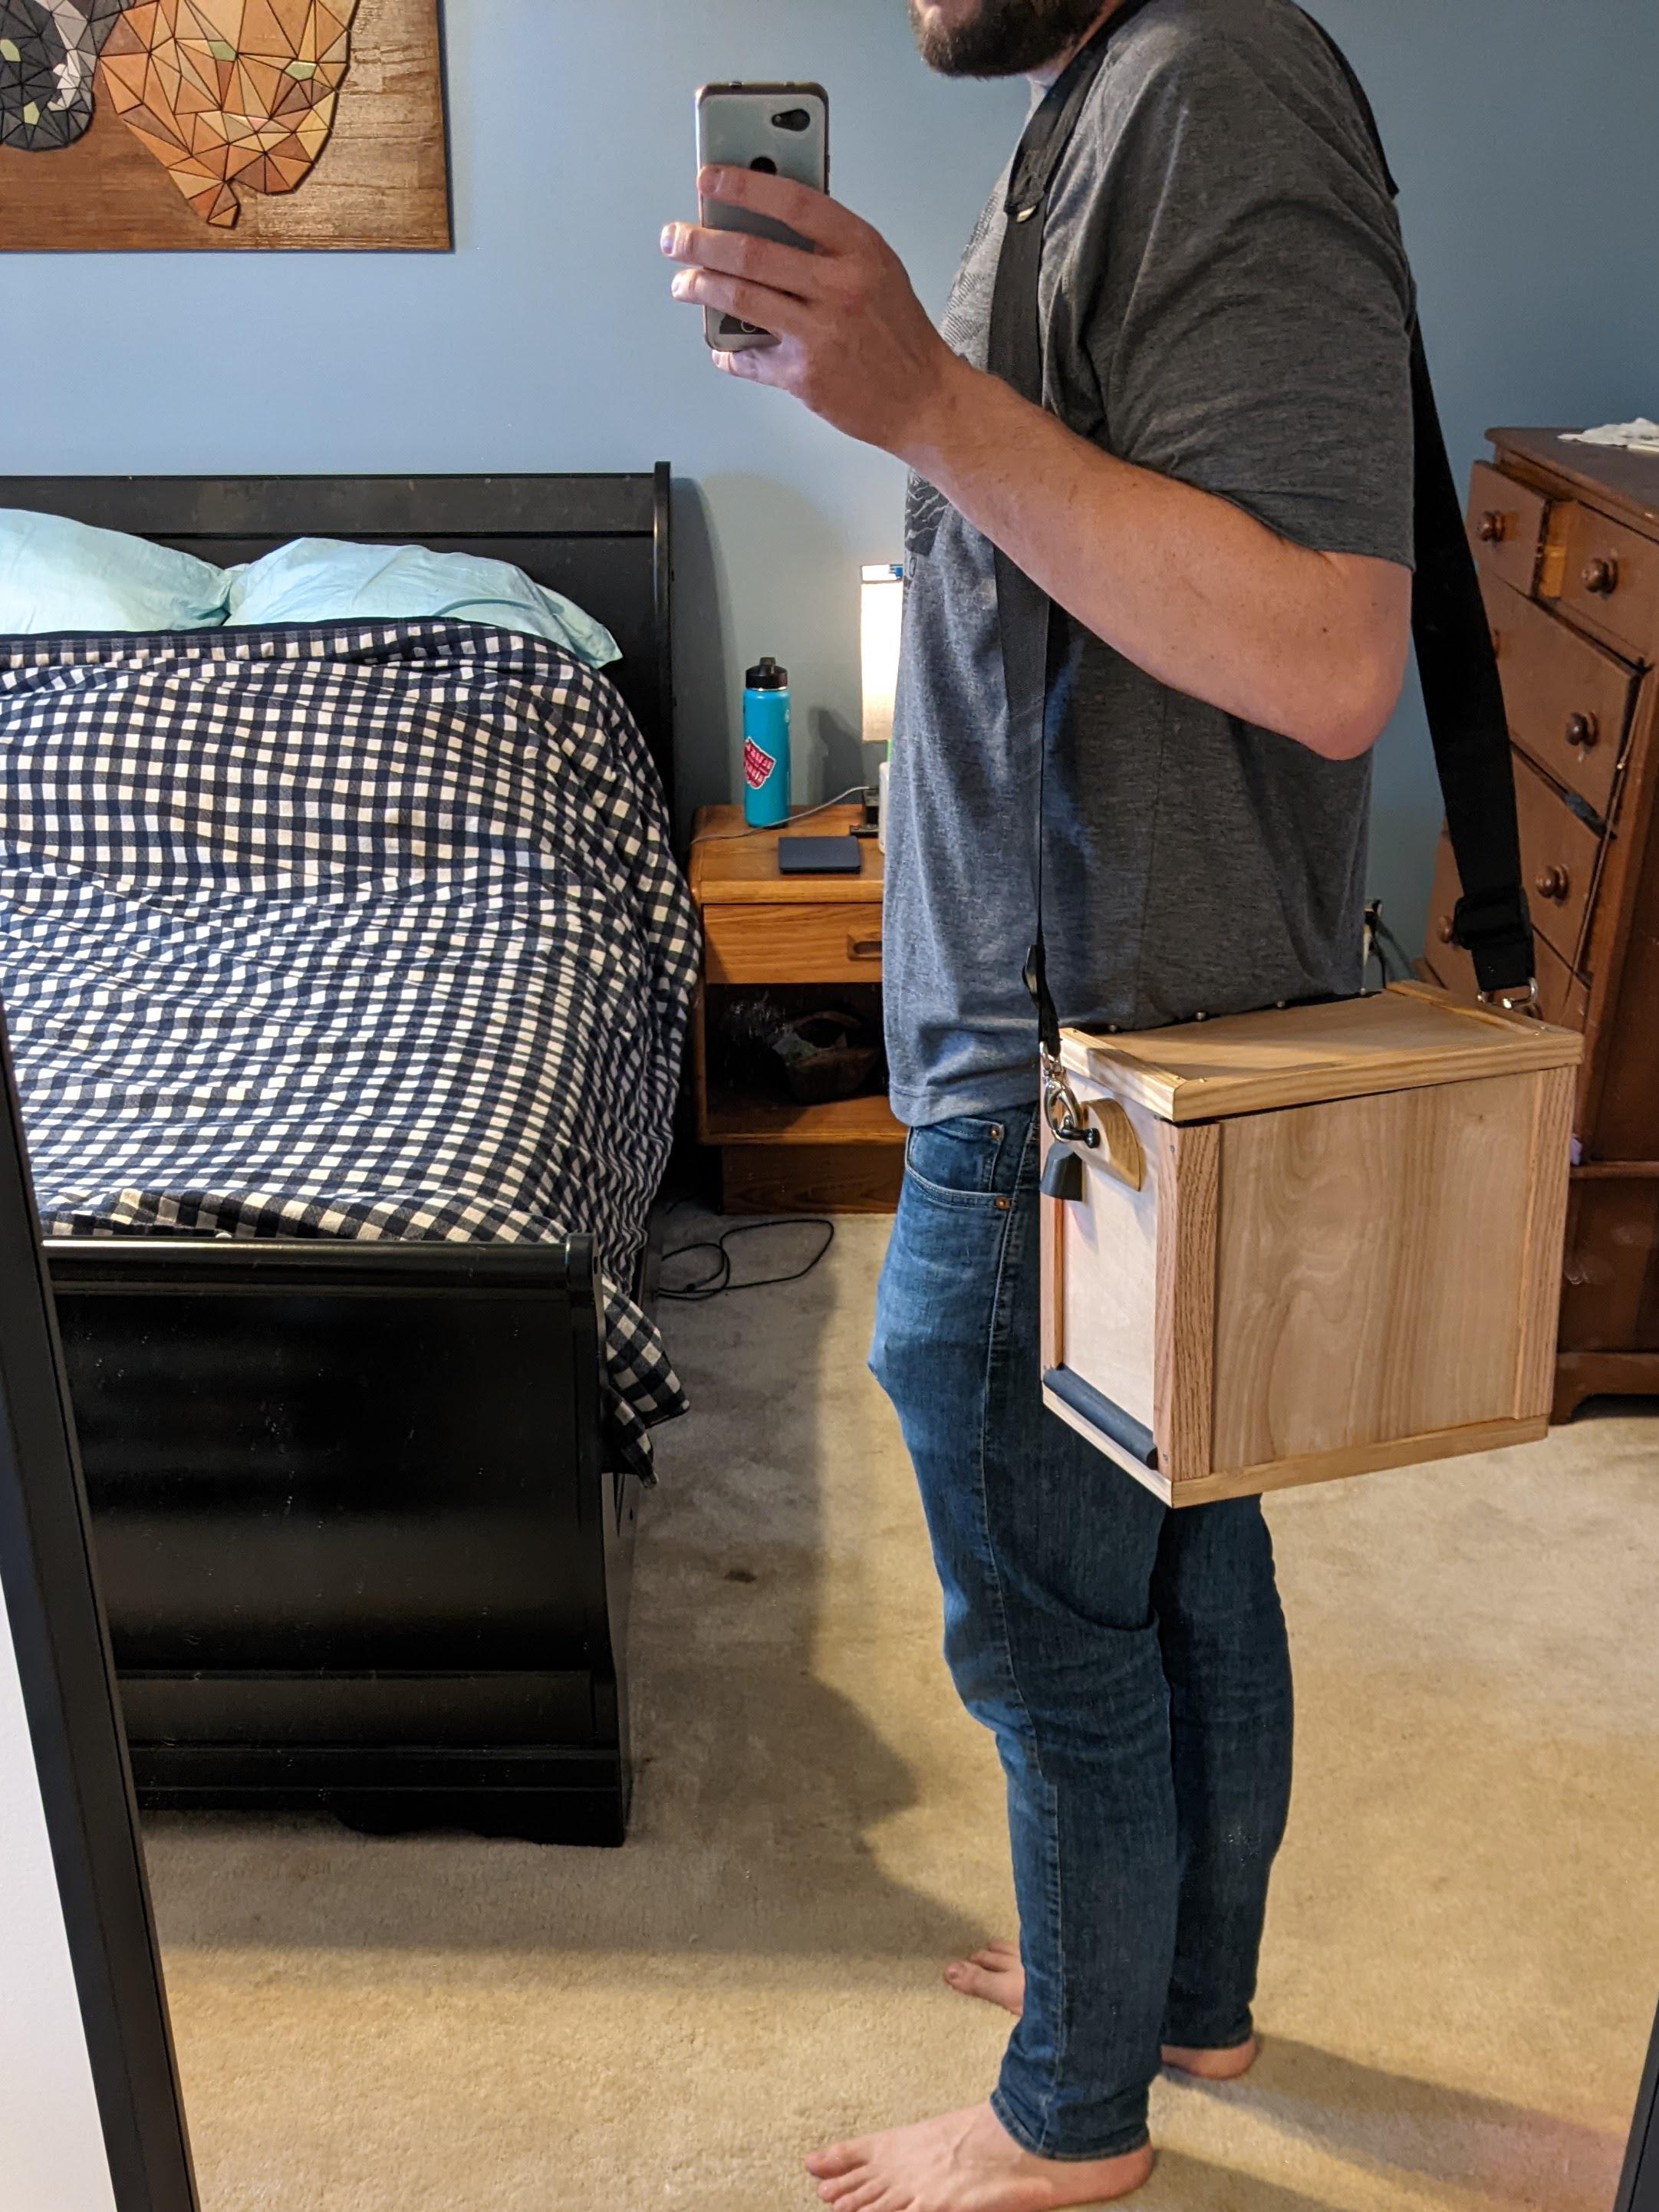
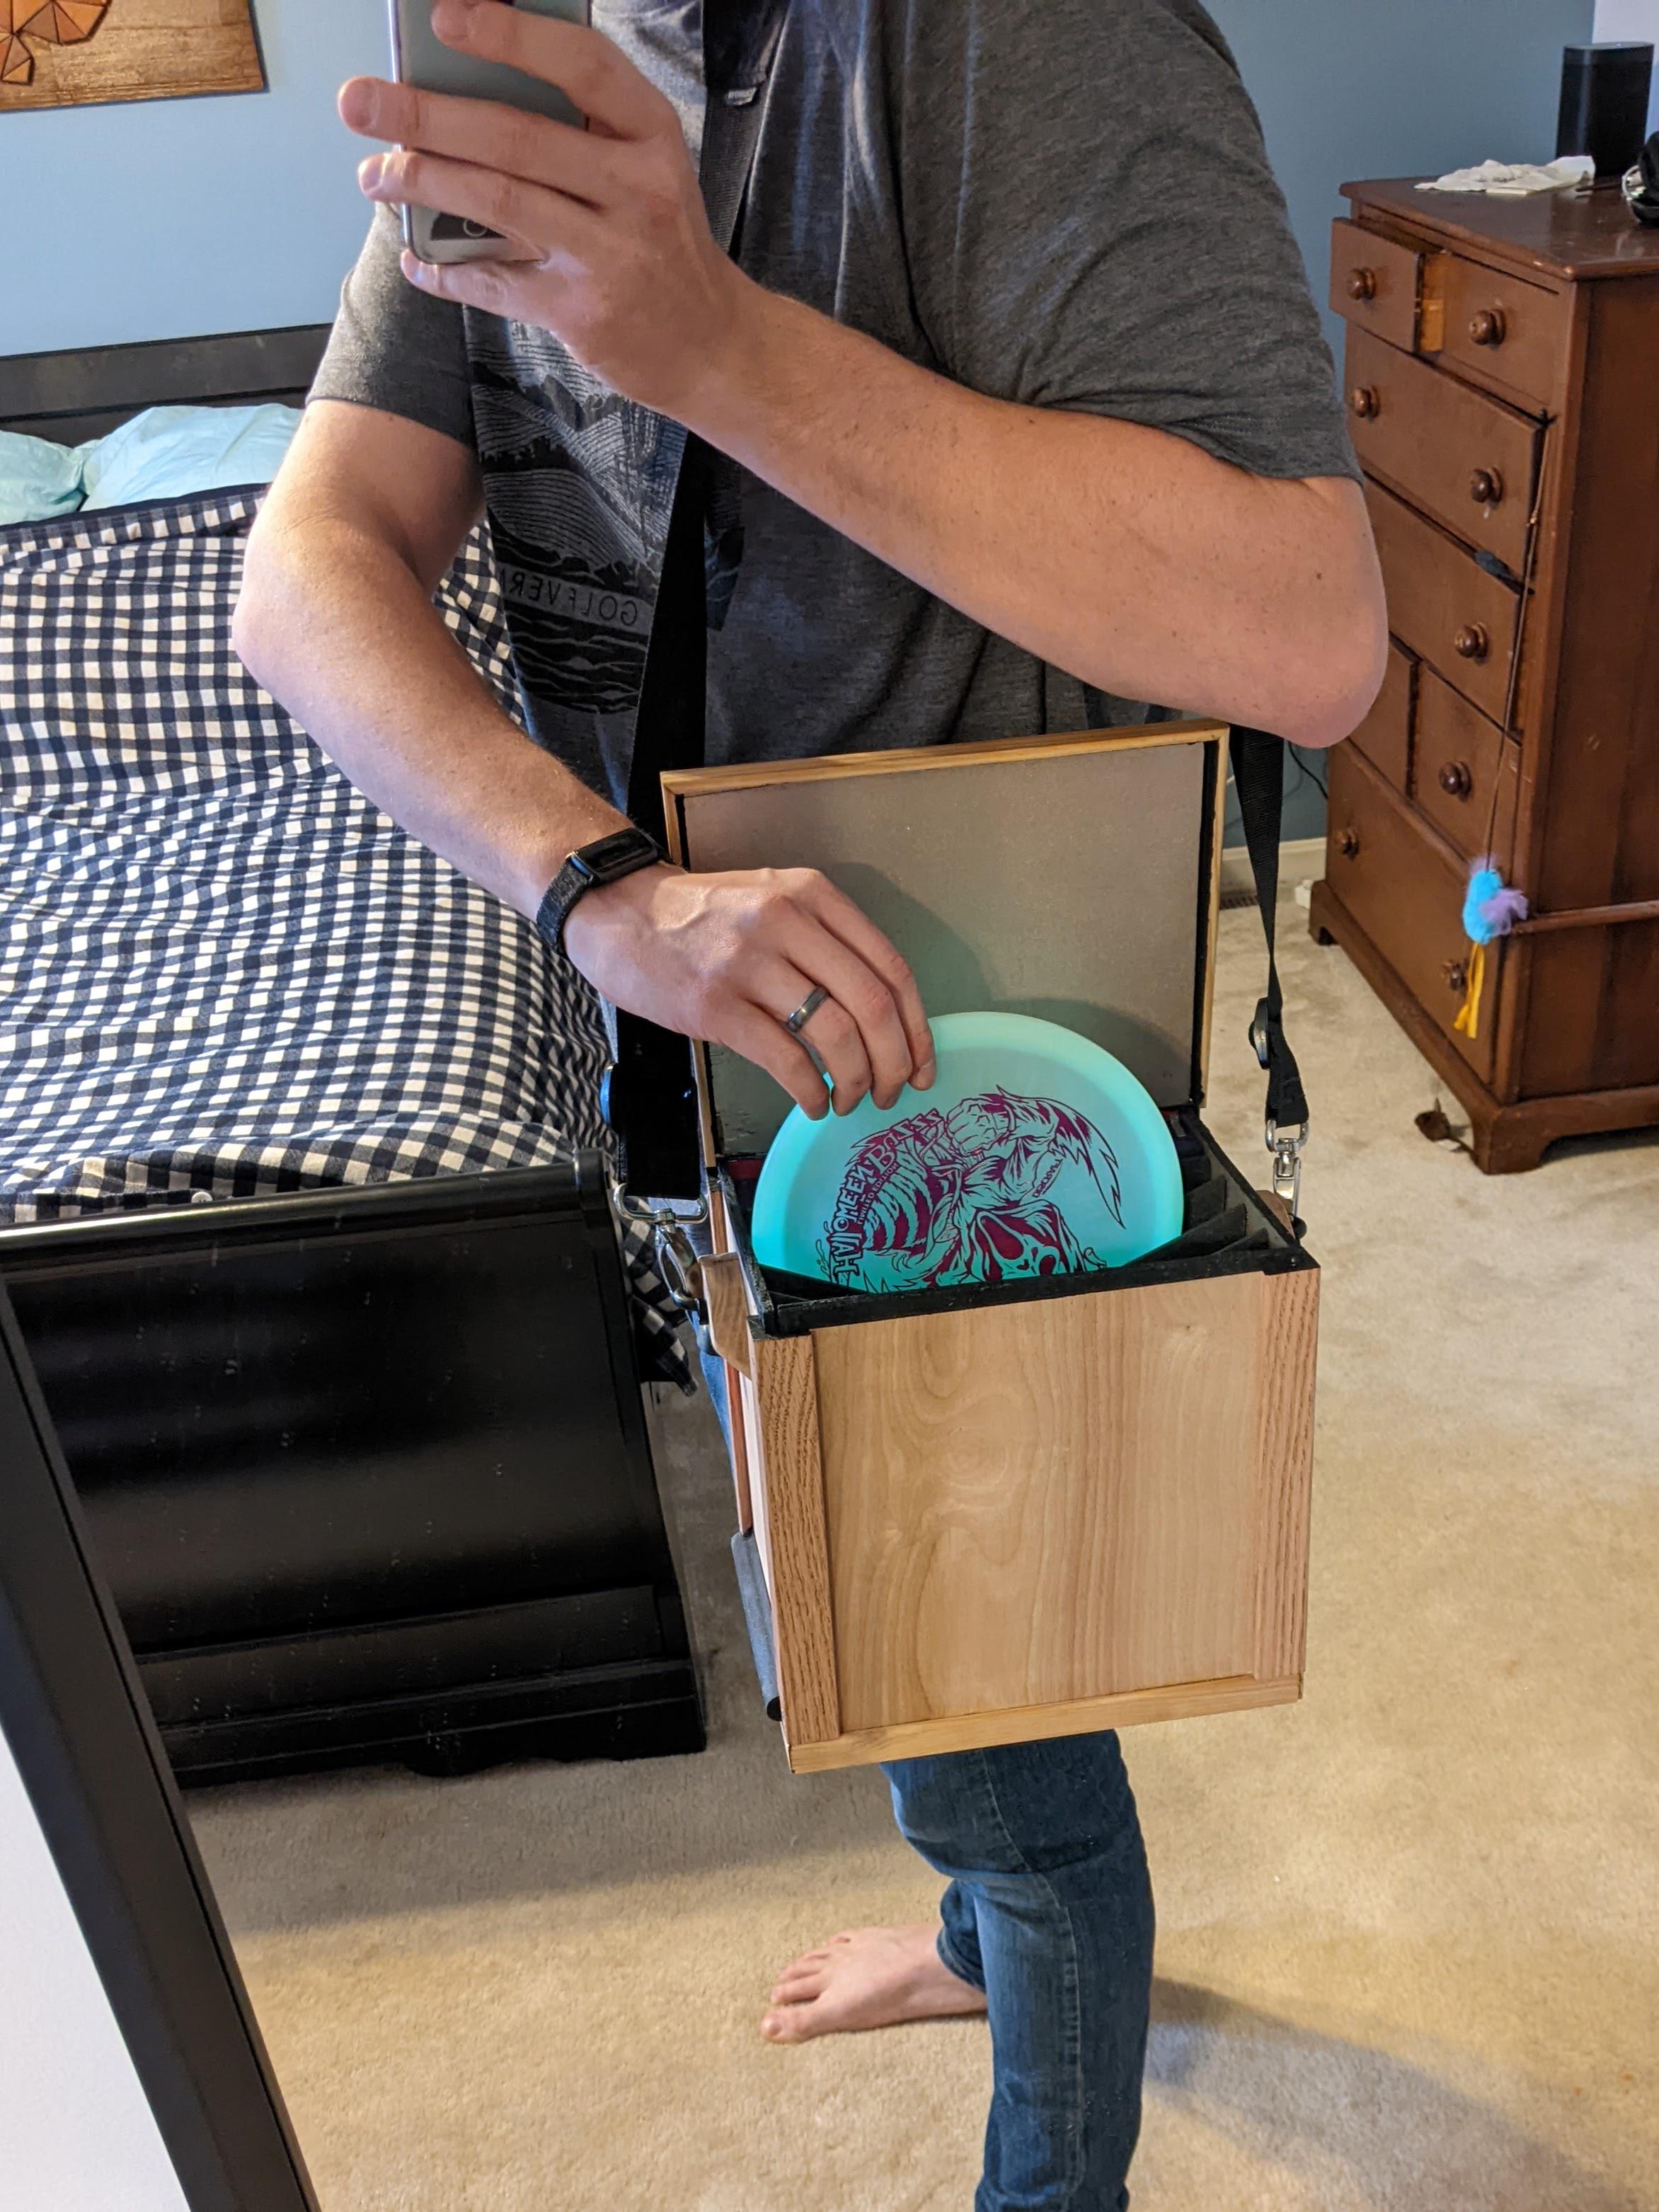
I salvaged a shoulder strap from an old camera bag - it sits right on my hip, which is perfect. I was really happy with how comfortable it is to carry. (I’m 6’5” for reference.)
I made sure that the straps wouldn’t stop you from opening the box while wearing it.
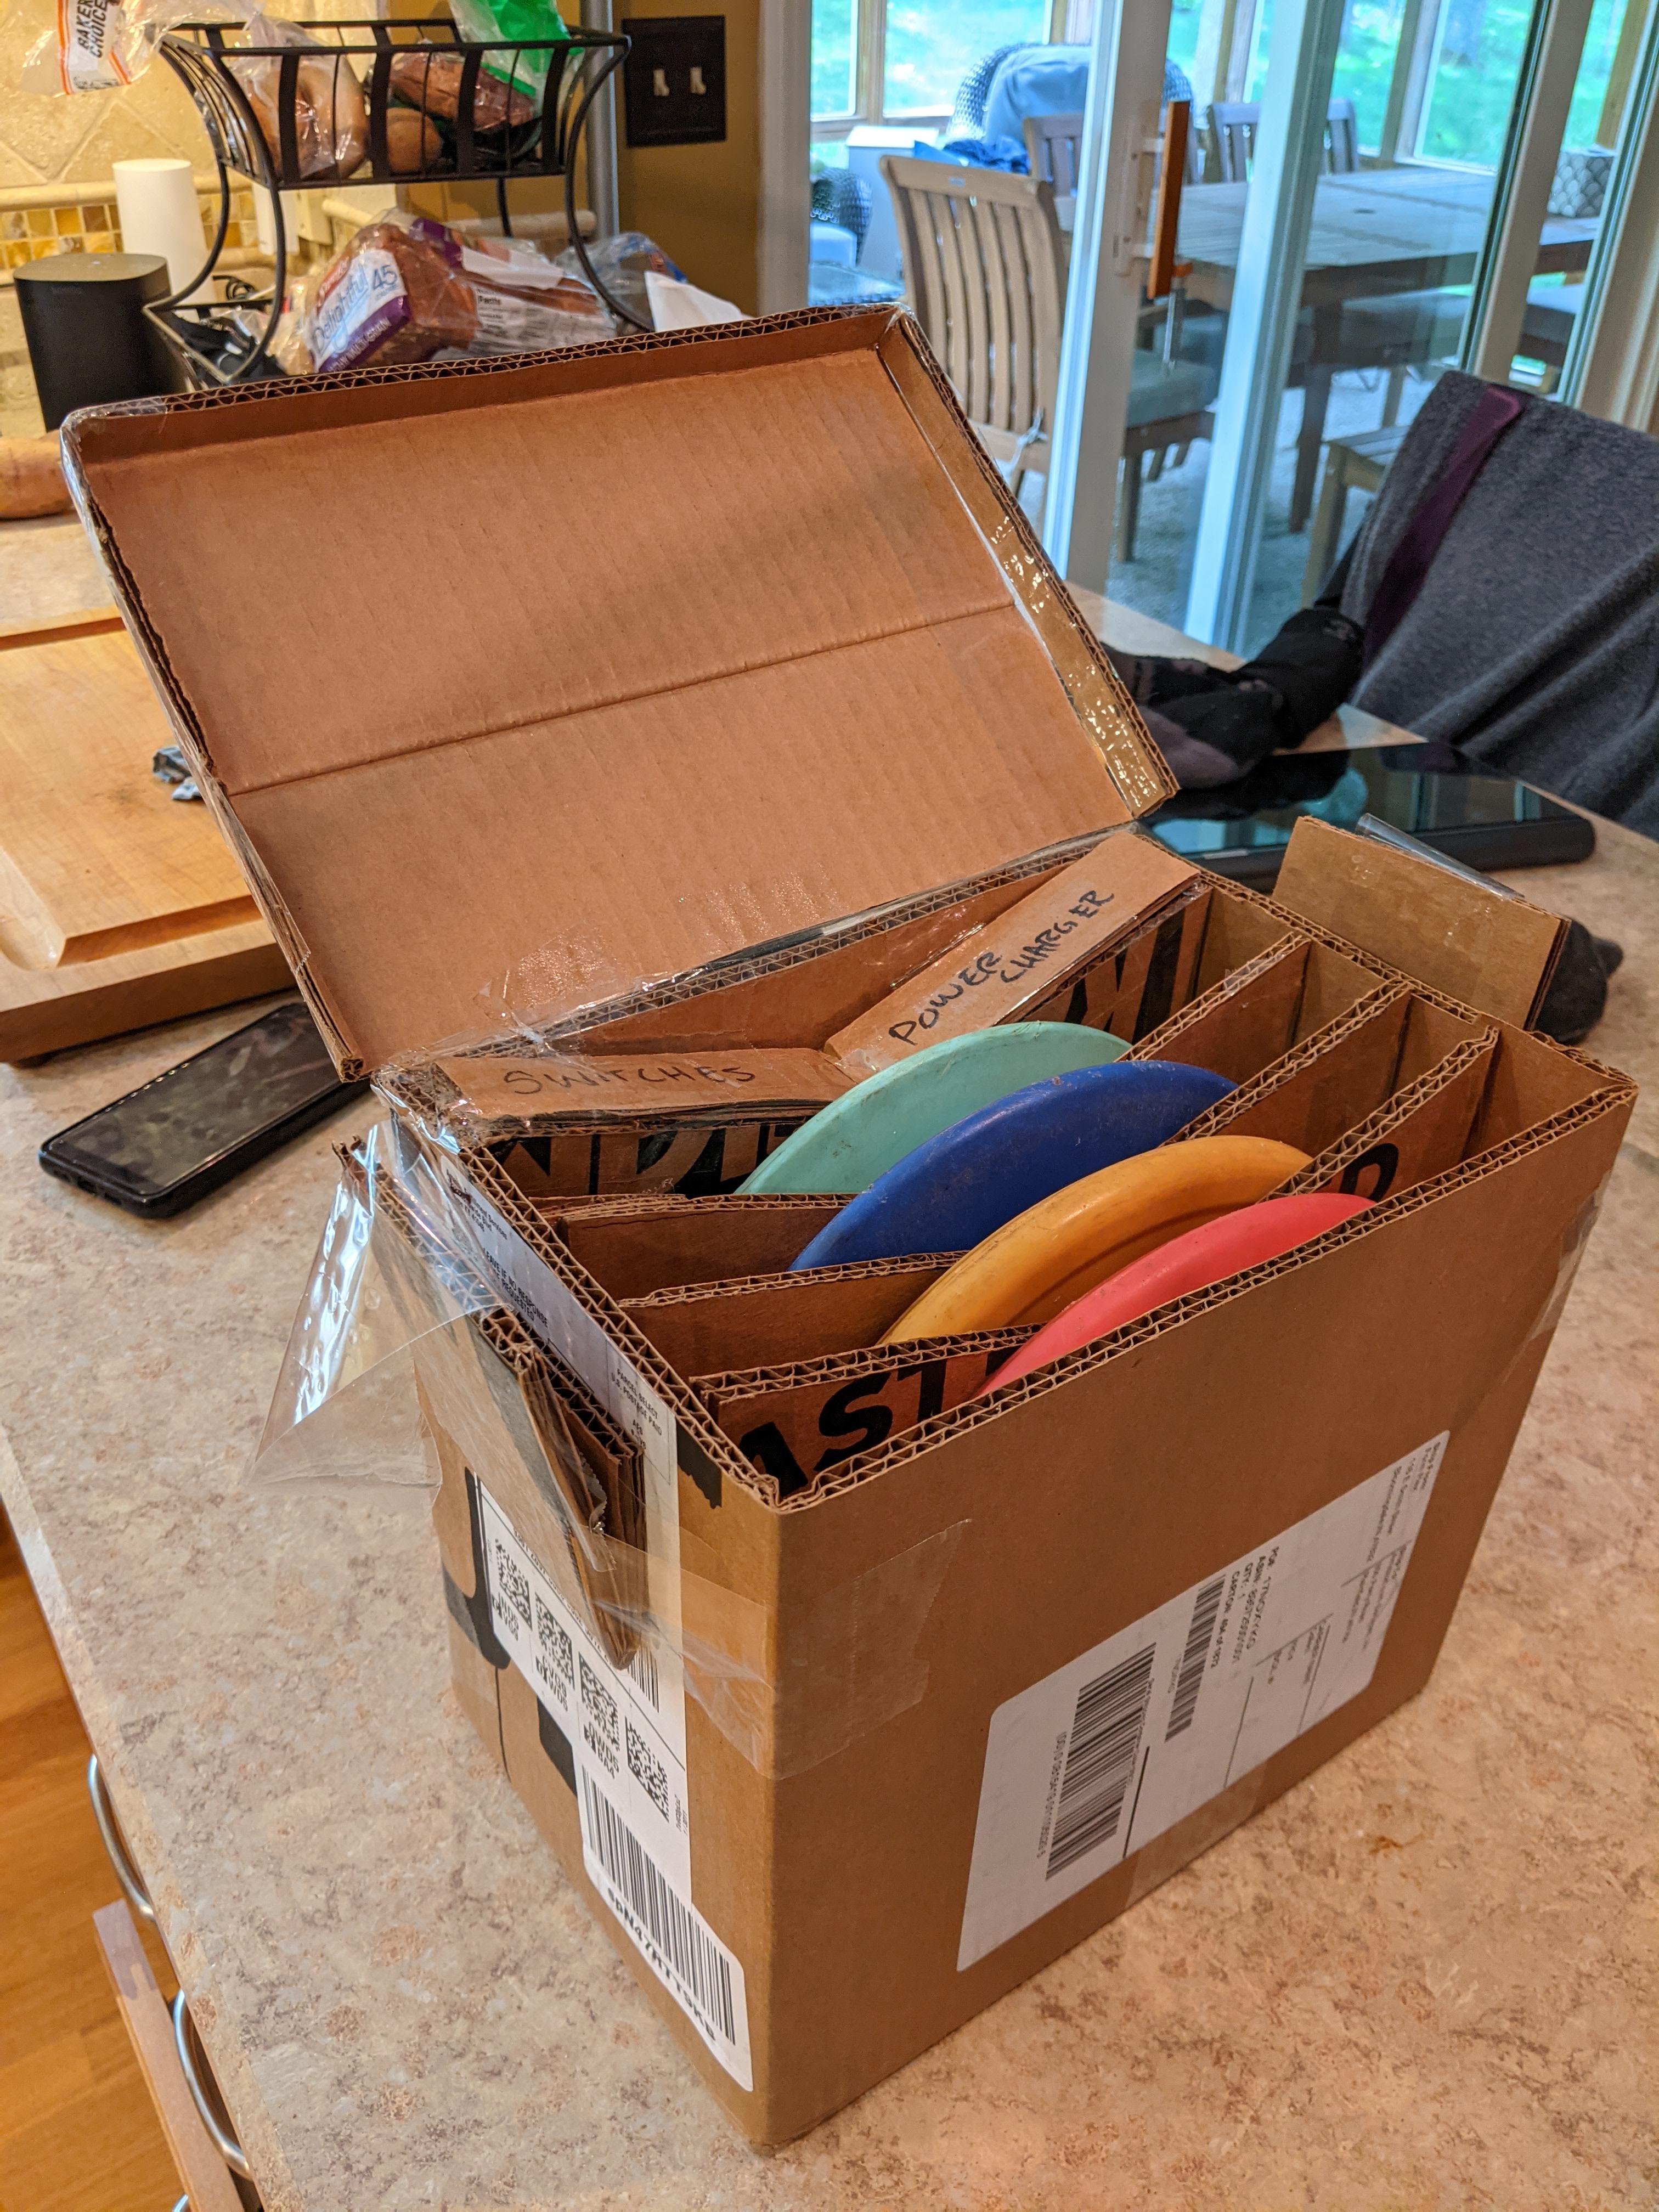
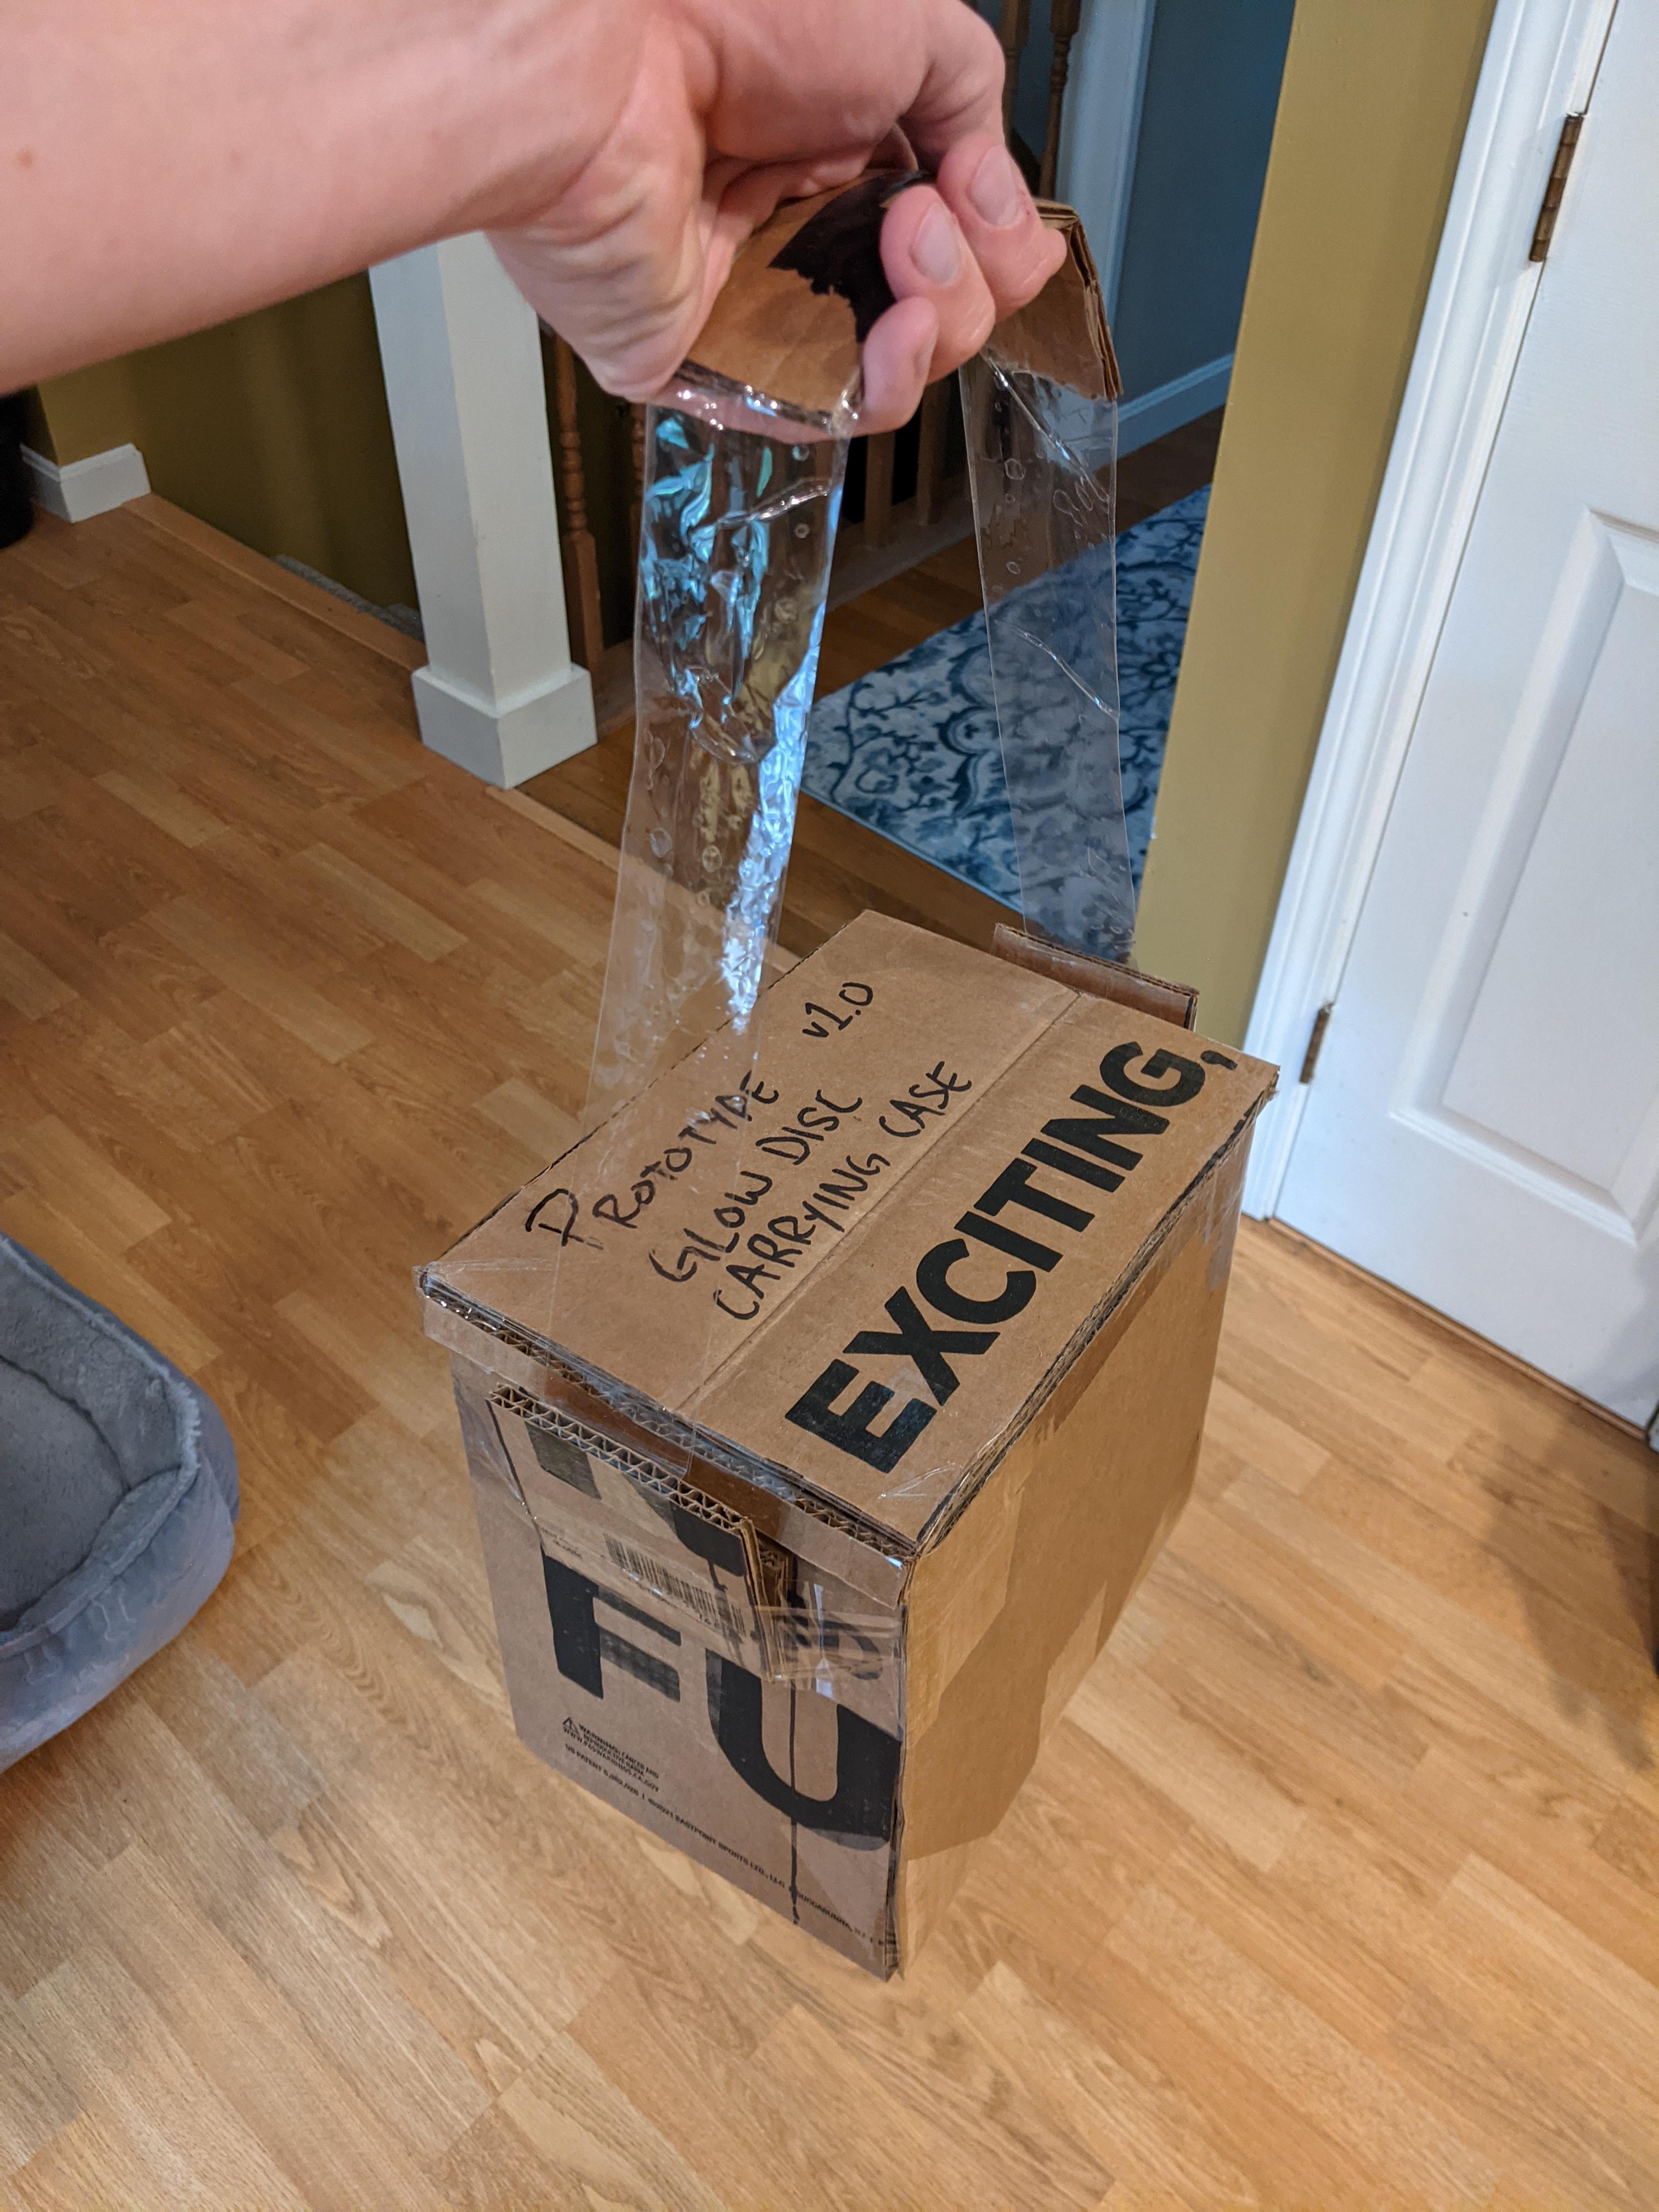
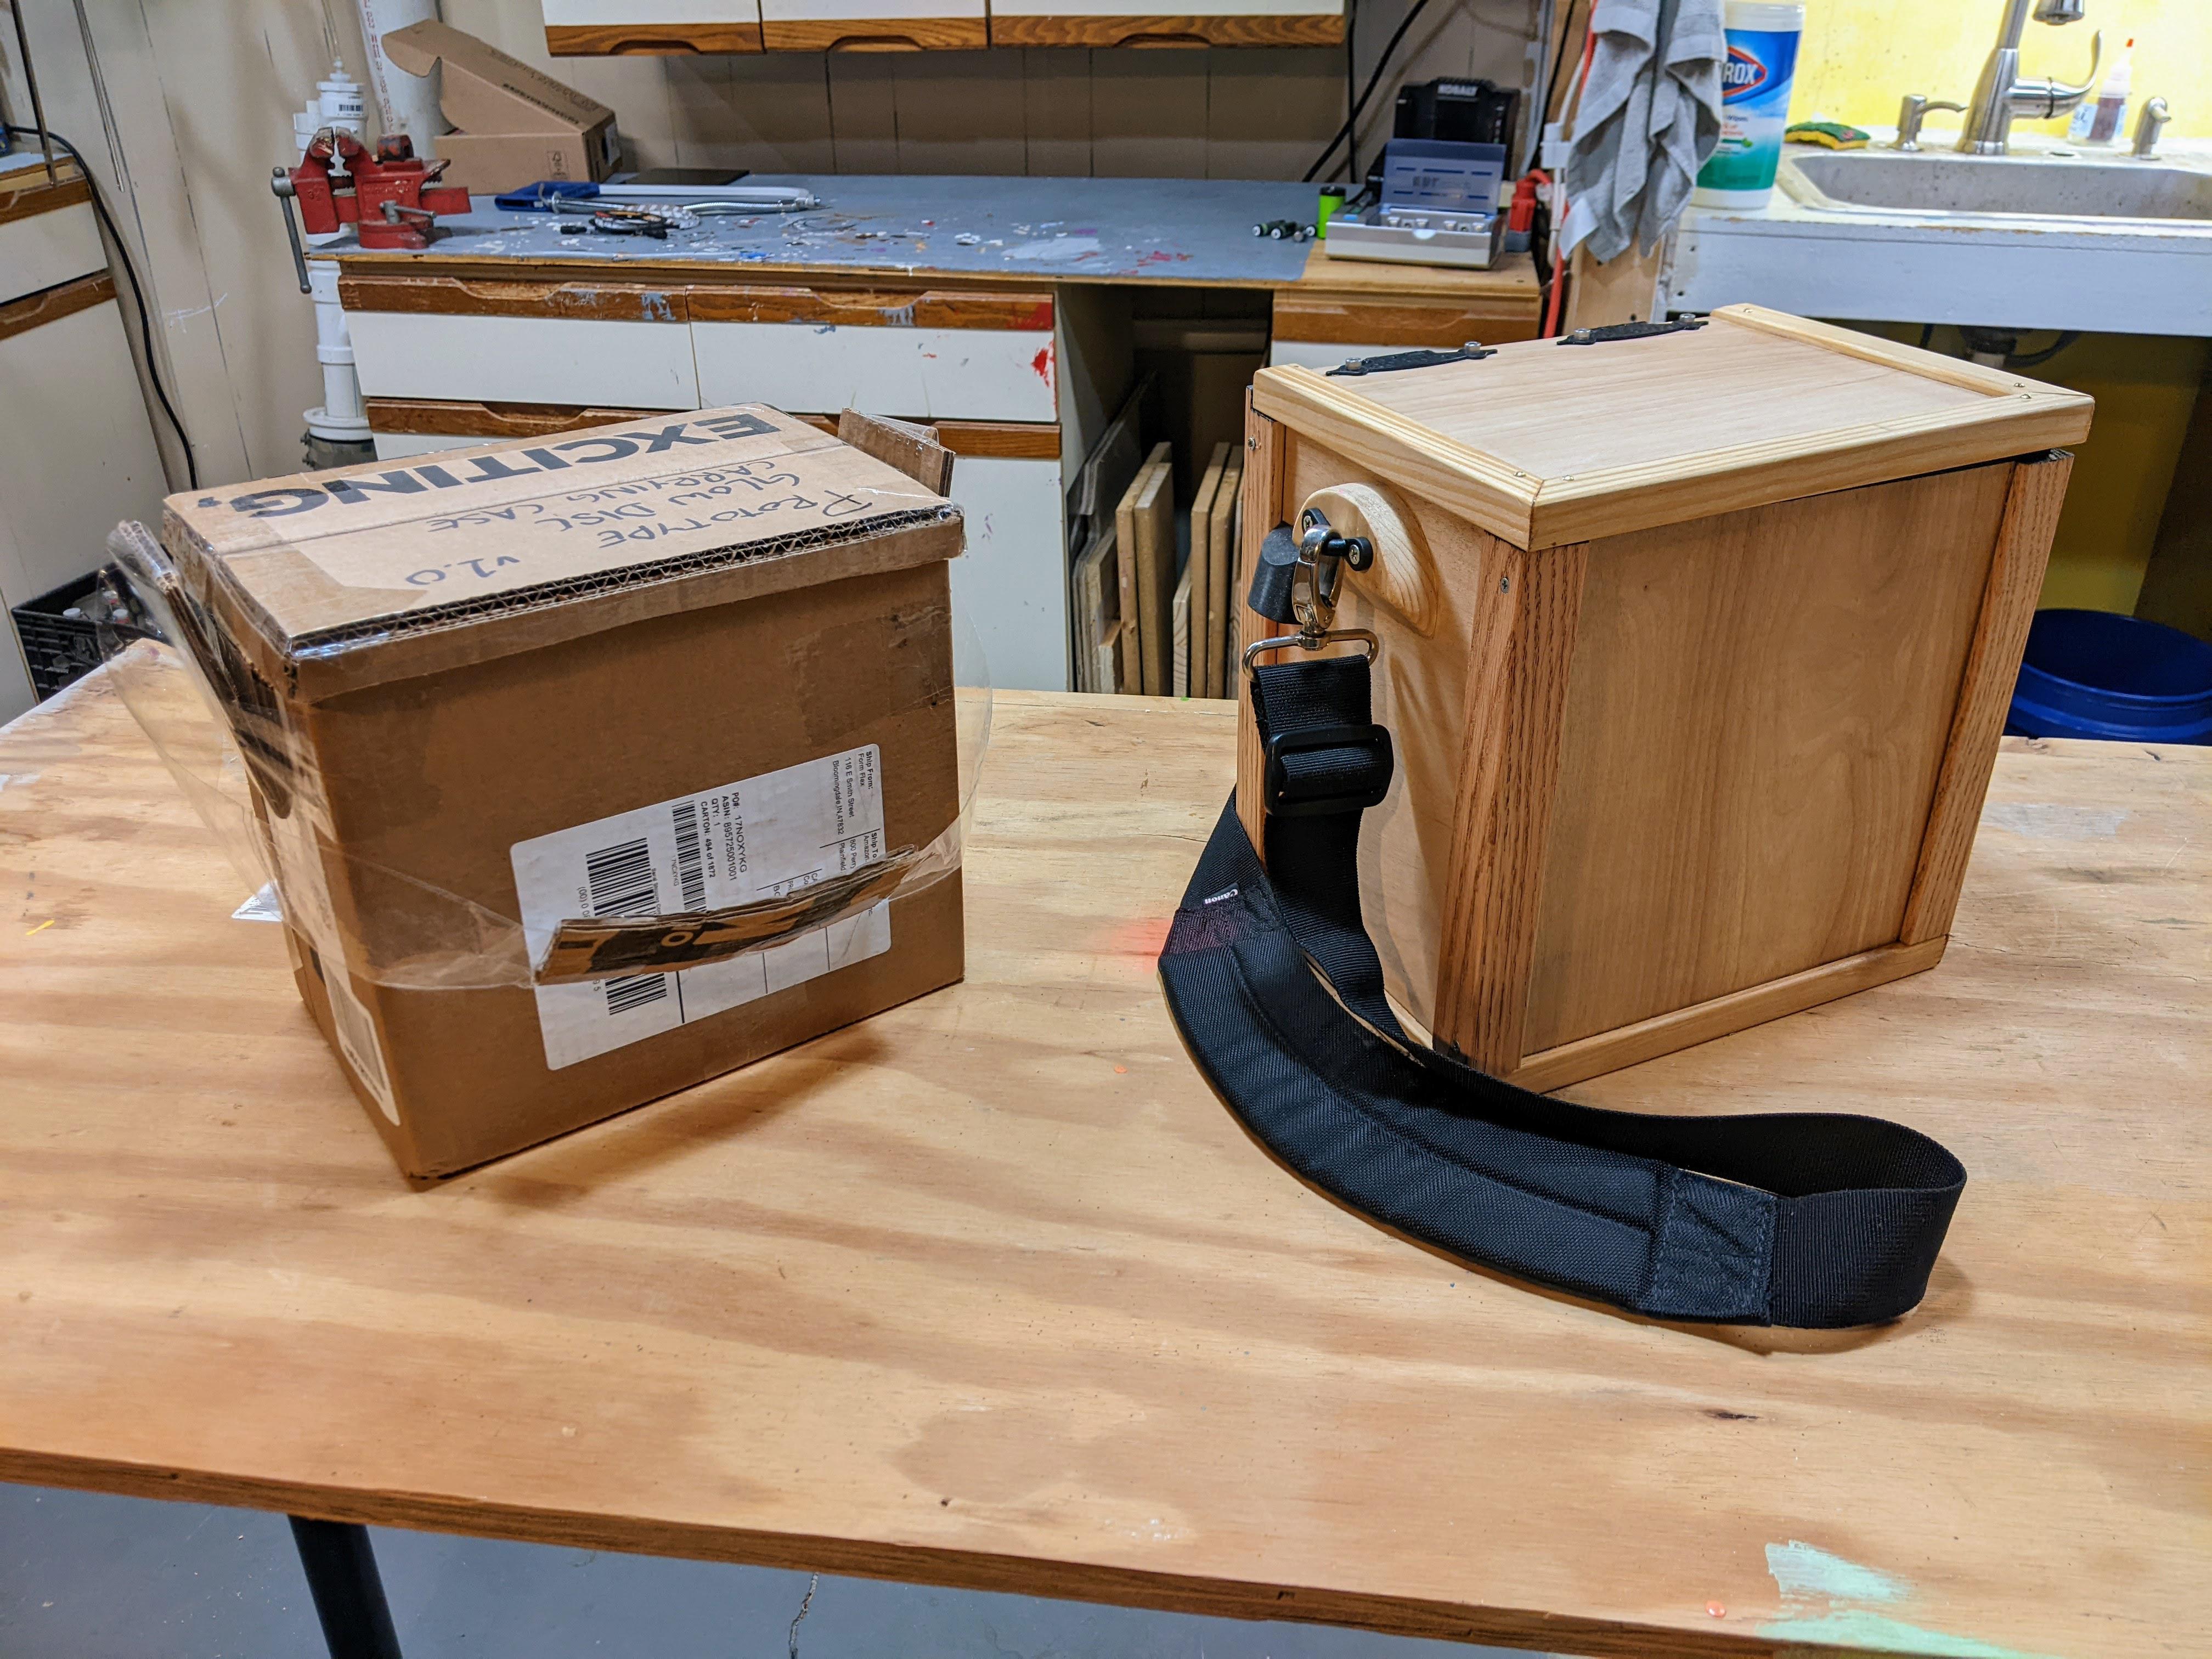
This was the original prototype I made months ago. The final product was only slightly larger.
Shoulder strap included! :D
Here are both compared to each other.
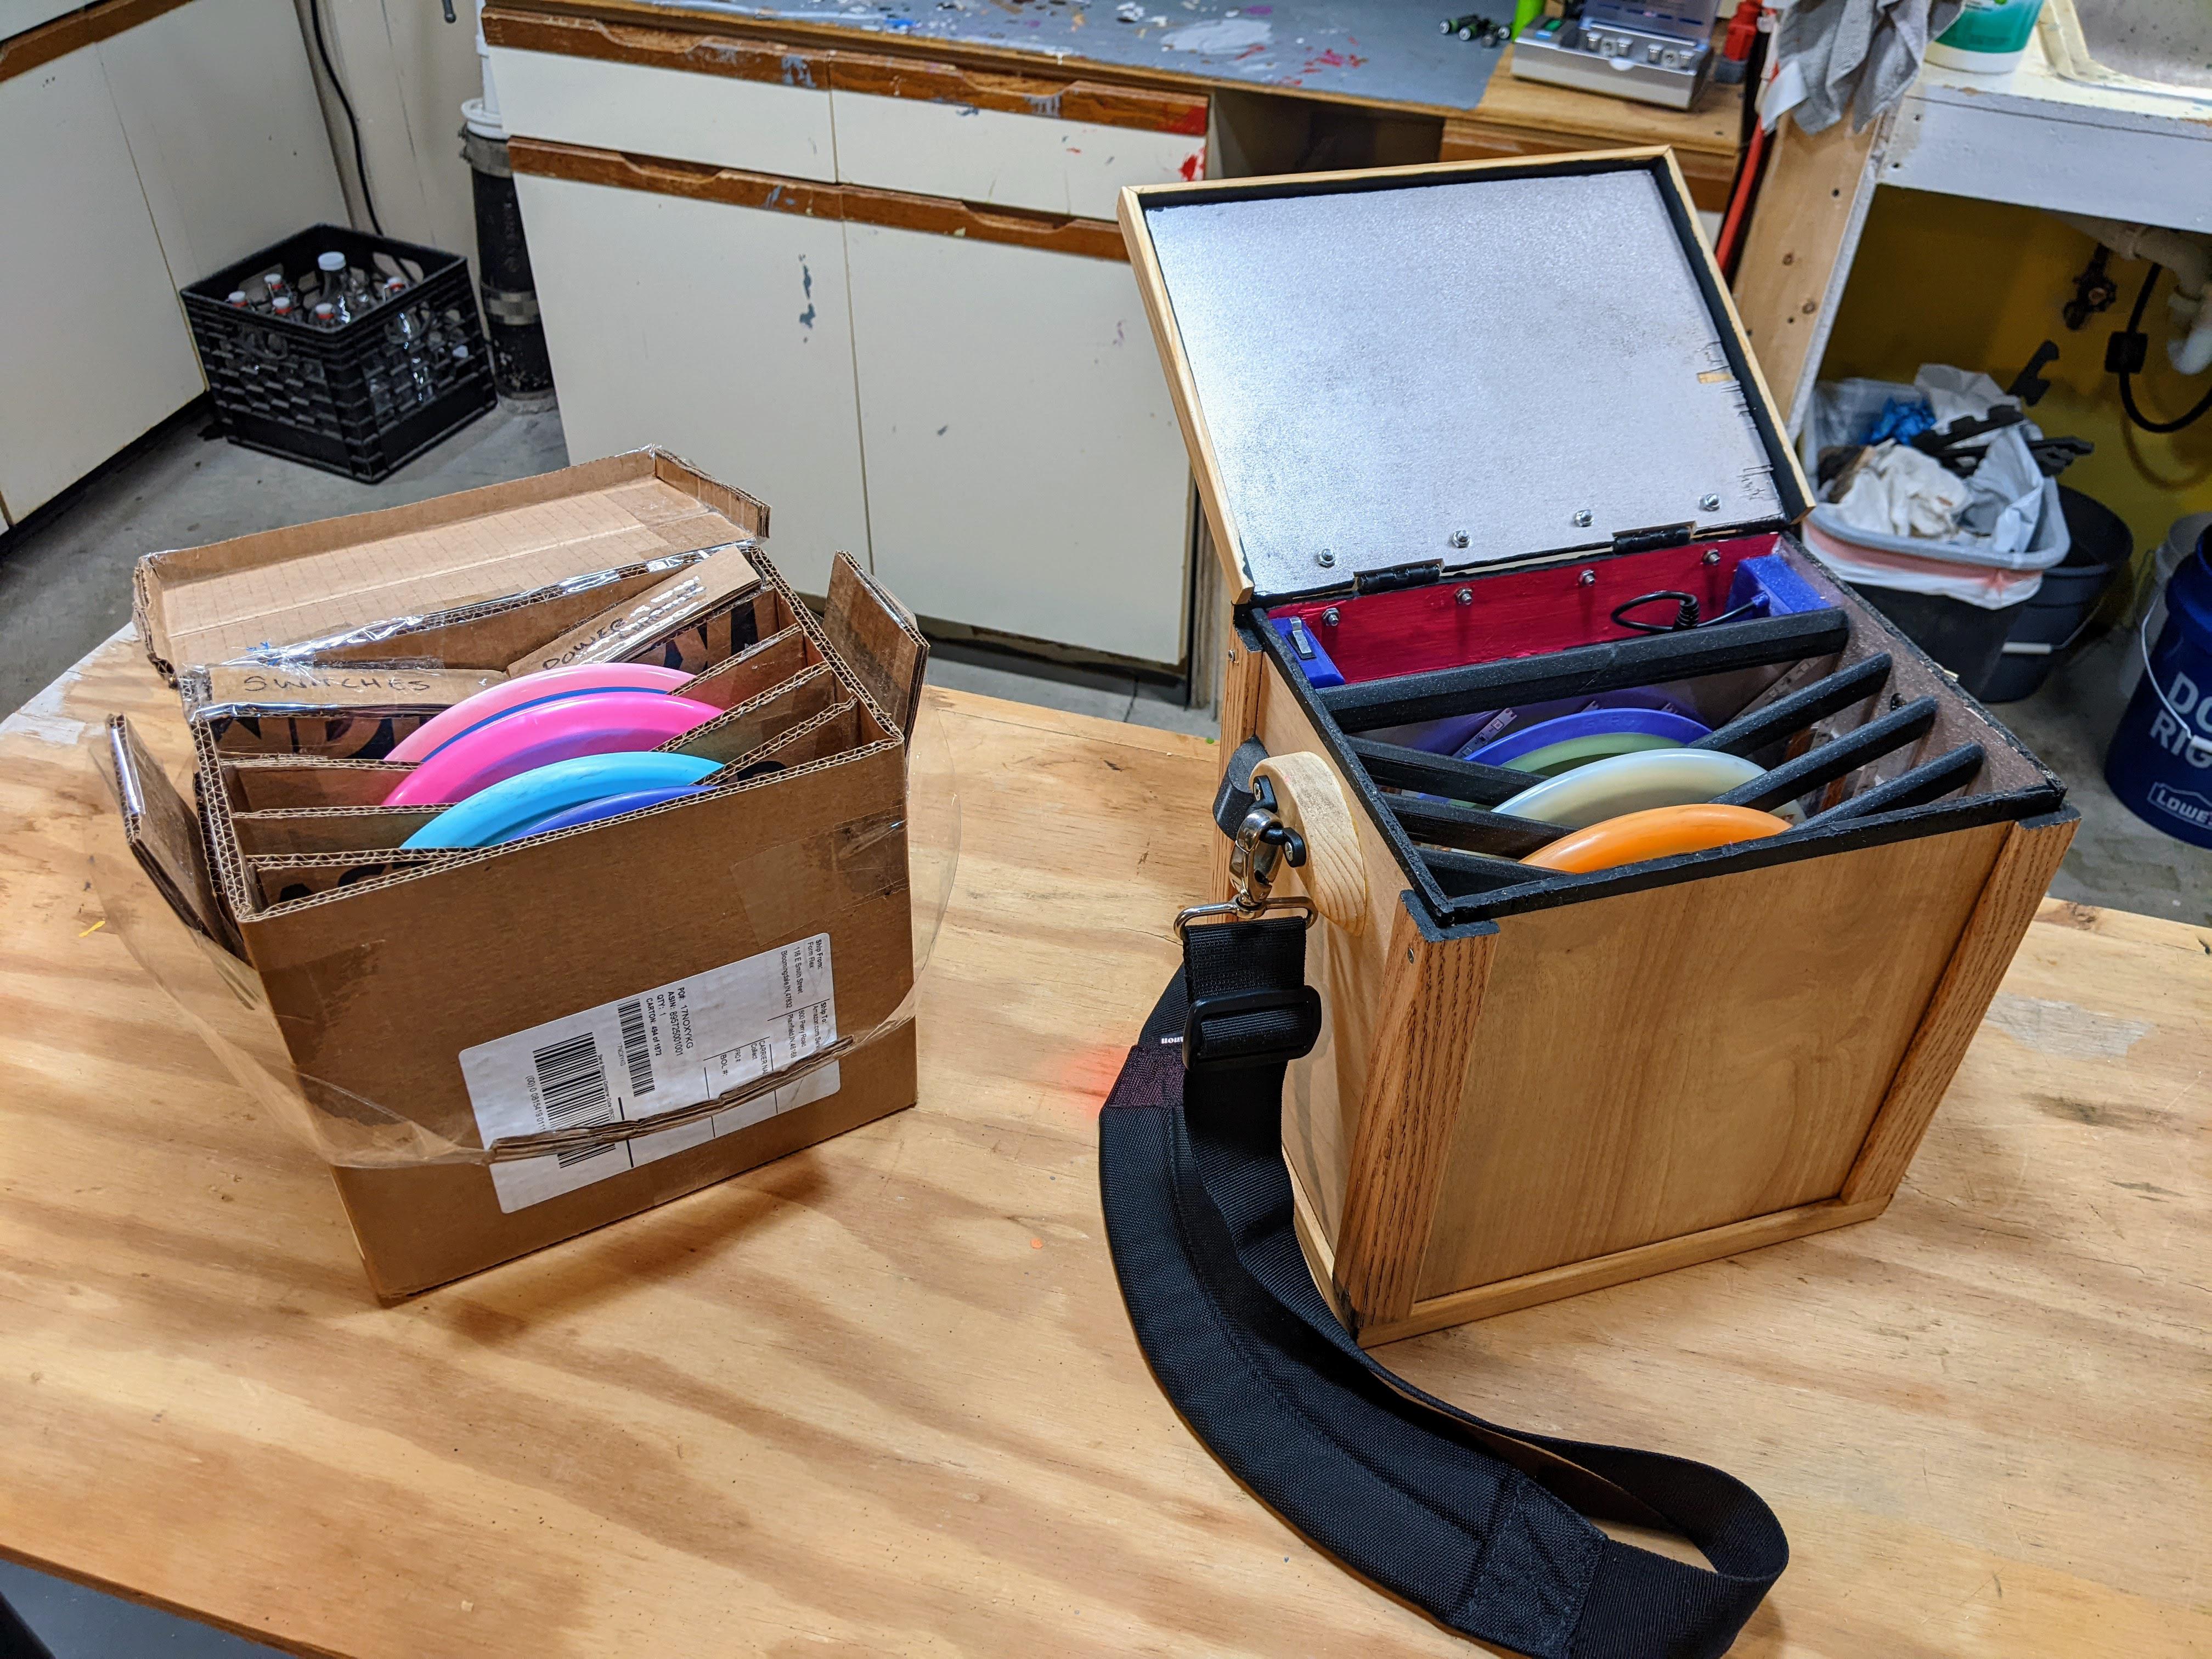
And both open.
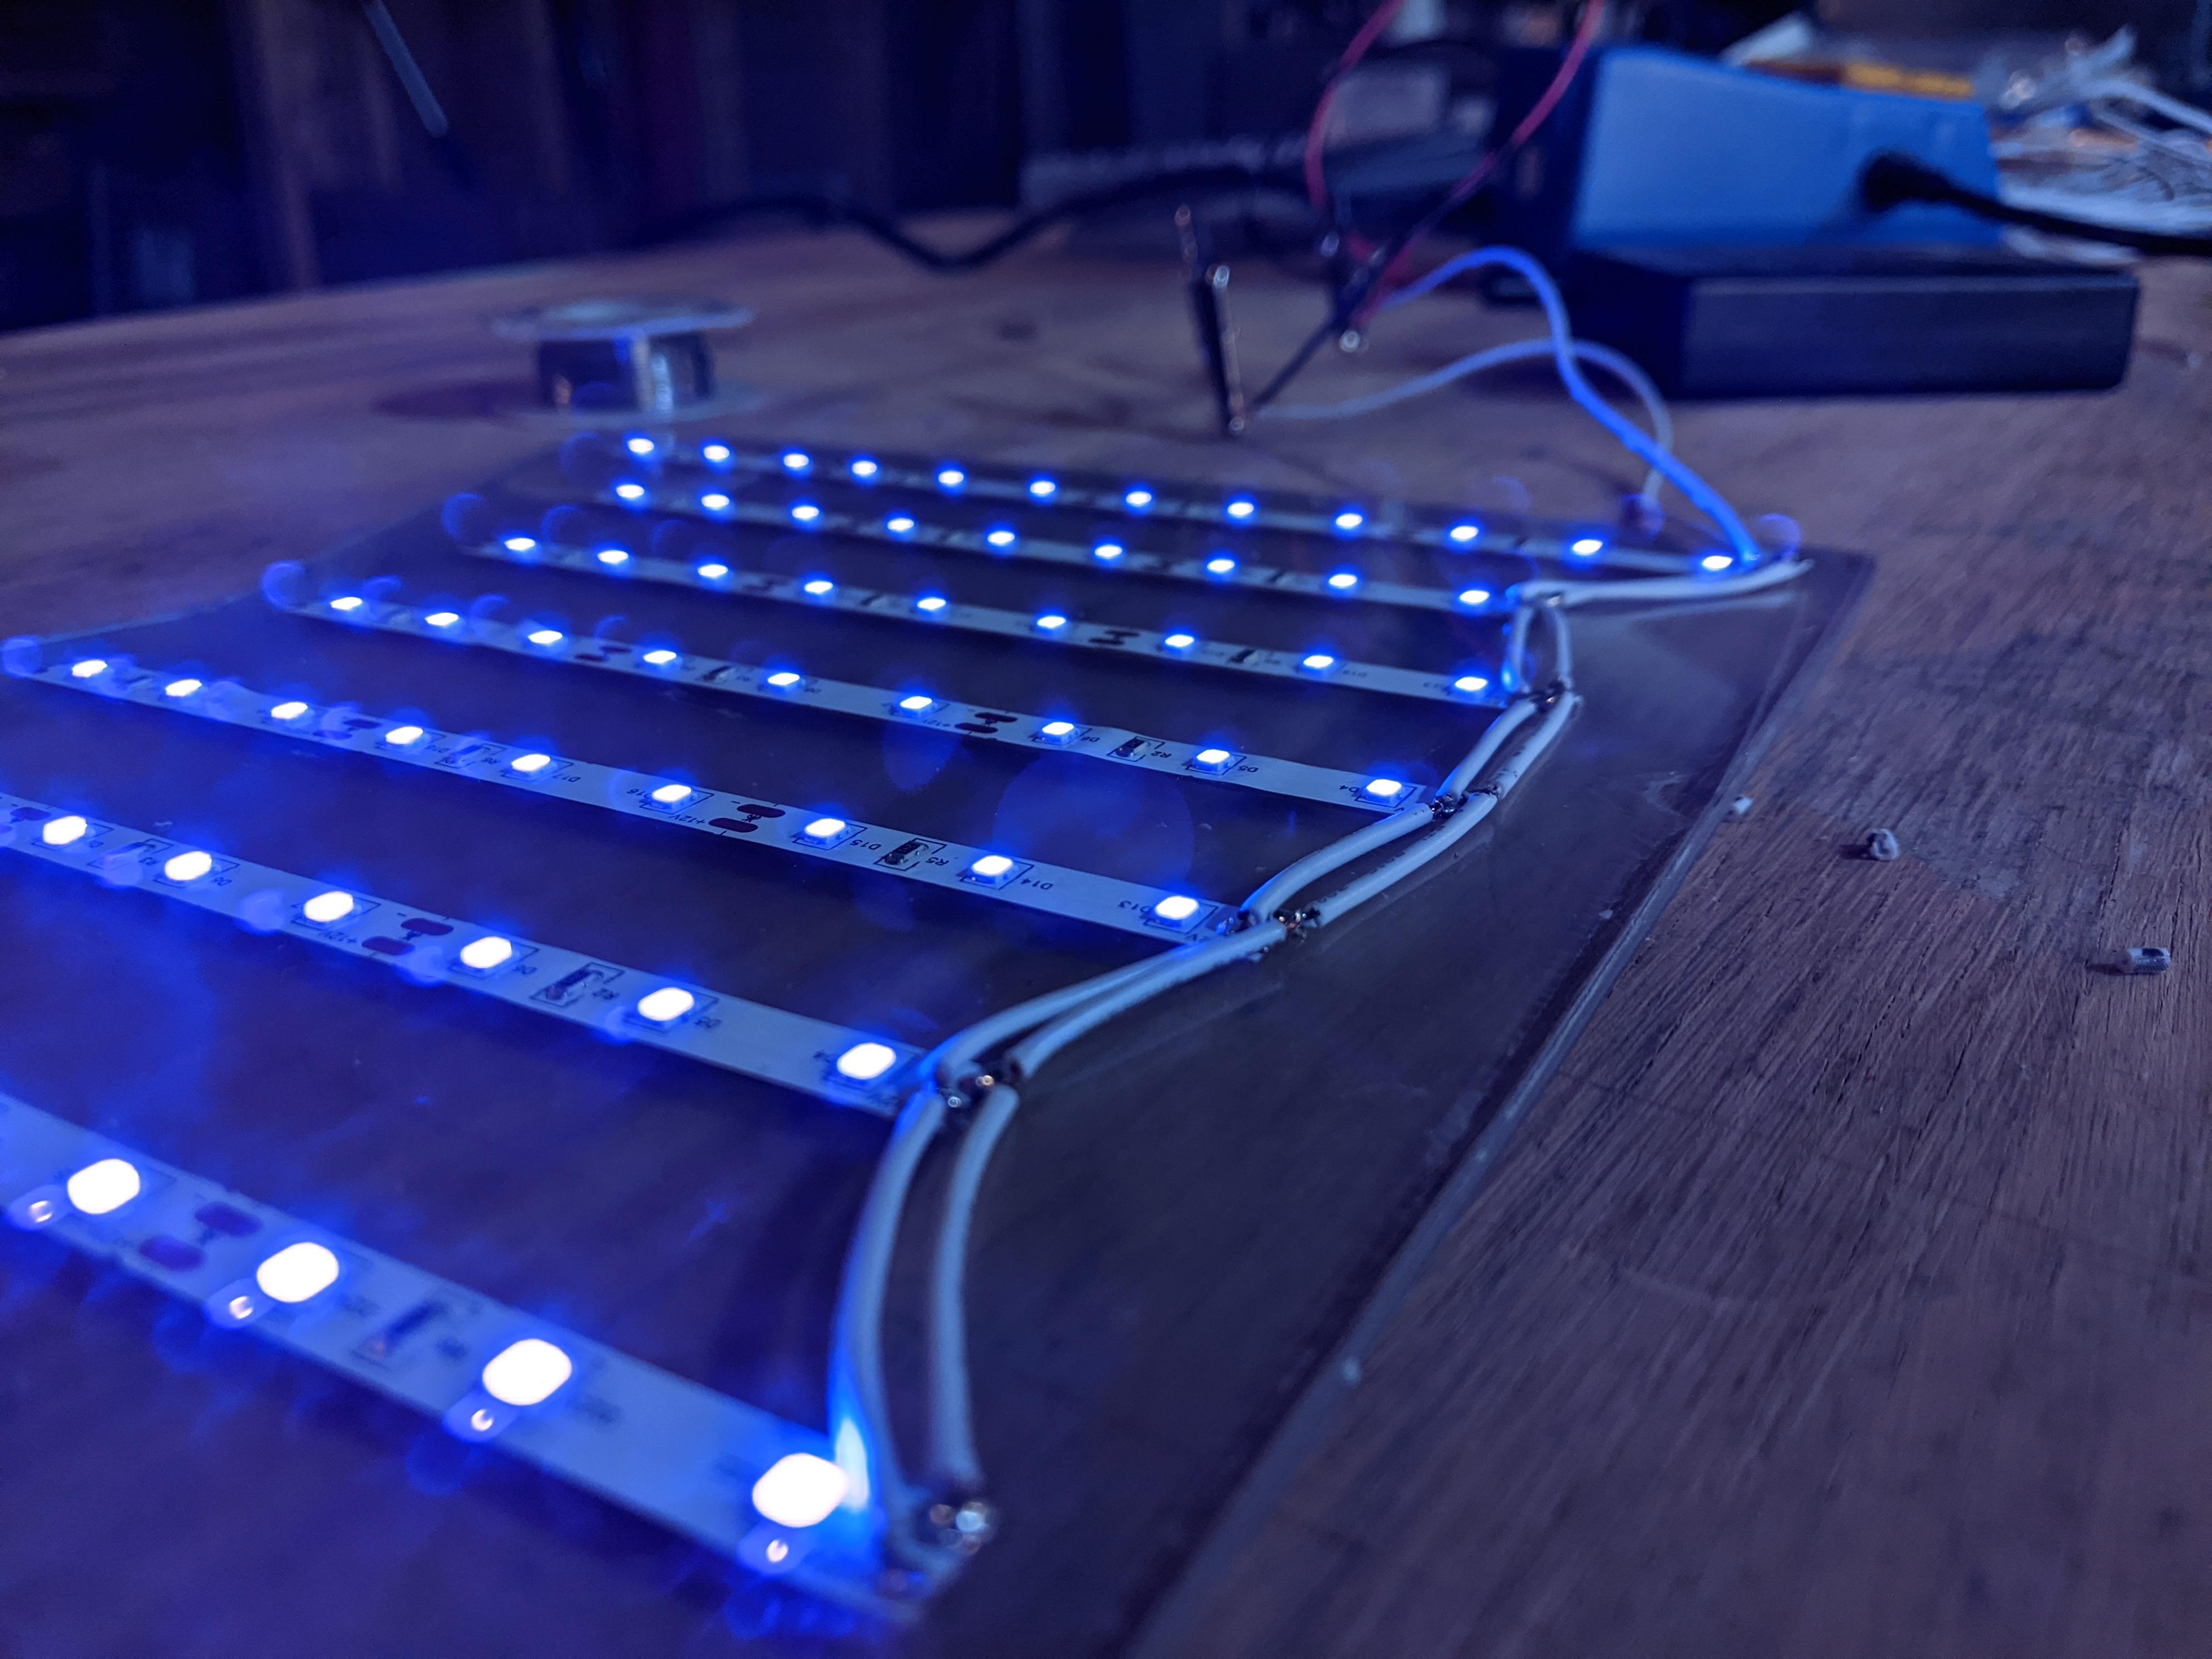
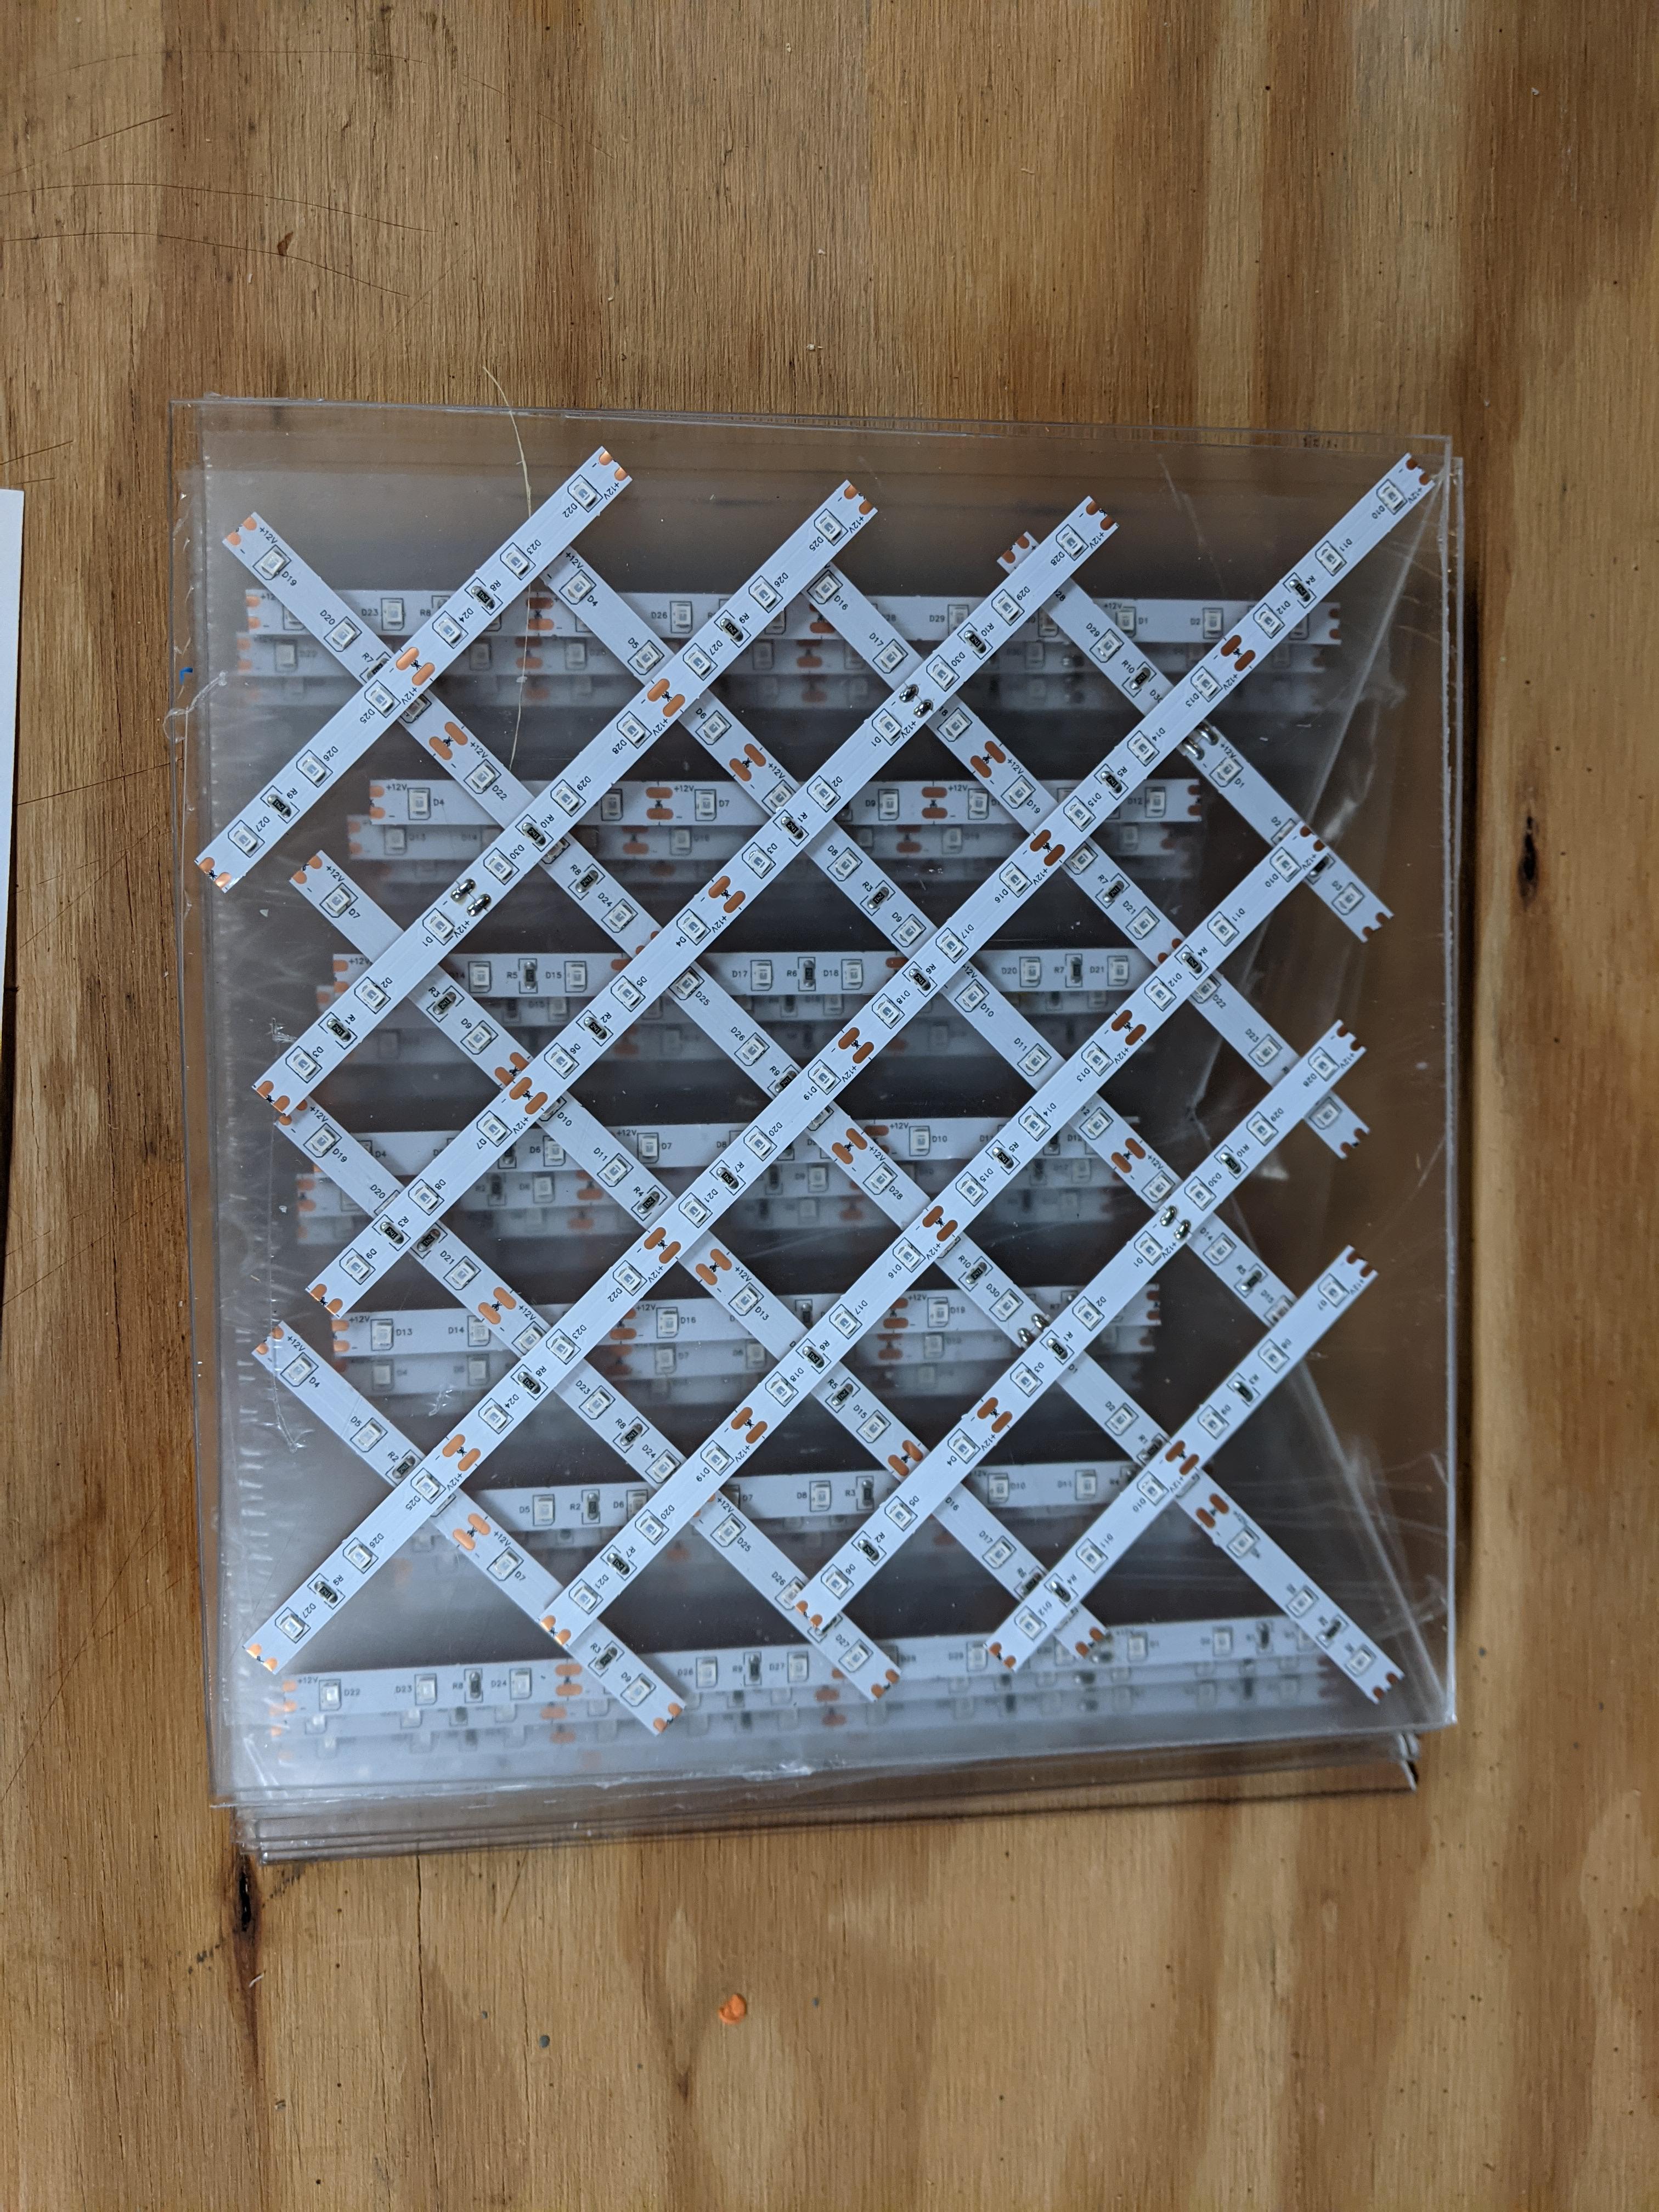
Between each disc are two plexiglass sheets with UV LED strips stuck to them.
The lights were placed so that they charged the disc on the opposite side, and the strips didn’t block each other.
Making these took the longest time, especially the wire-cutting and soldering…
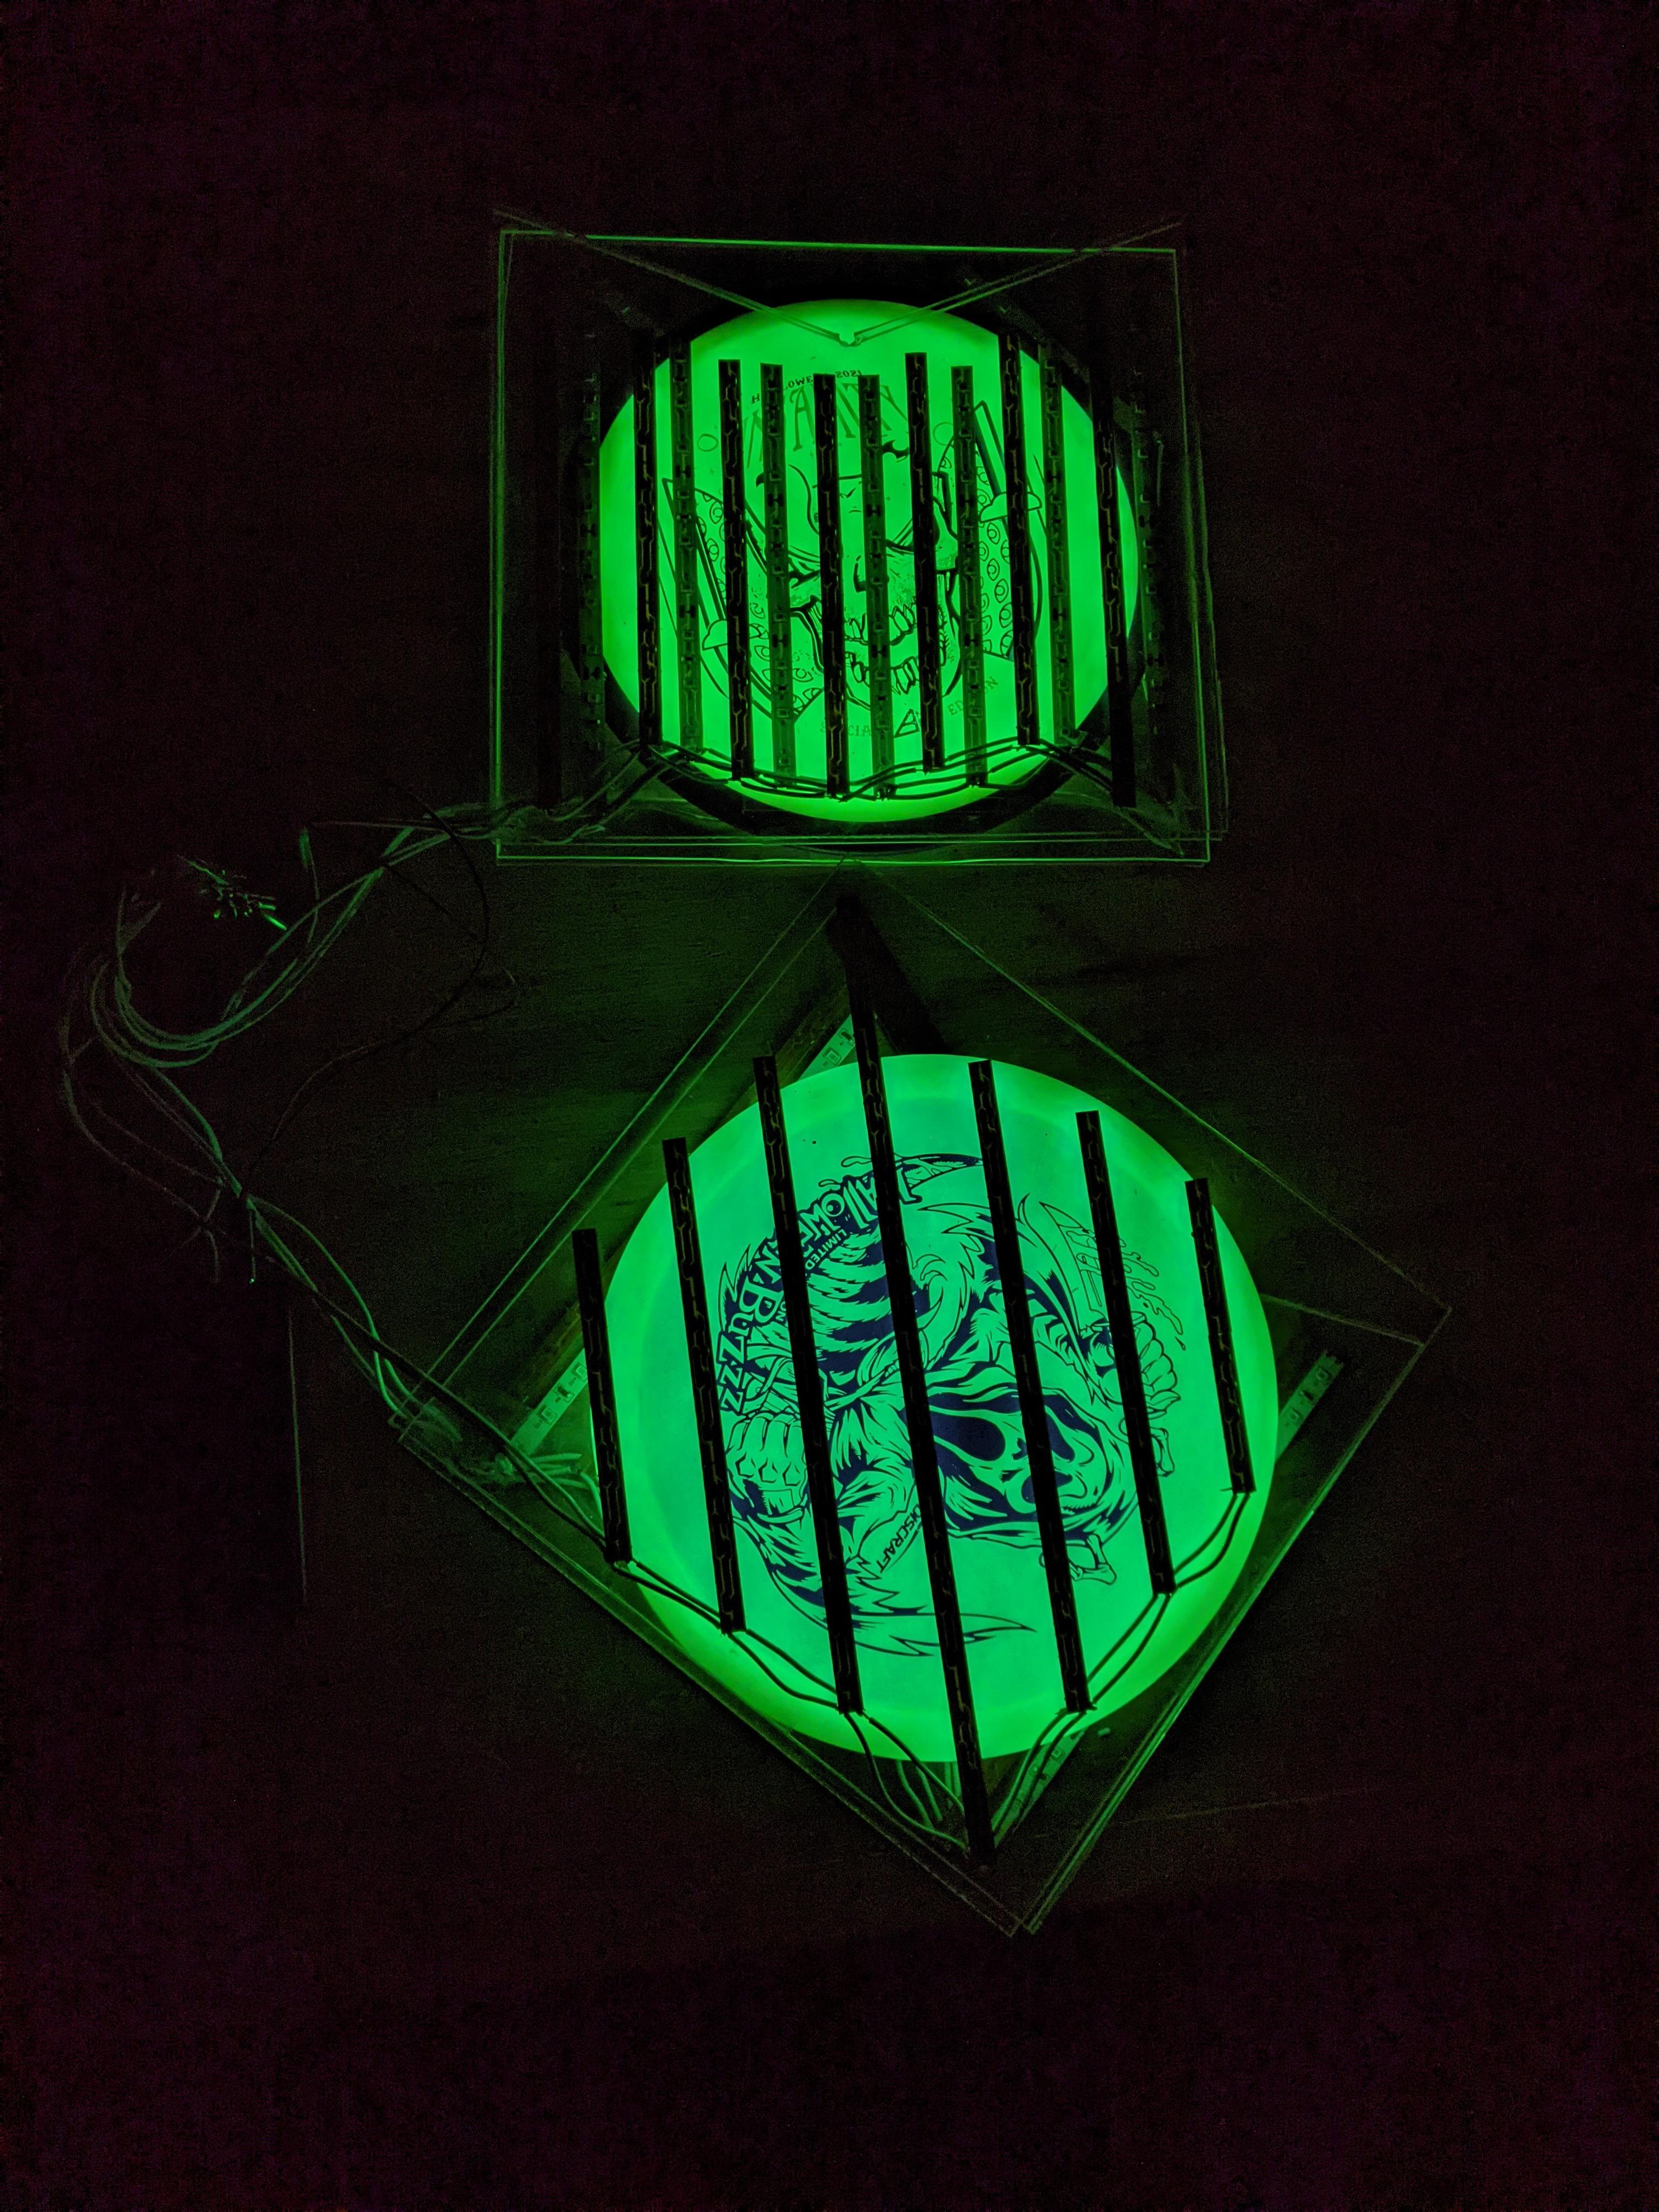
This was my first test-charge.
Yup. That worked.
It’s not a perfectly even charge - but they’re super bright. I hope that they get jostled while being carried, resulting in an even charge.
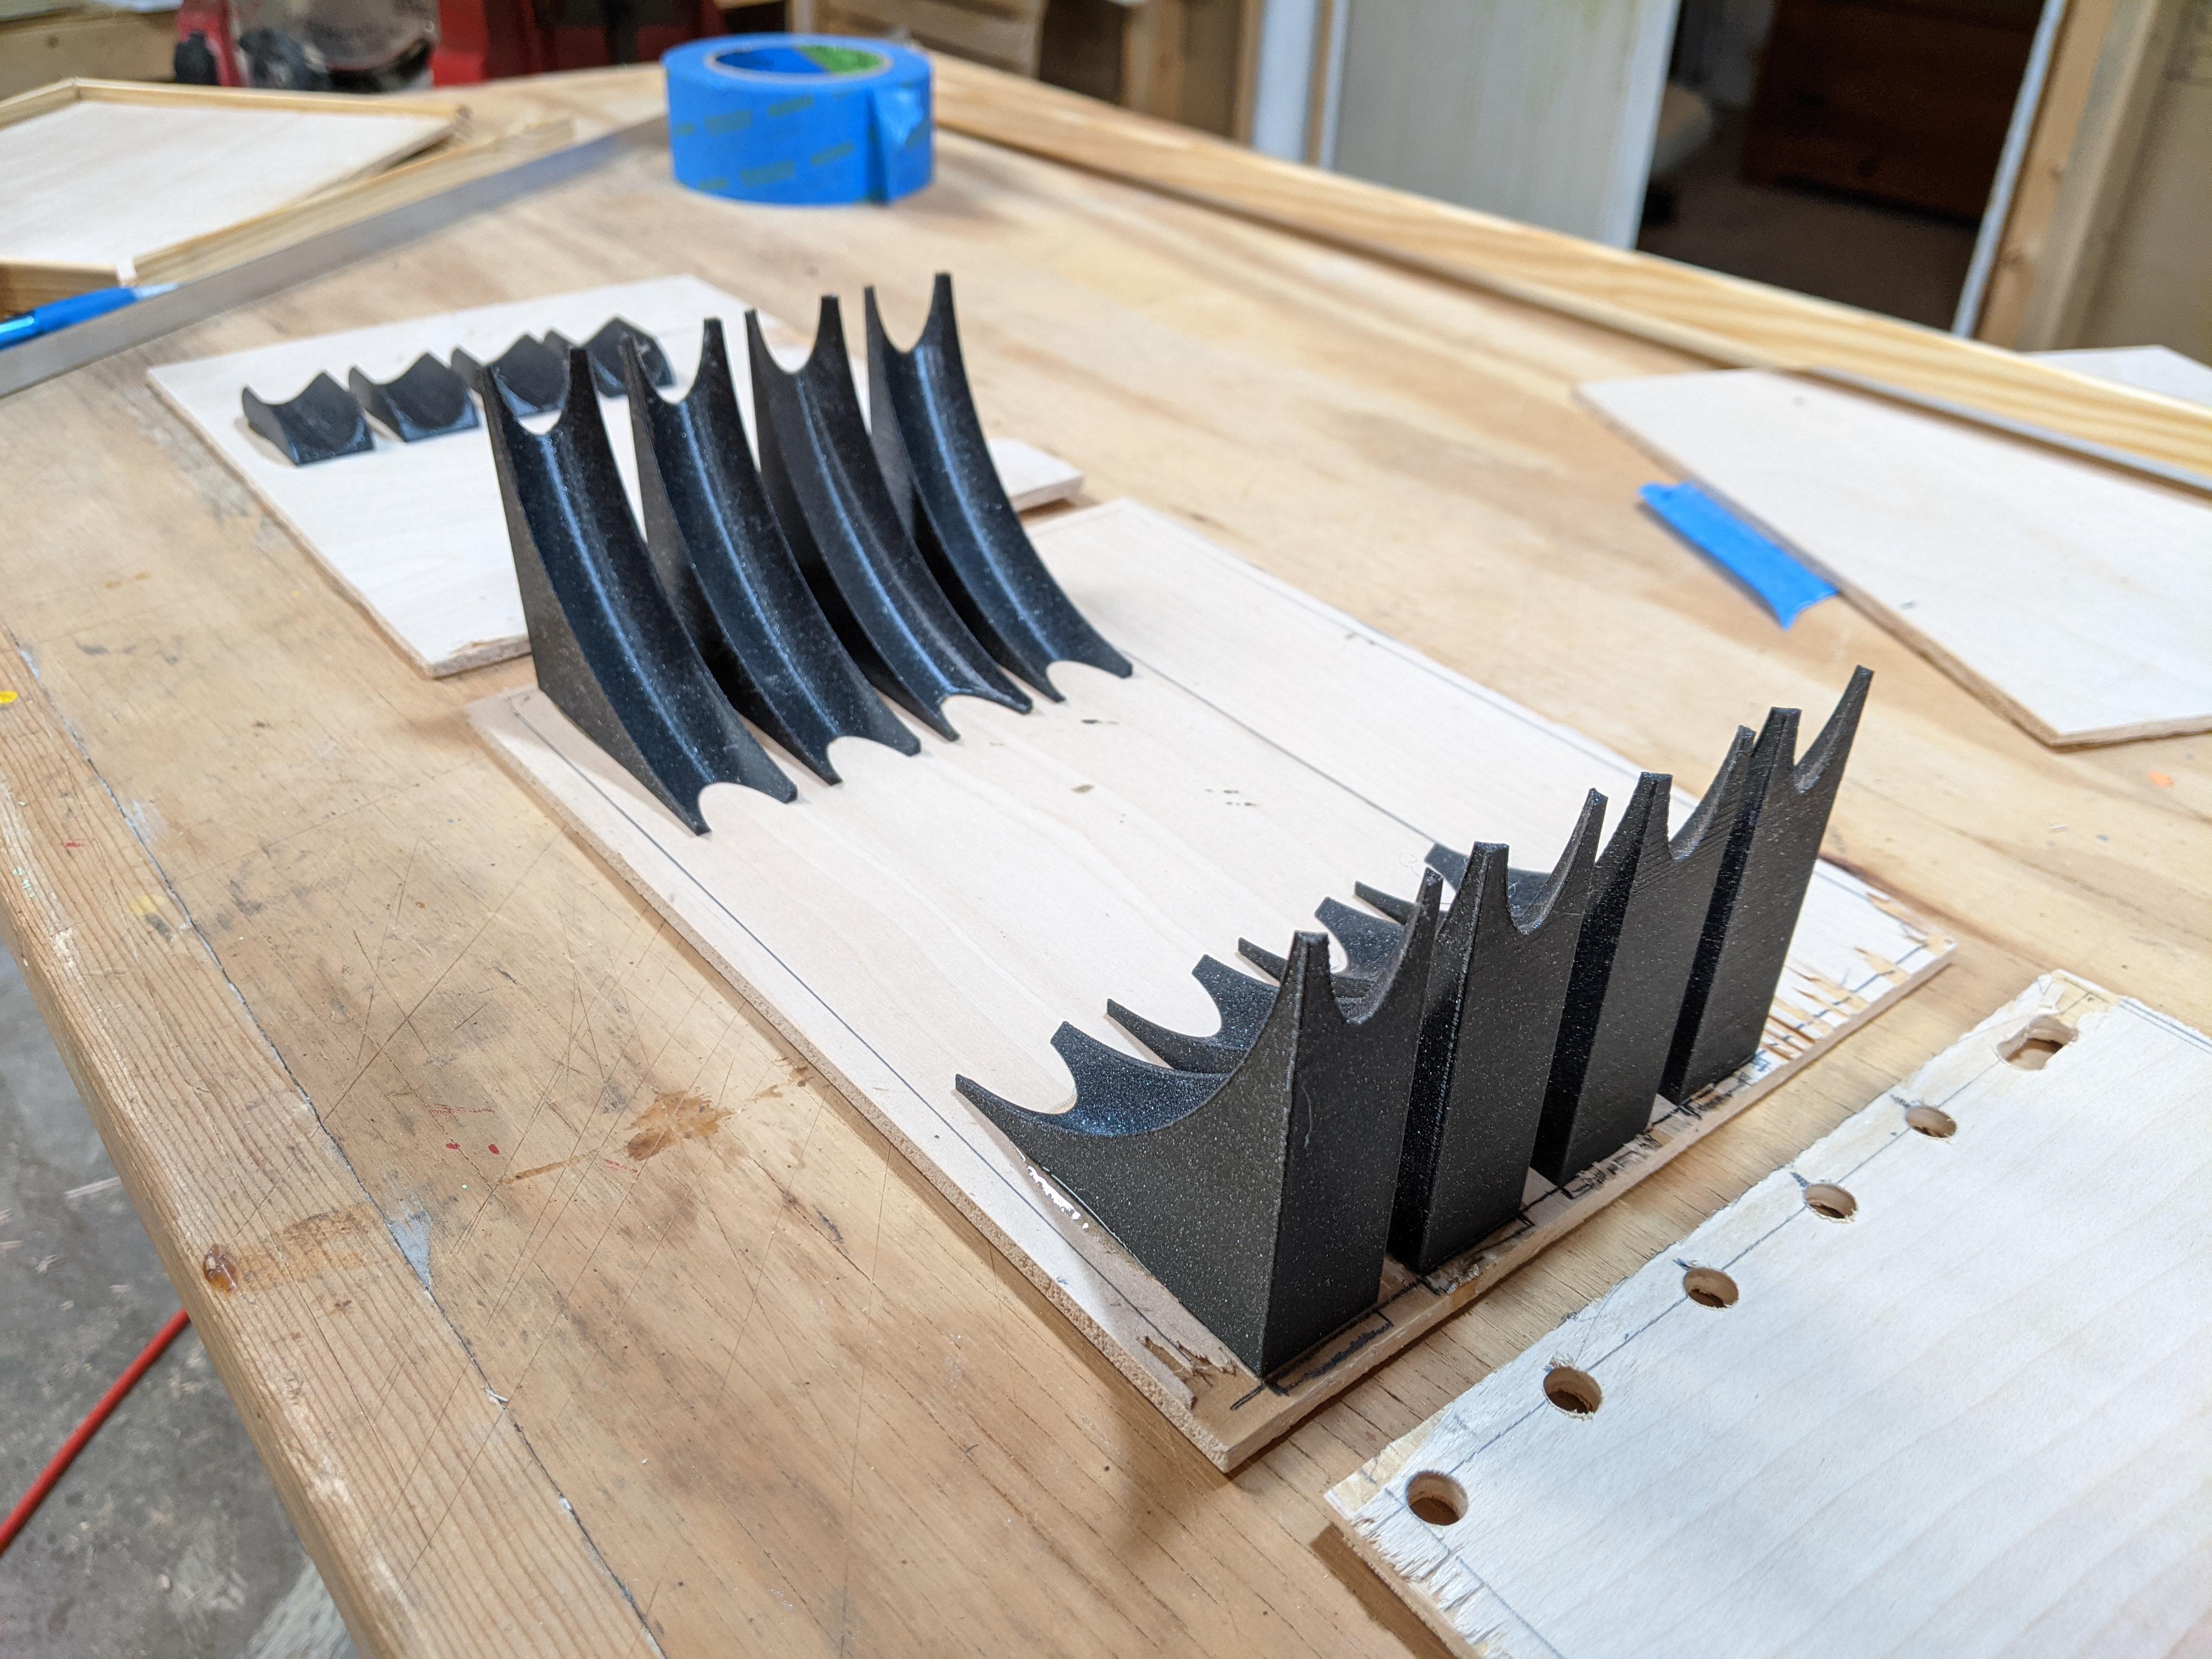
I bought a 3D printer recently, and this was its first big project. Almost all the internals are 3D printed (plexiglass guides, disc holders, dimmer switch mounts, battery cage, etc.).
Not my favorite dye - but happy it worked, didn’t expect it to be so vibrant! Apparently R-Pro plastic takes non-neon dyes really well; it just takes some heat…
I’ve got a handful of pigs I can play around with now ;)
2nd generation of my 2nd cell bed attempt. Definitely better cells - but my heat lamp did some stamp damage. What do you think: should I wipe the stamp and leave the white plastic, or leave what’s left of the shinny-purple stamp?
First stab at a cell-dye. I like it, but don’t love it. Not exactly what I expected: the blues really mixed with the pinks, the cell lines aren’t crisp, either air bubbles or silicon oil created some accidental stars… If anyone has any tips, let me know!